Behind the scenes: “Coffeeshop”
This is a set I build specifically for the Foolish Lego comic. However, it was such an elaborate set I wanted to create at least one high-end picture too. To be more specific, I wanted to see if I could light it as close to reality as possible. This behind the scenes post will specifically be on the lighting of the ‘coffeeshop’ Lego image.
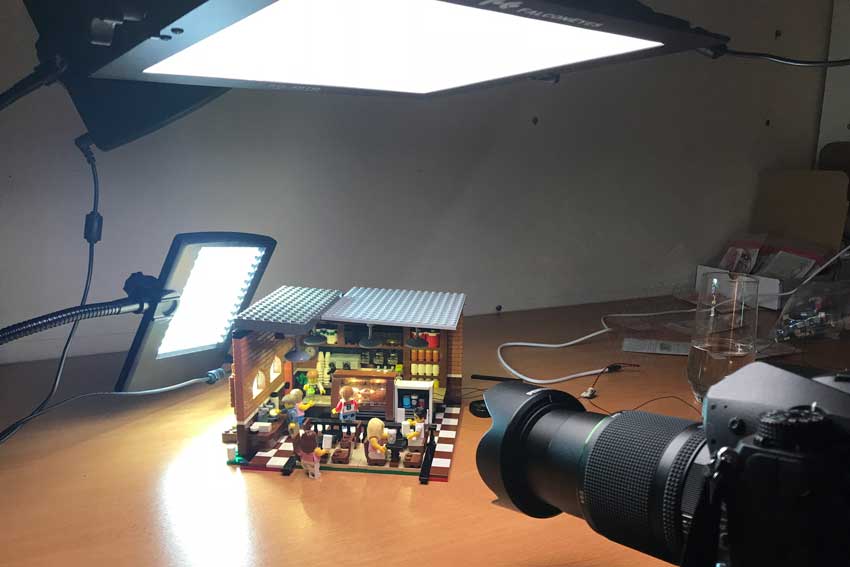
Lighting the scene
Mostly I like to have at least two color temperatures in an image because I like the subtle contrast. In this scene you’ll see different regions with somewhat different temperatures somewhere between cool and warm . First I wanted to take care of the main light-sources; the light falling through the windows and the ceiling-lights. This part actually consist of three lighting sources. The ceiling lights over the counter are from a wonderful company called Brickstuff and emanate a warm yellow light (figure 1).
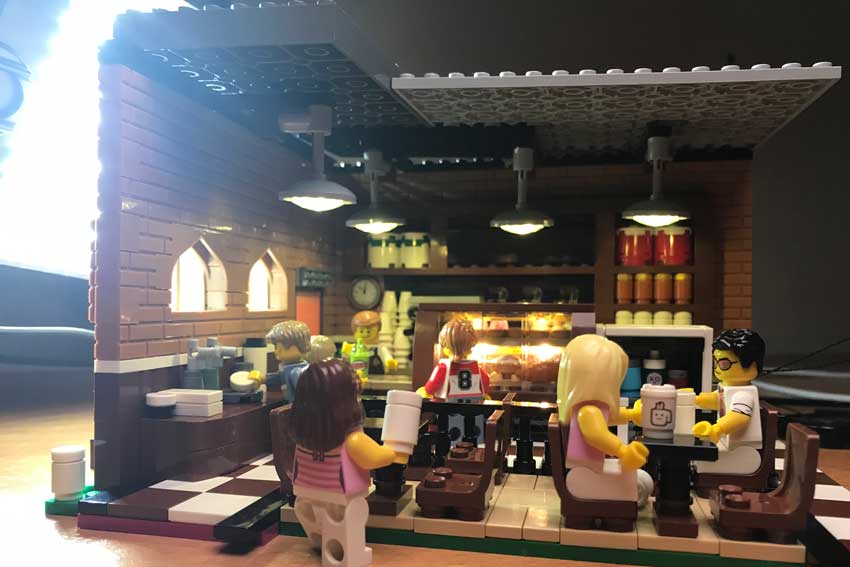
The light through the windows is from a harsh, cool LED-light, coming slightly from above because the sun would come from above at this time of the day (the clock in the corner reads 11:50 AM 😉 ). The customer-area was underexposed, so I added a third (soft) cool LED-light, whilst also blocking this light over the counter-area with a few large plates, so I would not lose the warm light at the counter (figure 2).
Smaller lightsources
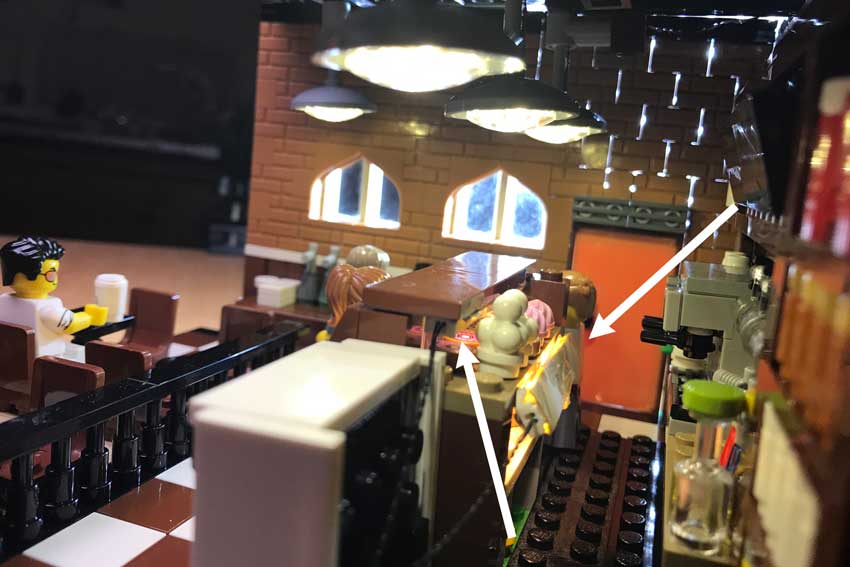
As you can also see, the pastry cabinet is lit. For this I used two strips, each consisting of two warm yellow LED-lights (Brickstuff). These two strips are fixed with a little tac (figure 3).
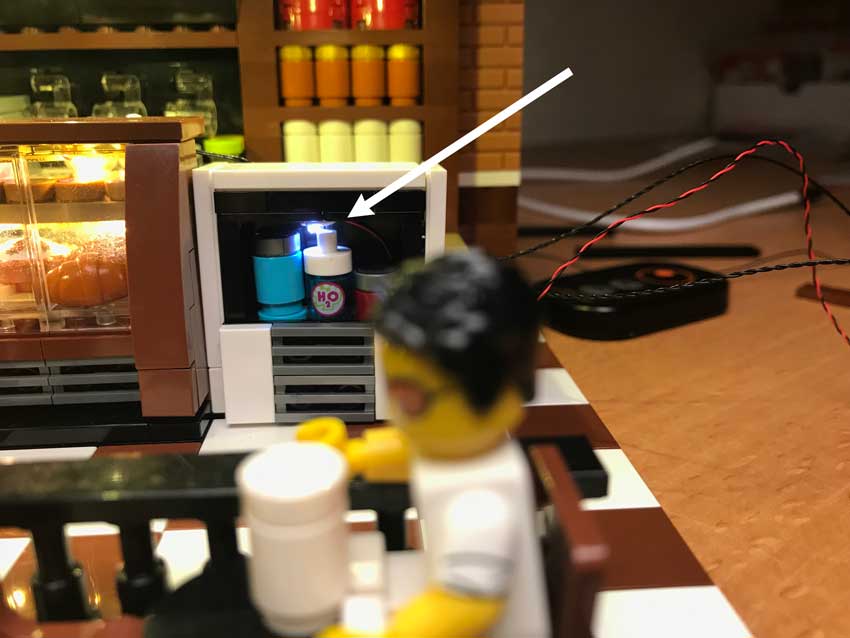
Lastly, I needed a light in the fridge. This one could be better, but I had too little space to fix get more lights in there. Anyway, I used another Cool white LED light from Brickstuff (figure 4).
Final touches
Then Icarefully placed the Lego minifigures. I wanted to create the illusion of a busy coffeeshop without accidentally blocking interesting scenery with the minifigures. That was a challenge, yet, I feel it worked rather well.
I shot the whole scene with my Pentax-K1 at f105 mm (focal length), f/20 (aperture) 1,30’ (shutter speed) and ISO 100. In post-production, I deepened the contrast a little and added a few subtle light beams.

That’s it! The final Lego image: ‘coffeeshop’, is done.
OTHER POSTS THAT MIGHT INTEREST YOU;
You can subscribe to the newsletter to receive occasional updates from Foolish Bricks.
The result is just… Awesome. The lights have to be my favorite part of the building because they create such an atmosphere. Very well done. And a behind the scene of such a shot is a great idea.
Lighting is everything… and the most difficult of all I do on this site…
Beautiful job! Thanks for sharing the BTS. Adding smaller lights for different angles of light under counters and such is a great idea.
Thanks! These small lights open a complete world of possibilities… and problems haha 🙂
I just discovered your “behind the scenes” description of this fantastic shot! The lighting is perfect! I recently got some lights from Brickstuff also, so I’m starting to learn how to use them in photos 🙂 I really enjoyed reading this.
Great build too!
Lynn
Hi Lynn. Thank you! I’m posting more behind the scenes posts these days. Sometimes even (beginners) tutorials.
I love the Brickstuff equipment. I’m not using it at it’s full potential yet and I’m looking forward to what you’ll do with it.
I am just toying with the idea of Lego photography (pun intended) and I have just discovered this blog. It’s a great place to start. You are very generous with your behind the scenes tips. That is very useful for a newbie like me. The coffee shop scene is an absolute delight and the lighting is gorgeous.
Thank you kindly
Thank you Mostahfiz! Happy that you like it. Be sure to let me know if you have any questions.
Dude, that’s gorgeous! I know one of the faults I have in Ballinabricky is that I designed most of the ceilings a wee bit too low and most rooms are about four studs too narrow. Alas, I have not the space to make the buildings larger…
Thank you Anthony!
What I love about Ballinabricky is that your town breathes atmosphere! And to be honest, the narrow walls and low ceilings now add character to your comic, it’s sort of a trademark. I wouldn’t worry about it. 🙂