
My trouble with Instagram
Blog
Time for an explanation…
As many of you noticed, I hadn’t updated Foolish Bricks for quite some time. I realise this might have looked as if I abandoned the site al together, but, I did not. I simply needed a longer break than I expected.
So, what happened?
Well, not that much actually. However, it was enough to bring my productivity to a full stop. It all started when a few people advised me to invest more time in social media and to be more precise; in Instagram. As some of you might already know, I am not a fan of social media, especially not Facebook. I’ve never been on Facebook, had never used Instagram and deleted Whatsapp the day it was bought by Facebook. However, I already was a moderate user of Twitter and had used Flickr in the past.
Anyway, at first I was reluctant. Mostly because I feared the time that would go into maintaining social media outlets. Nevertheless, people kept insisting and at some point, I gave in.
Instagram madness
I started posting on a few social media – Flickr, Google+, Twitter and Instagram – and actually thought it was fun at first. It was engaging and I found some nice work of other artists on there. On the other hand, I spend an ever growing amount of time on there. Especially Instagram turned out to be very, VERY addictive.
What is the deal with Instagram?
First off, I’d like to say that I don’t believe Instagram is wrong or something like that. I just came to realise It’s wrong for ME personally.
And even for me, it was fine at first. It is nice to get a little exposure. Simply post a few images add a couple of hashtags and wait to see if anyone takes the time to like, comment on or follow you. Then, i noticed accounts with (tens of) thousands of followers and less than five photo’s. There were accounts with equal amounts of followers and not that exciting content (though that is a very personal opinion of course), and it showed because there were only a few 100 likes per post and nearly no comments. This was the first clue that Instagram for a significant part is not about the quality of content. Because i’d gotten intrigued by this phenomenon i started looking into Instagram etiquette and found several sites with tips on how to grow you following and such… and that is were things started to go wrong.
Rules, tips, tricks for growing your audience
There are so many site with all kind of rules, tips and tricks for growing an audience.
Some examples of these rules are:
- Post high quality content.
- Follow many people
- Like and comment as much as possible, hoping you get a follow in return.
- Use a maximum of 10 hashtags in your post (while other sites urge you to use all 30.).
- Don’t use the same hashtags over and over again because it’ll be seen as spam.
- Use hashtags of large accounts in the hope they notice you and re-post your post.
- Create Instagram stories on at least a daily basis.
- Post multiple times a day. And post strategically, find out what the best times to post are.
- Buy a few followers and likes in the beginning (very controversial) to get your account going.
- Ask for shoutouts by large accounts.
- Post personal stuff.
- Do give-aways, run contests and such.
- Tag other accounts in your photo.
- Call-out to other large accounts.
- ETC!
Well, you get the picture, a few ‘rules’ are great and promote high quality content, others are far from great and are only focused on spending more and more time on Instagram and again others are simply mwoah…
And then… it became an addiction.
I started to experiment a bit with #1 through 9 and since then Instagram rapidly became very frustrating to me. It was so much work! I tried to post as often as possible (once every few days) and tried to be an active participant. I experimented a bit with the hashtags and created a few stories. My account grew steadily and I got nice and welcome comments and likes.
However, Instagram turns out to be carefully constructed to be very, very addictive! Of course I already knew that before I started, yet I never thought it would influence me as much as it did. Before long it suddenly was all about follows, comments and likes…. And not about the content. I was following people I didn’t want to follow, I was liking posts of everyone around, without even looking, because that was the right thing to do…. etc. Constantly checking for new posts, new accounts to like and comment upon, etc…
Instagram can be as addictive as a harddrug. I knew something was wrong, yet, I could not stop. I felt i needed to spend more time and energy on Instagram, I needed the follows and likes. So, I waisted even more time on there, whilst progressively enjoying it less.
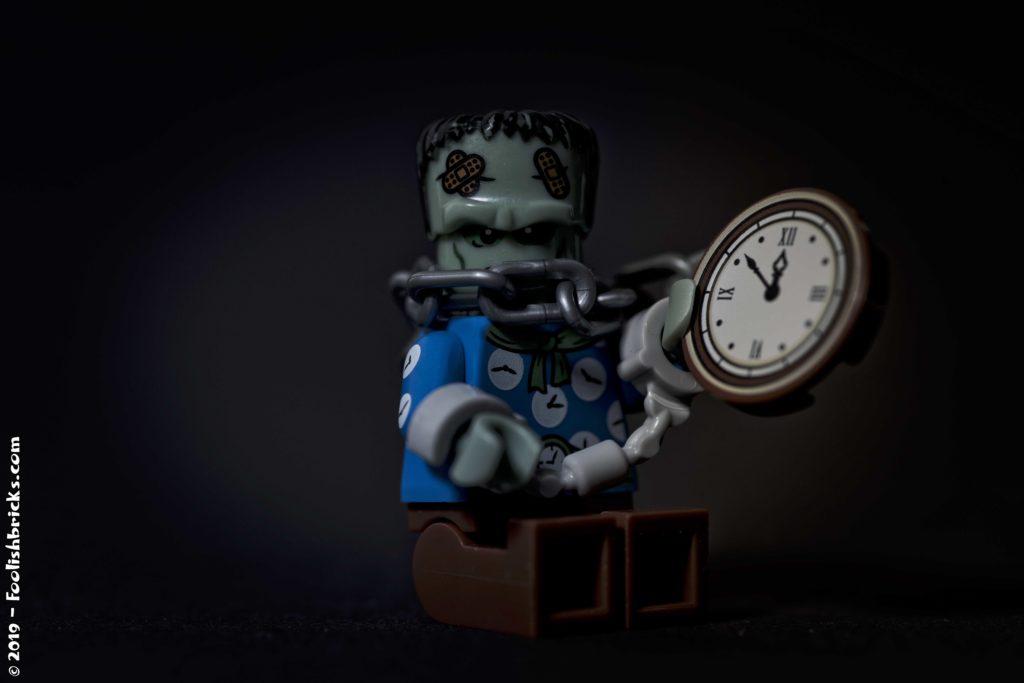
Time, time, time
It was so frustrating and it took so much time! People who know me, know I just don’t have that amount of time. I was constantly trying to create new, high quality content, liking, commenting, following to get that very temporary rush each time one of my posts got liked or commented upon. Even when I got a follow I was excited, however, many accounts only followed for a follow back and even if they got a follow back, they were quick to unfollow again, hoping it wouldn’t be noticed. As a side effect, i kept comparing my work to the work of others, wondering if I should change my style to get more likes from the masses… Yikes!
“What am I doing?”
Anyway, I let Instagram take control of me and for WHAT! A few likes? A few follows? Why is that important? Well, it isn’t! For the most part, the amount of likes you get on Instagram is not related to quality of content (with a few exceptions of course!), it’s largely dependent on the amount of followers. And the amount of followers you get is all about quantity of post and time you spent on Instagram. And the more followers you get, the less engaged people are with your content. For example, there is an account with 90K followers, each post is liked 5-7 thousand times…. an engagement-rate of maximally 7%!
Here I was, trying to create high quality content but I didn’t have the time to promote the account, or create more content with fewer time between posts. And my account did grow within these few months, and my engagement was around 50-60%, but it took too much time.
Epiphany
Then I realised the amount of time I DID spent on Instagram was not spent on other important things in my life; family, friends, work and Foolish Bricks.
Another important realisation was that I lost the joy of working on Foolish Bricks. It was not relaxing me anymore. I was addicted to short-lived dopamine-shots provided by Instagram and lost track of what was important to me. I got behind on all kinds of obligations and I lost my inspiration and drive to create.
Cold Turkey
It really got to me and I STOPPED! I stopped everything. And since I stopped I’ve been trying to find the fun in creating for Foolish Bricks again. And finally, this past week, it started to itch a little again.
The return
I started again January first 2019, with a new episode of the Foolish Lego comic. The rest of the site will follow. All my energy will go into the site again. Social media will be very low profile…. And Instagram? I don’t know if I will return there. Maybe I’ll start posting the old comics, I don’t know yet.
Of course, this is my personal story. Instagram is a great medium and fun and relaxing to many people out there but for me it turned out differently.
I know now Instagram made me lose track of what was really important and I let myself be lured into the trap of spending my time, more time, and even more time than that. Time equals money! My time is limited and I’d rather spend it here, on Foolish Bricks.
OTHER POSTS THAT MIGHT INTEREST YOU;
You can subscribe to the newsletter to receive occasional updates from Foolish Bricks.
Behind the scenes: "Nature photography gone wrong"
Blog
Ideas, ideas, ideas
As many of you might know by now, my biggest problem is inspiration! I often need hours to even think of a feasible idea. Because of this, once i have an idea that might work, i don’t ditch it right away if the photo itself does not work.
The idea for this image
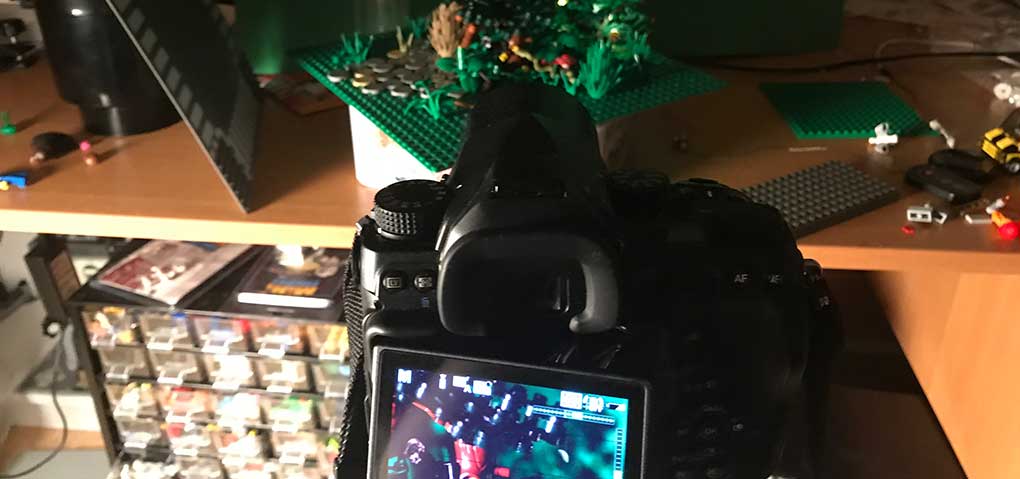
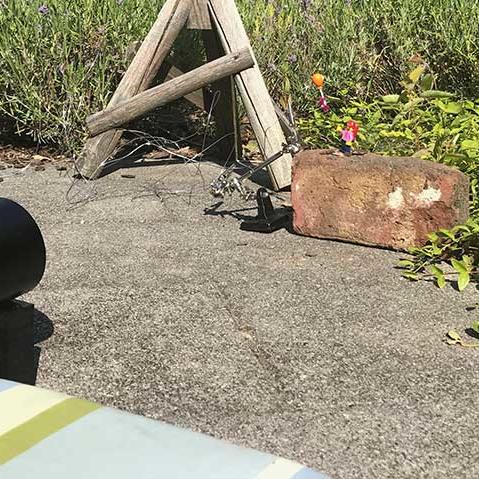
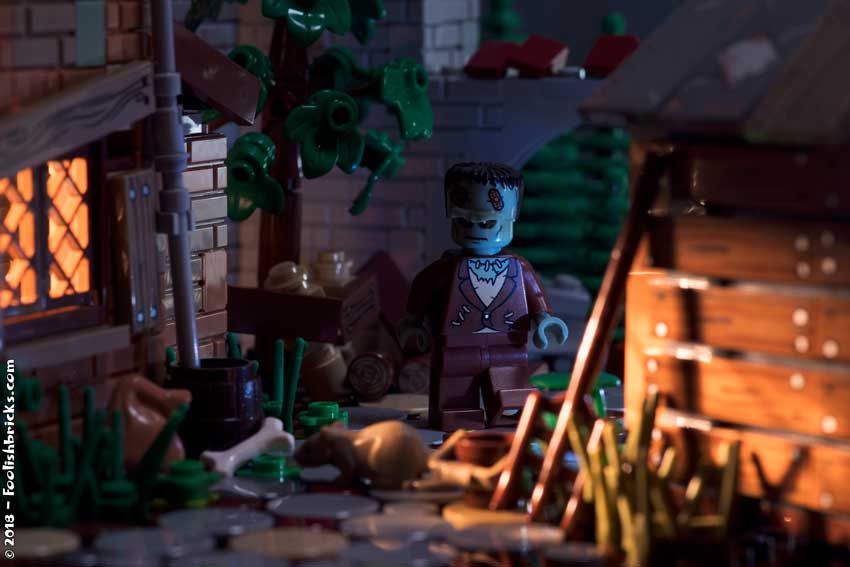
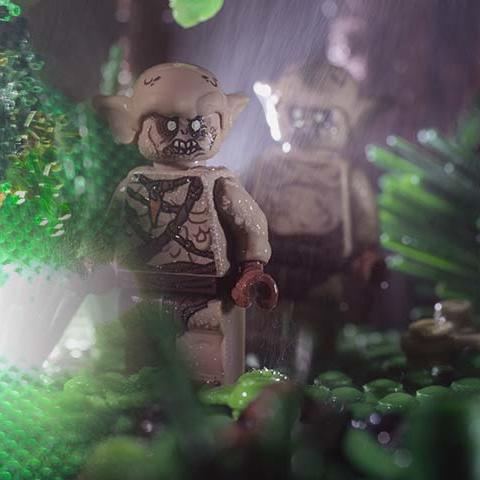
Being in Canada for work, I only had limited (plastic) resources and time to get some photography done. In the end I only created one image I liked (“Eye of the beholder“), but of course I shot a few more images that did not make it. Before I create a “rejected Lego photography“-post, I usually wait to see if the idea is still usable. This idea I tried in nature (under time-pressure), resulting in the images in figure 1 and 2.
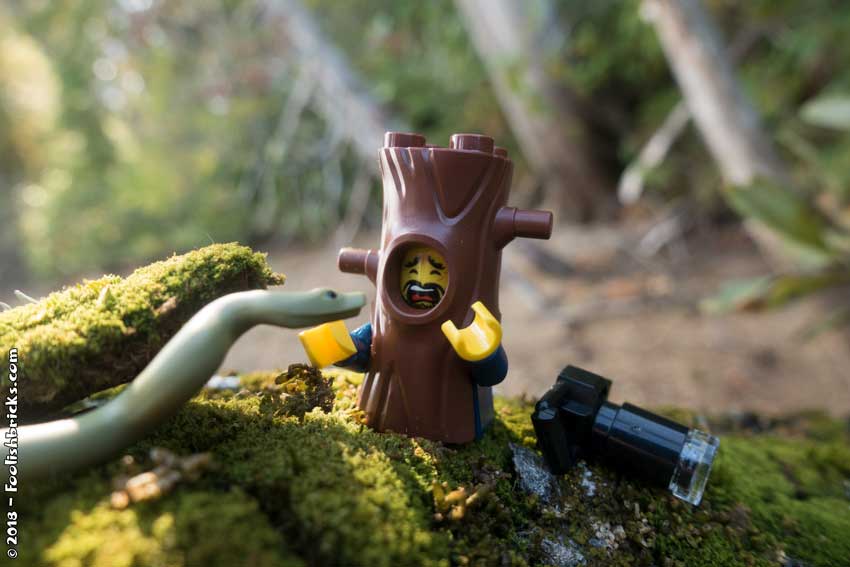
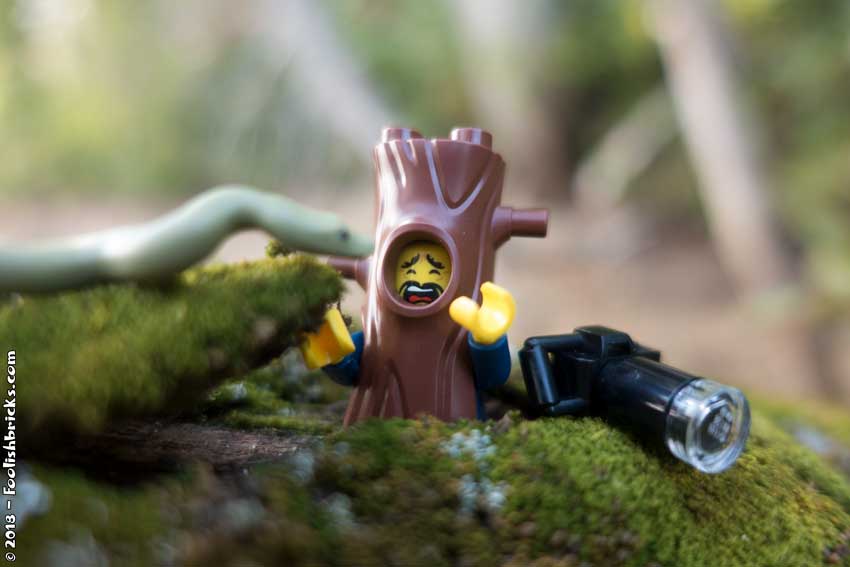
In hindsight they weren’t too bad, but I didn’t like the light and for some reason the fact that I didn’t use the legs, did not feel right. Also the images looked out of focus to me. sadly, in the end I did not have the time to redo them.
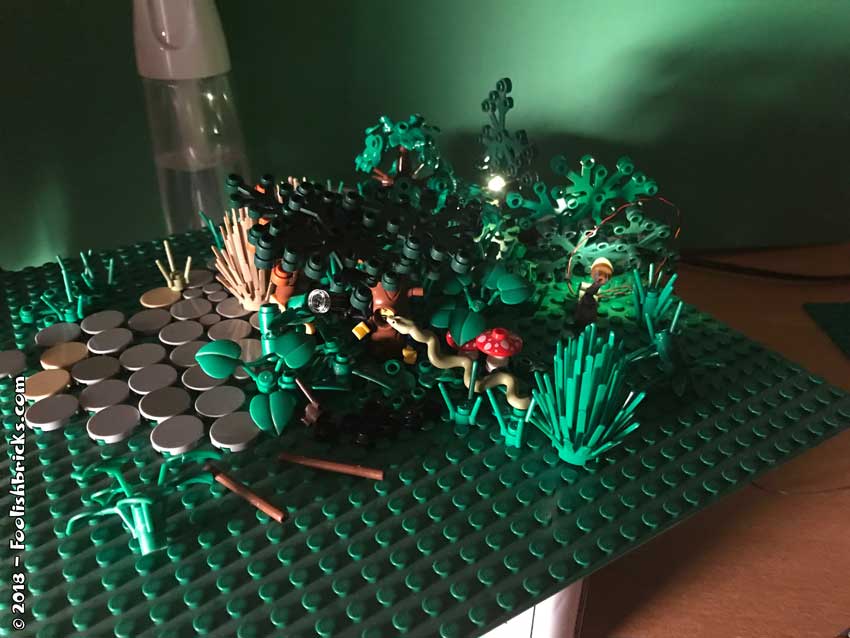
Back home, the setup
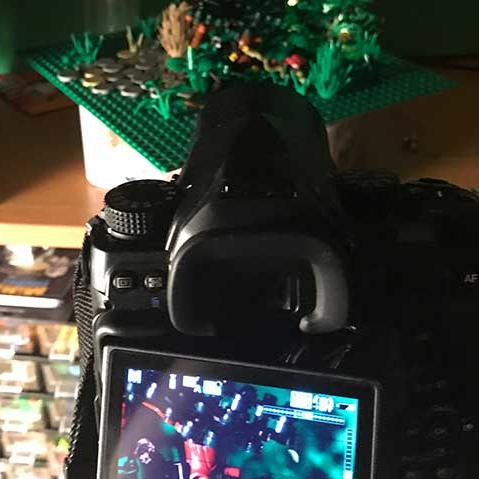
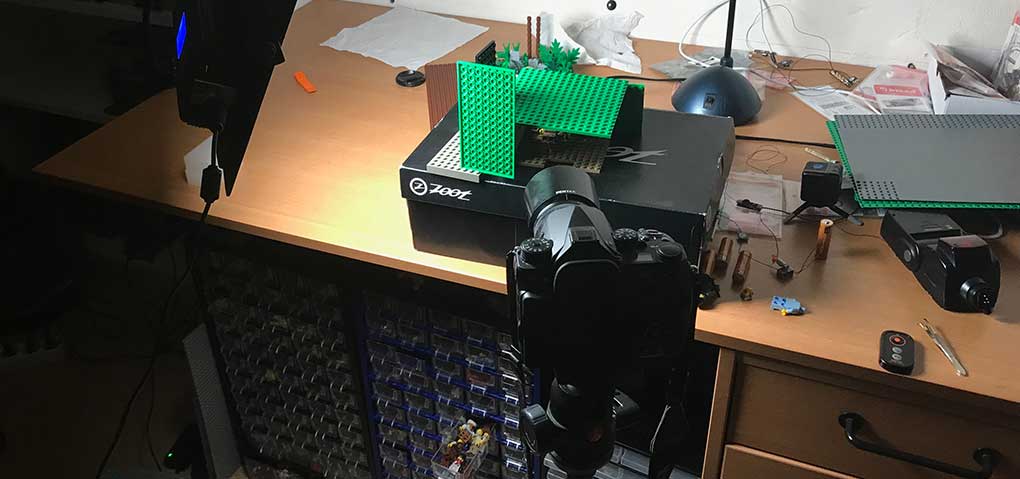
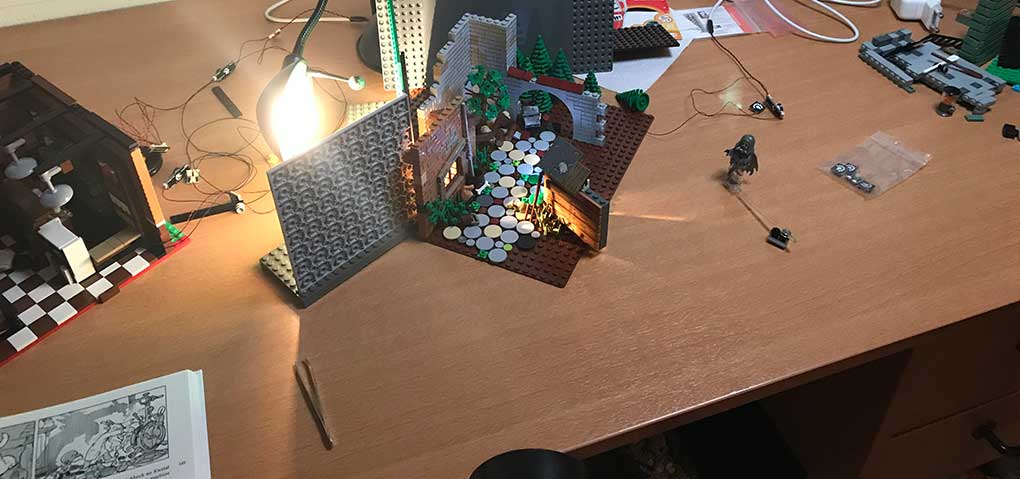
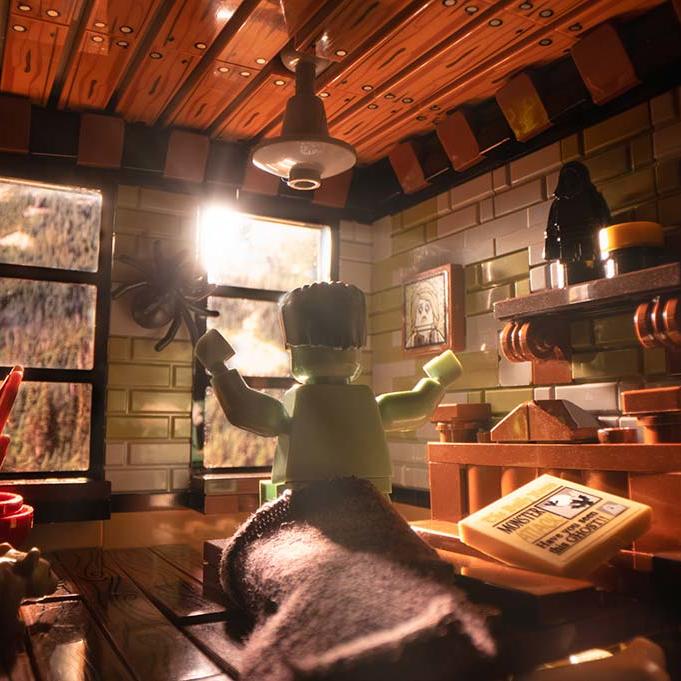
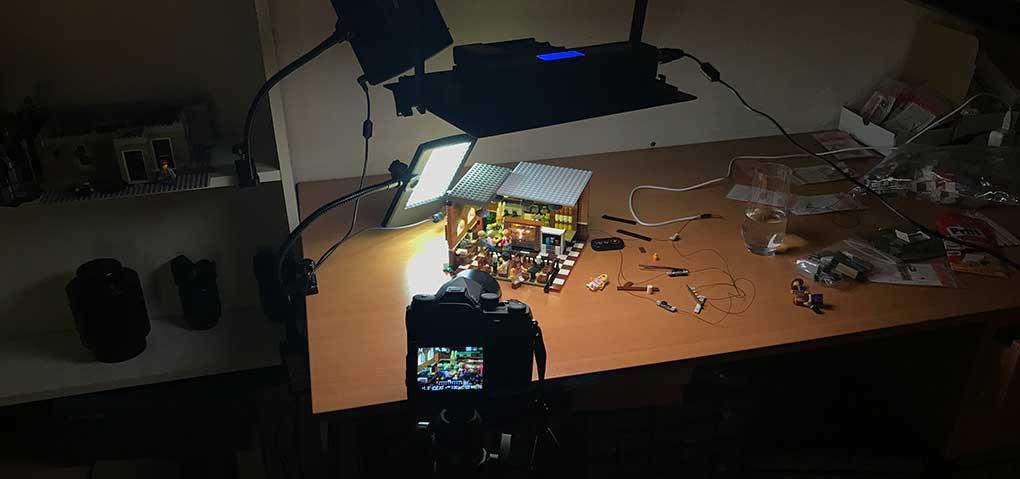
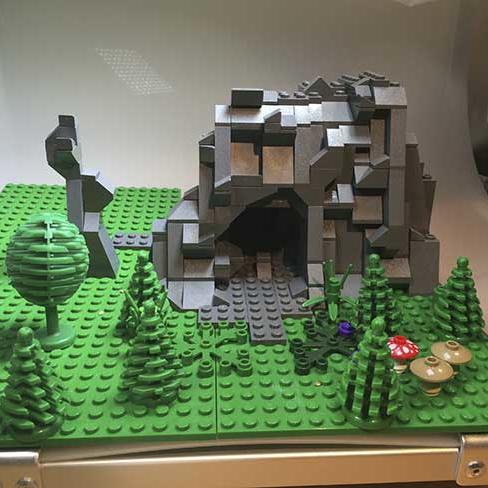
Once home, I decided to recreate the image in my basement, and purely in a Lego environment. This way I could control the light better. The primary setup for this Lego photo can be seen in figure 1.
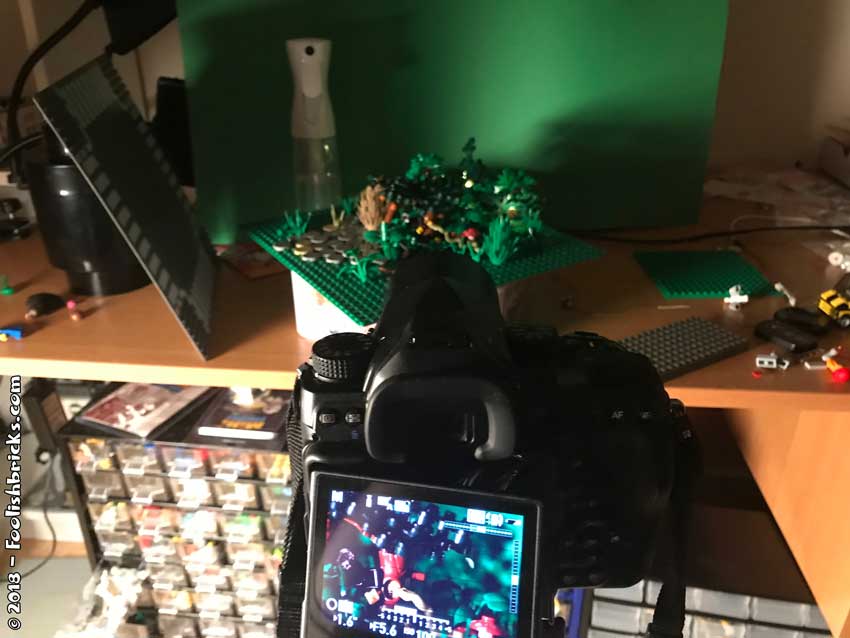
Figure 4 shows a close-up of the setup, showing you a few lights bringing out a few contrasts in the background. Also, it keeps the background from becoming too dark!
You can also see a few tiles on the left… this plate I used for another photo before; “the startled guard“.
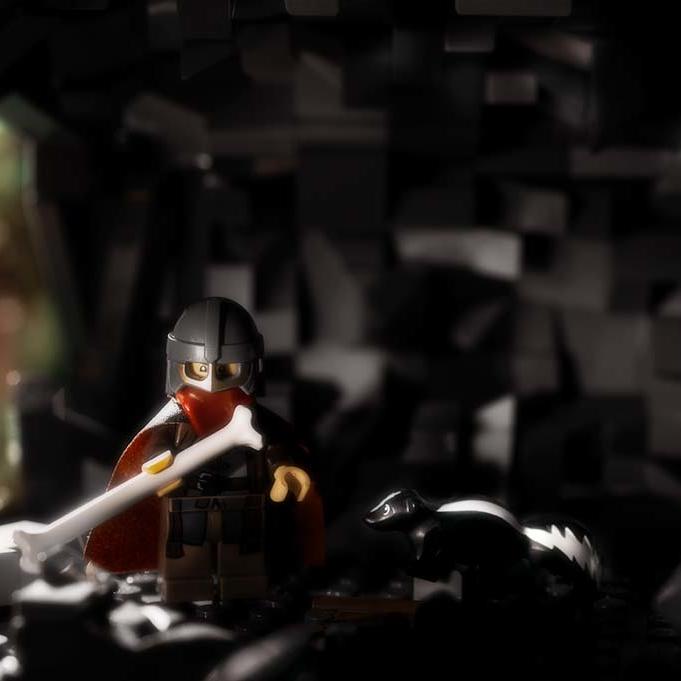
Concluding
This time it is a pretty straightforward behind the scenes post. The main message is to give your ideas a second, or maybe even a third chance if the first image does not work.
Ultimately, I don’t know if I like the resulting image yet. The lighting is nice, but not really logical with the light coming in from the left versus the darker side on the right… I explained it as being dawn, but there’s something off. Anyway, it’s not a stunner… but it’ll have to do for now.
OTHER POSTS THAT MIGHT INTEREST YOU;
You can subscribe to the newsletter to receive occasional updates from Foolish Bricks.
Rejected Lego photos - part 1
Blog
To learn is to make mistakes.
Over the years I’ve made many Lego photos. The first two years, because of the time-pressure of a 365, I published every photo I made. For better or for worse, readers of Foolish Bricks could follow my growth, and also see every mistake I made. Eventually, there were many failed images.
The last few years, I created less images, but still published (almost) every image. This year I decided to stop publishing images I was not happy about. Yet, it can be very helpful to keep them in mind. Once a mistake is made, i might be able to avoid it in the future. So, following are three of the images I rejected.
Wrong color-settings and ‘texture: rejected
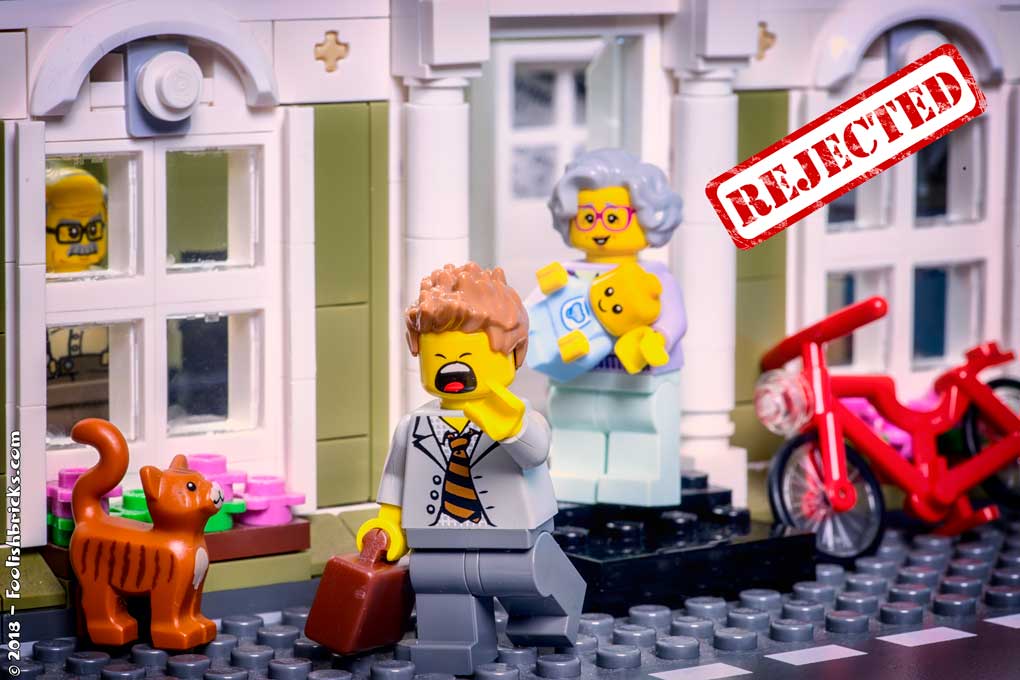
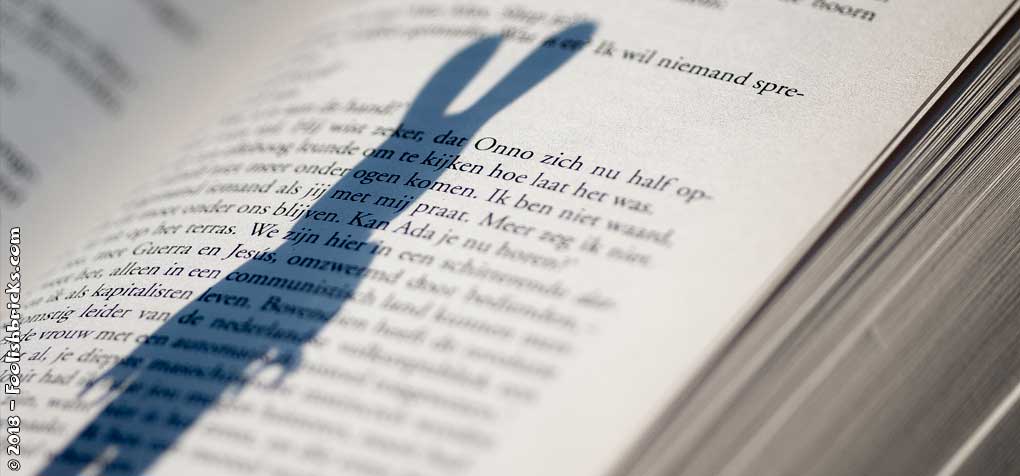
The premise of this image was of course my newborn and the non-existent sleep at night :). However, I just couldn’t get this image right. For some reason the colors are off. The green just does not work for me. I tried to make this image ‘pop’, but I did not figure out how. It was just not there.
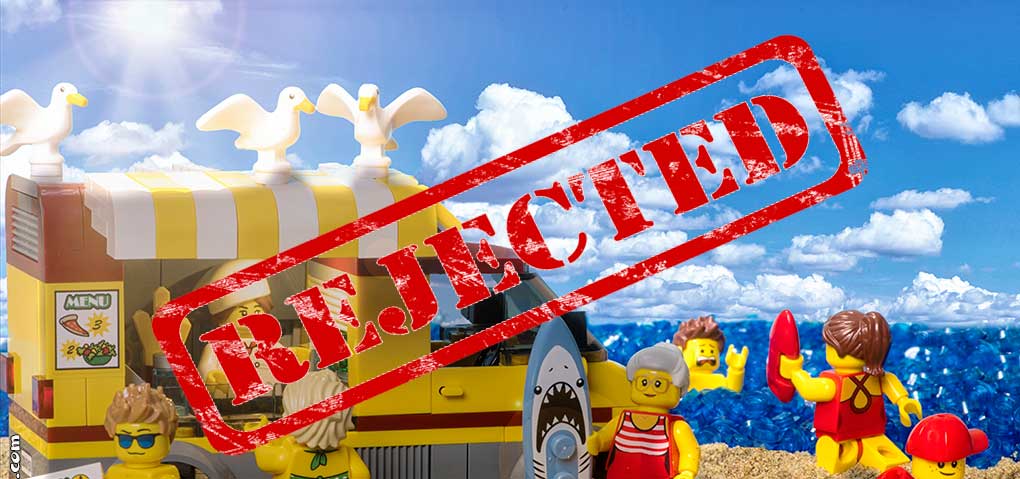
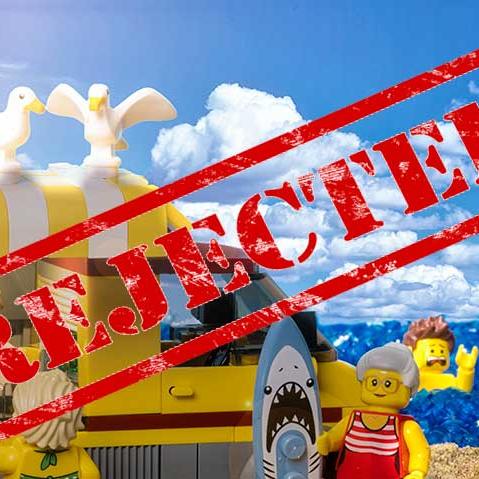
Too much going on: rejected
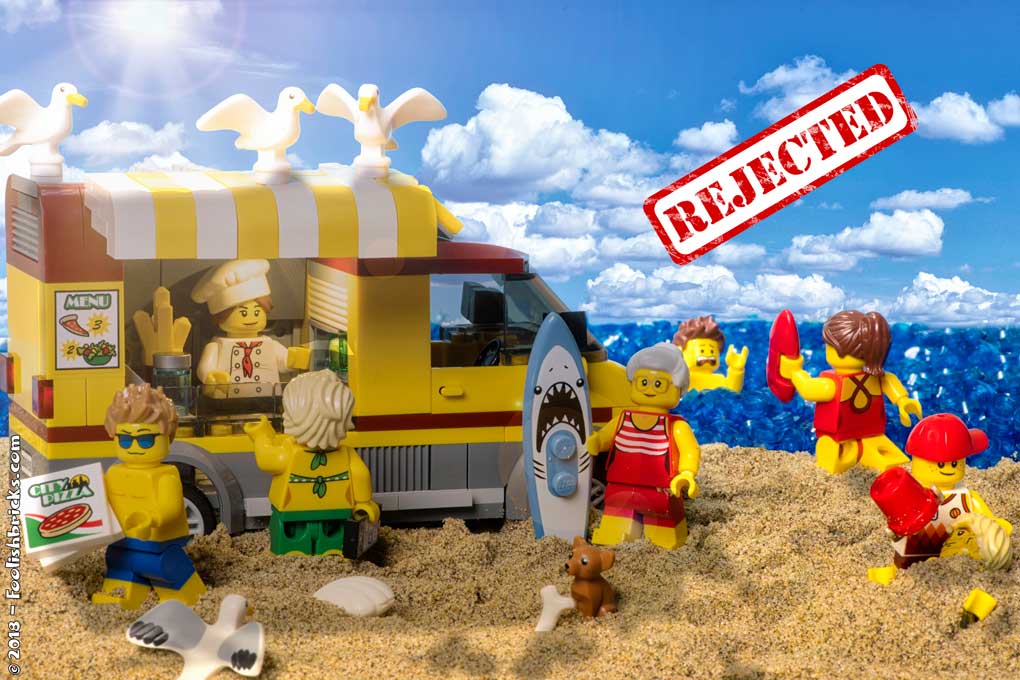
There was just too much going on in this image. It was one of my first attempts at a backdrop, it did not look very natural. Furthermore, I just had to do too much to make it look a bit natural. The backdrop, the sun, the color-adjustments, the shadows. It was all too much. Besides I had a rel light in the car, but it did not bring anything extra to the image. All in all, a disappointment and so I rejected the image.
Too unnatural: rejected
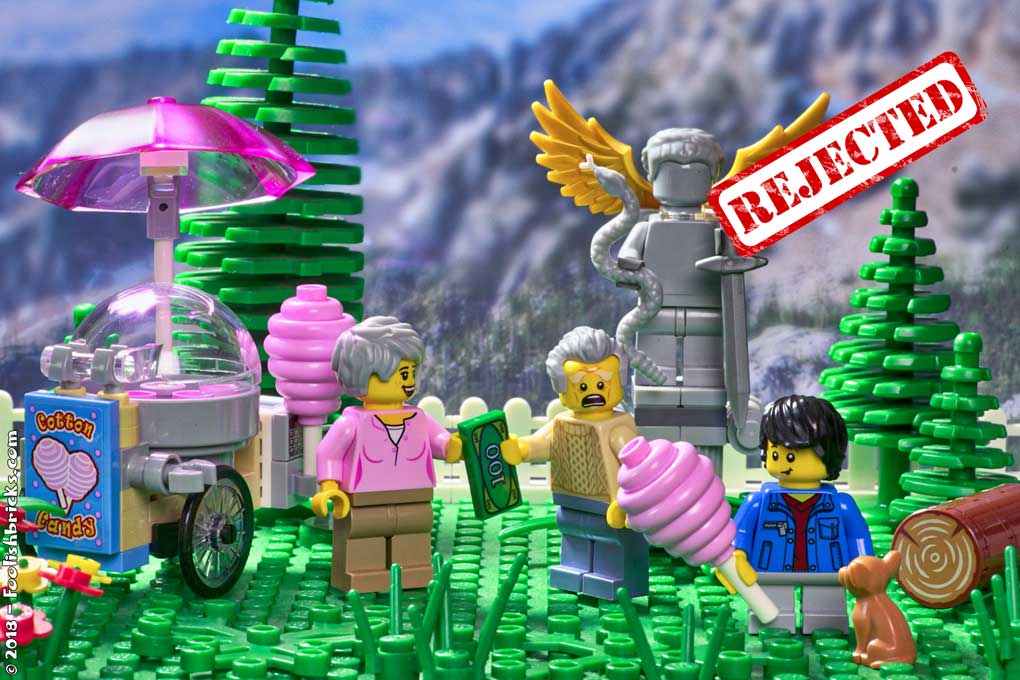
Another try at a backdrop. This time I tried many things, and this image was shot with my computer-screen in the background. It ruined all the lighting and colors in this image, making it all way too unnatural. It simply looks as if it was shot in my basement.
Concluding
There will be posts like this once in a while. I feel this is a nice way of using my rejected images, maybe someone will benefit from them. Or – even better – if anyone has an idea of how to improve them, just let me know!
OTHER POSTS THAT MIGHT INTEREST YOU;

You can subscribe to the newsletter to receive occasional updates from Foolish Bricks.
Behind the scenes: "Good old times"
Blog
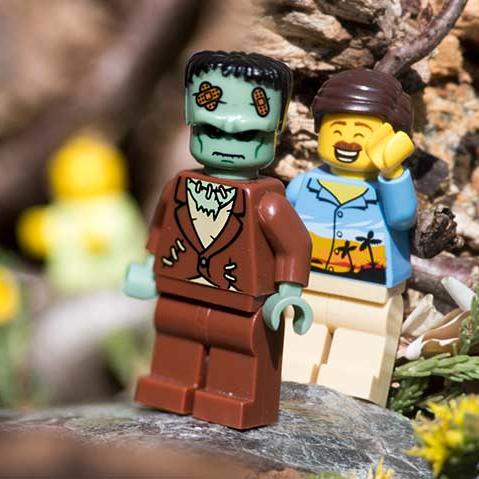
This is a behind the scenes post for the Lego photograph: “Good old times“.
Planning the Lego photo
This time I was looking for a happy emotional scene. And again, I wanted to try something complete new to me. I had seen a lot of toy photographers use photos as a background. Up until now, I never did. I always feared it would look too artificial. Yet, a few months back i did print a few backgrounds… to be put in a drawer unused. One of these backgrounds was a sunset. The sunset struck a cord. It got me thinking of a couple walking into the sunset. For some reason an earlier toy photo of mine entered my mind: “Lonely old man“. That brought me to the decision to use an elderly couple.
Contrast in the title
Some of you might know I like some kind of contrast in my photography. I did not see any contrast in this image. Instead, the contrast is a little hidden in the title combined with knowing about the “lonely old man“-photo. Good old times can refer to the good times these two ‘old’ people are experiencing, making this a happy image. Yet, it could also be the lonely old man remembering the good old times…
Setup
As stated I used the sunset picture as a background. Lighting could also be relatively simple this time. One light as far to the front as possible. Because I did not succeed in putting it directly in front, I put it to the side a little as shown in figure 1.
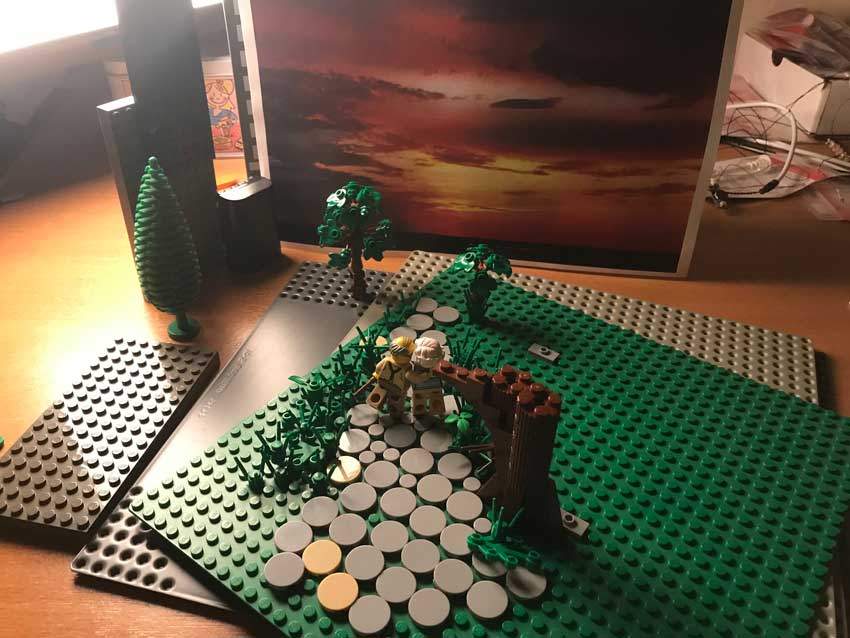
The plates to the side serve two purposes; first and foremost they prevent direct light from entering my lens. Second, they regulate the lights/shadows on the trees and couple a little.
Building the scene
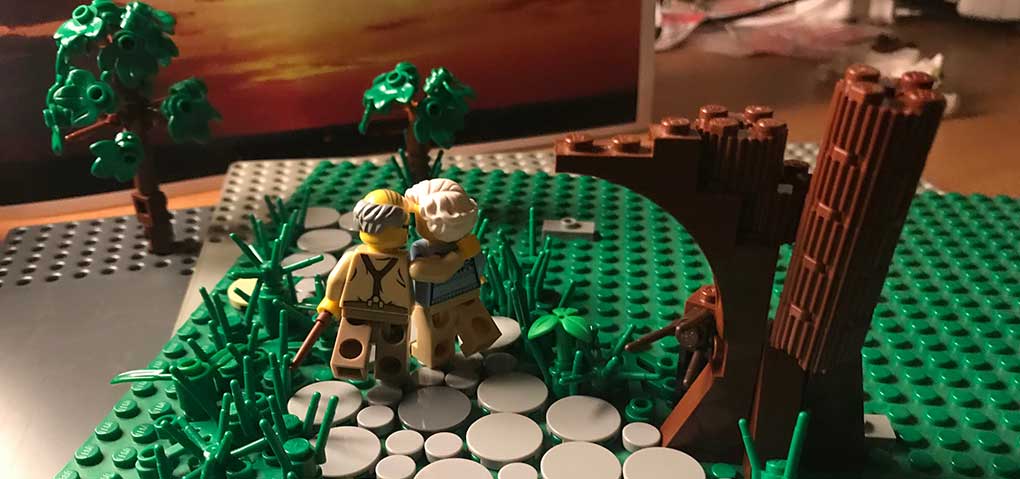
Typically I build the scene before I do the setup. This time I Used the path from the ‘startled guard‘ image and put the couple on there as he center of the image. Next i placed the camera, framed and lighted the scene. Only then I started to build the scene, constantly looking through the cameralens for the effect of everything I added. I did something like this before in the ‘back alley ghost‘ image and again I was surprised at how few Lego bricks were actually needed to fill the scene as you can see in figure 2.
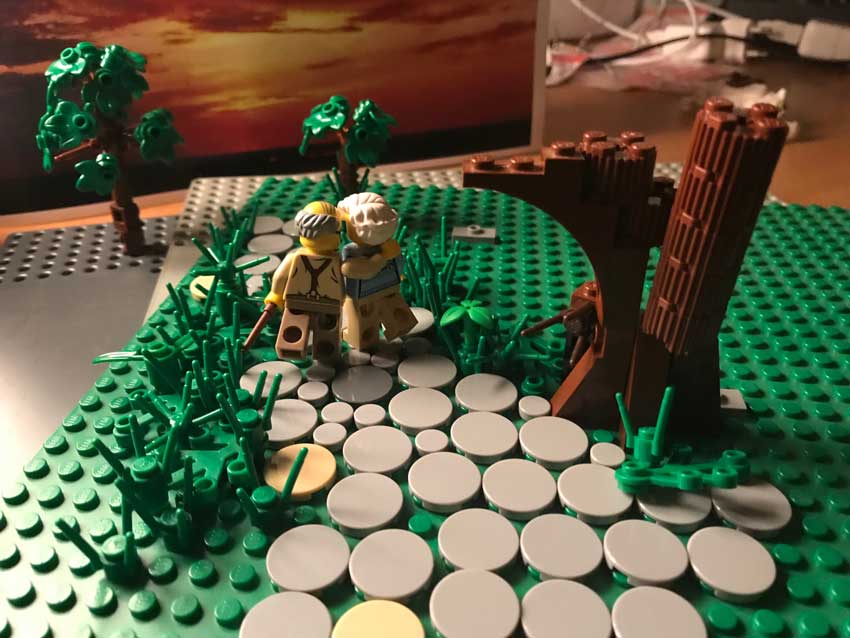
Take a special look at the trees. The small tree in the back right was used for adding a little depth. Because of the contrast with the much higher tree on the left, it looks as if the tree on the right is much further away than the one on the left (forced perspective).
Also take a look at the ugly big tree in front. I could have build a stunning tree, correct and beautiful. However, it would’ve never shown in the photo. Because I was a little short on time this tree was build brick by brick, looking through the lens for the effect of every brick. The illusion of a normal giant tree is there (I think).
The shot and post-processing
I took the shot with a f100 mm Pentax macro lens at ISO 100, aperture f/5.6 and shutter speed 1/60. In post-processing i added vignetting and adjusted the levels a little. The resulting image is below.

In the end, I am not completely happy with the effect of the background. It looks… well… like a photo in the background. I’ll have to see how I can refine the technique, so if you have any tips, I’ll be happy to hear them. Have you ever used photographs as background in your photography? How did that work out?
OTHER POSTS THAT MIGHT INTEREST YOU;

You can subscribe to the newsletter to receive occasional updates from Foolish Bricks.
Behind the scenes: "Hope"
Blog
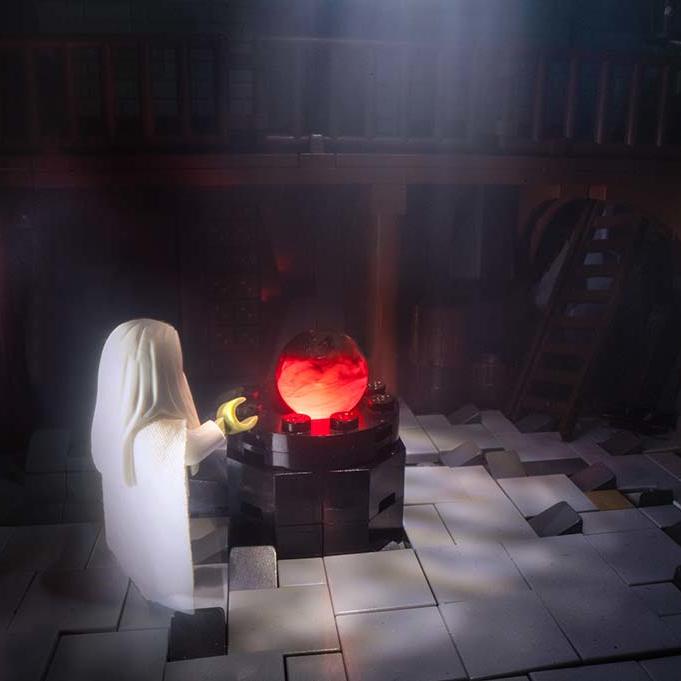
This is a behind the scenes post for the Lego photo: “Hope“.
Inspiration
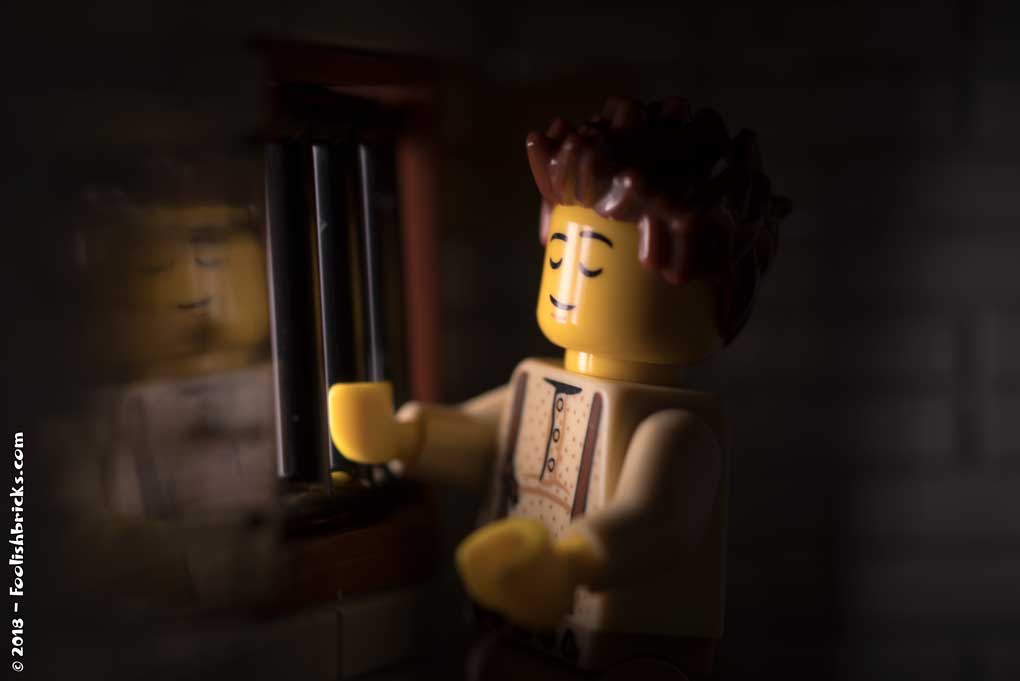
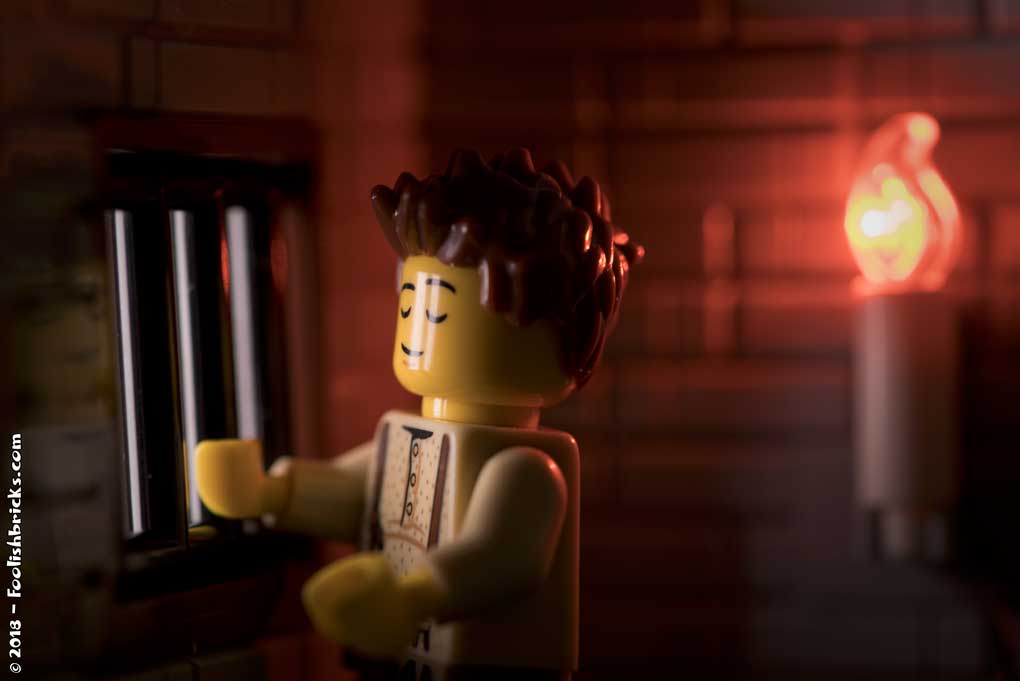
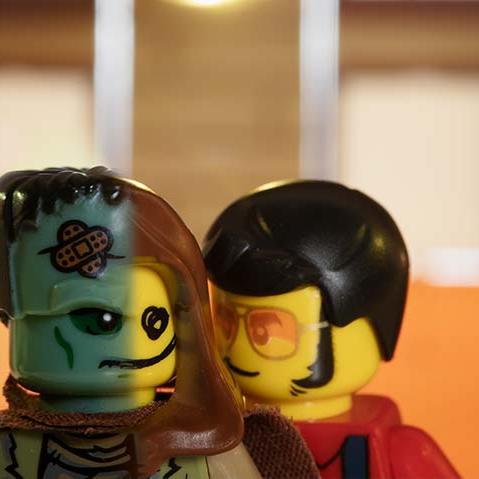
For this image I wanted to capture a dark image wherein light would play the starring role. I would’ve liked an image that was dark in nature, yet with a glimmer of happiness, serenity or hope. After some time I decided to work with a prison image, with a prisoner showing some kind of peace with the situation.
Setting up the scene
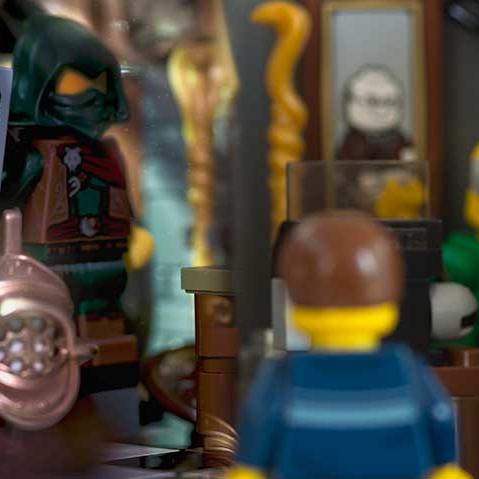
The final image changed quit a bit from the first concept in my mind. I build a small prison corner and put the minifigure directly in front of the barred window so the warm yellow light could shine on half his face. I used the sleepy head so it would look asif the imprisoned minifigure would seem to be silently enjoying the warm rays of sunlight with his eyes closed, remembering better times.
That did not work quite as well as I hoped. Because the minifigures have flat round heads, all contrasts that could provide depth in his face got lost. Also, you couldn’t see anything from the inside of the prison because of the darkness behind the minifigure (figure 1).
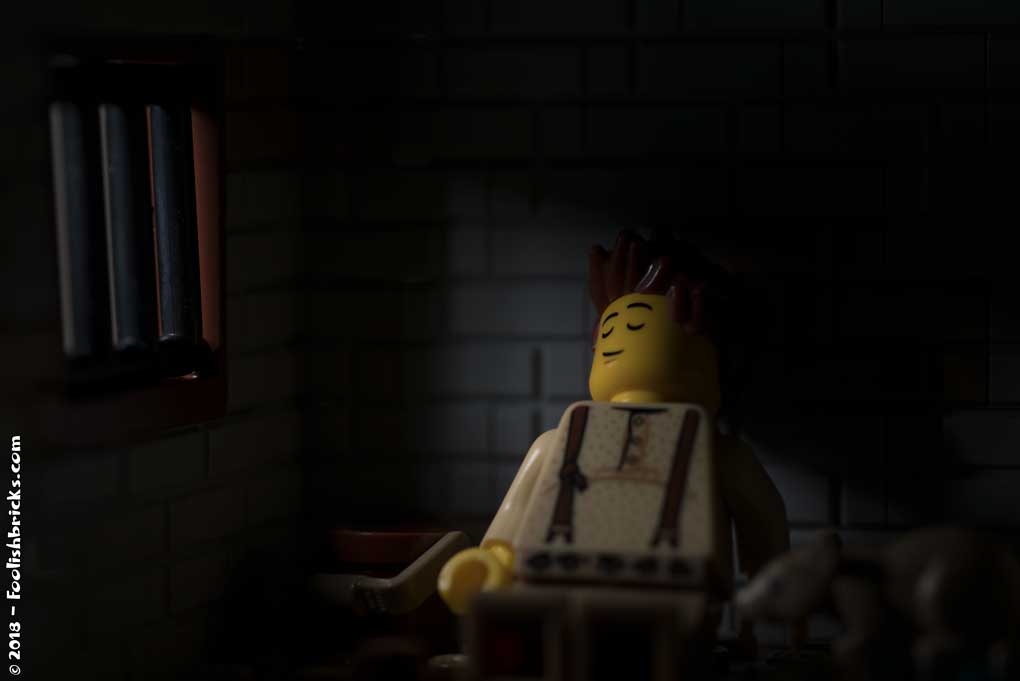
I tried adding a second light behind the prisoner, but that looked really artificial and unbalanced. I needed some kind of light source behind the prisoner. Next I tried a candle on the wall. This could’ve worked, yet, I wasn’t looking for contrasting light sources, so I removed it again (figure 2).
There was more of the prison in the image, yet, there was too much focus on the barred window itself. I needed the focus on the prisoner (figure 3).
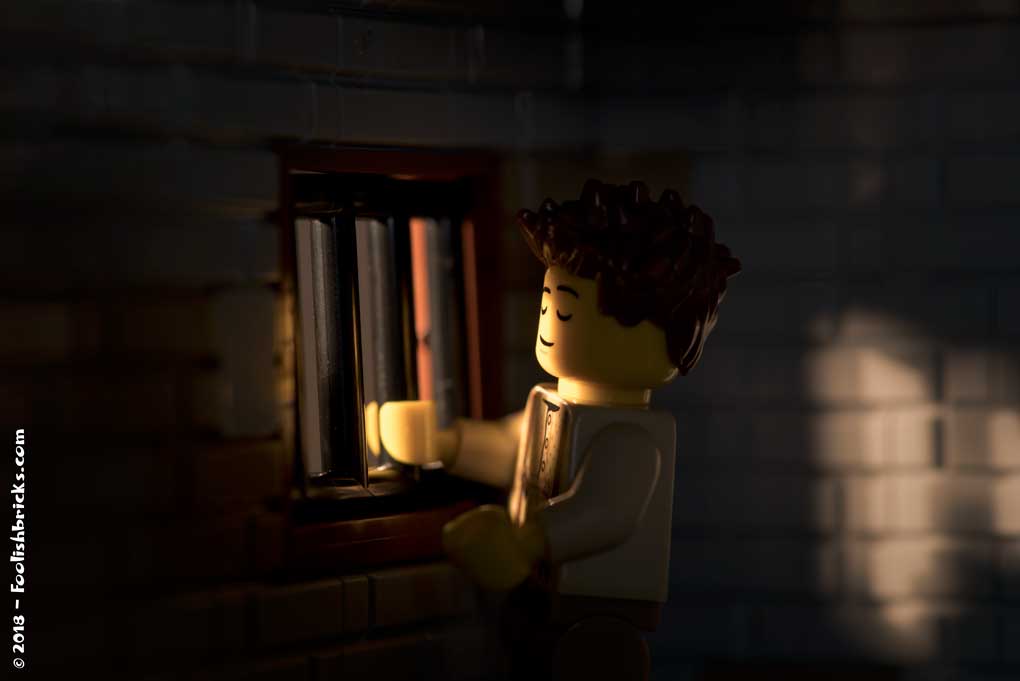
Then it struck me; I simply had to move the prisoner away from the window! This way I could use the natural light hitting the prisoner AND the wall, I could use the structure of the whole minifigure for depth and I wouldn’t need a second light source. So that’s what I did. I added a few smalle details, like the bucket and (of course) a rat. That was it.
Technical
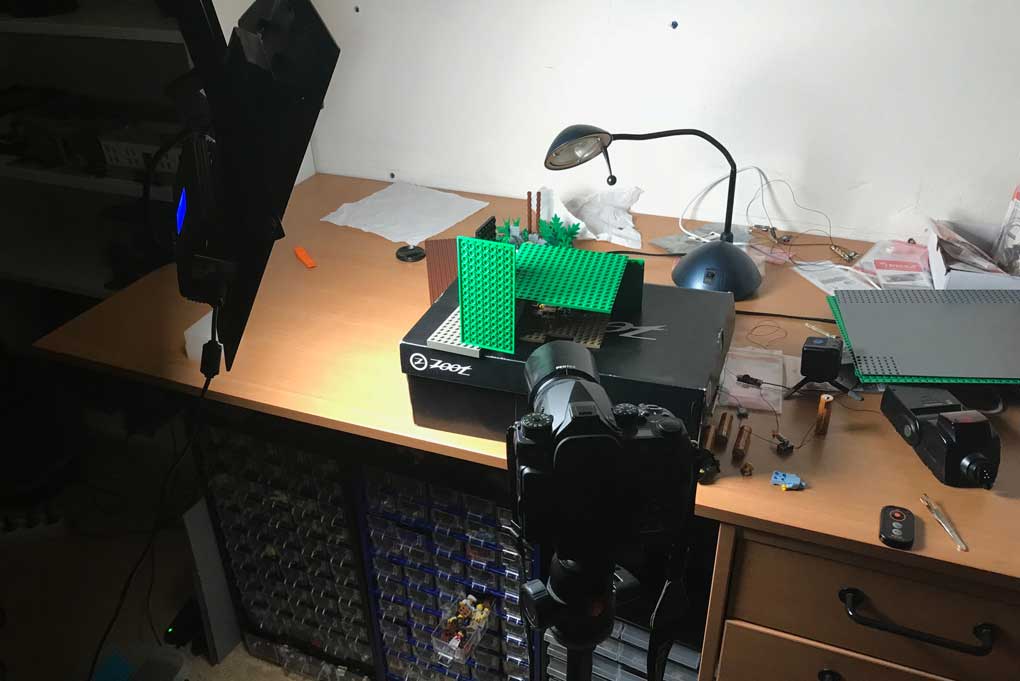
You can see the final setup in figure 4. You’ll notice the large plates outside of the walls. This is something I do in almost all my pictures and keeps the light from bleeding through the slits of the Lego blocks of the wall, especially if the light is shining perpendicular on the walls.
Post-production
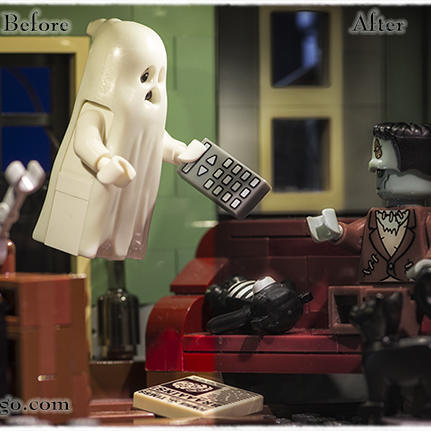
This photo didn’t need that much work. The only thing I did was lighten op the whites and shadows in camera raw (photoshop) a bit. The before and after is below.

OTHER POSTS THAT MIGHT INTEREST YOU;
You can subscribe to the newsletter to receive occasional updates from Foolish Bricks.
Behind the scenes: "Back alley ghost"
Blog
This is a behind the scenes post for the Lego photo: “Back alley ghost“.
Inspiration
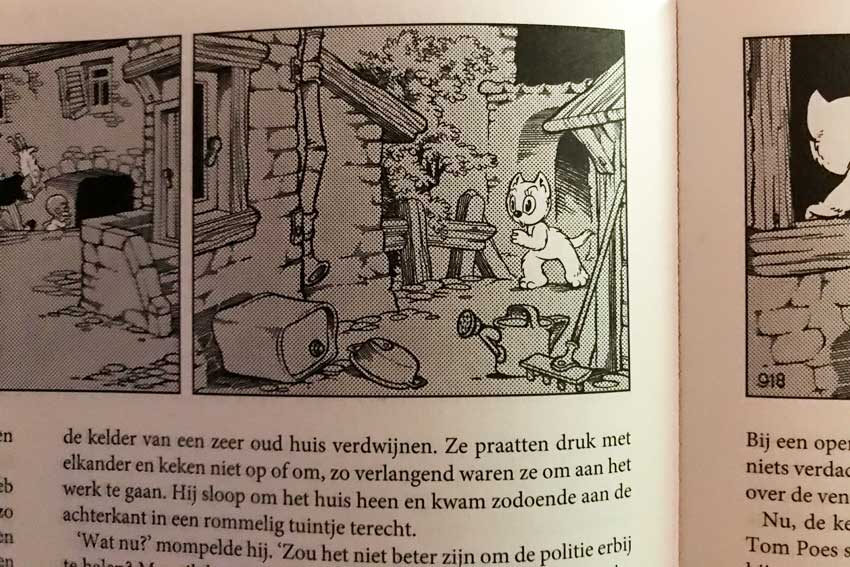
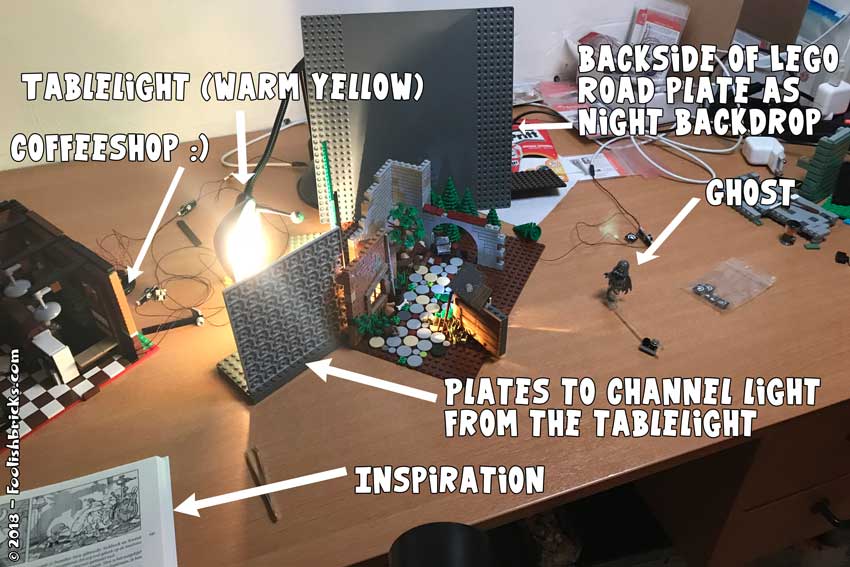
Inspiration for toy photography can arise from anything. The past few years I’ve been reading all the stories of Tom Puss (Dutch readers will instantly know who this is). One of the stories, “Kwetal de Breinbaas”, published in 1949 had a panel which immediately struck my eye. As you can see in figure 1, the inspiration for the back ally photograph came from one of the panels in that comic.
Setting up the Lego photography scene
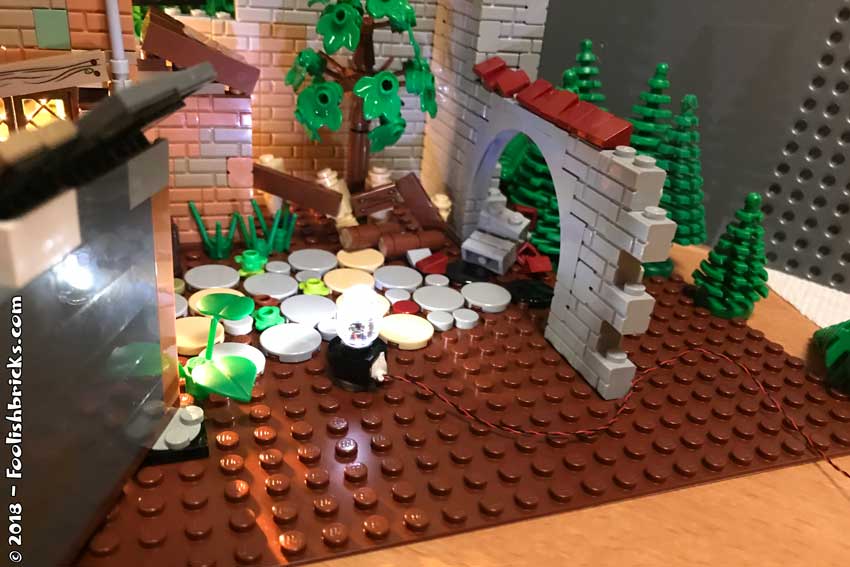
The basic Lego setup can be seen in figure 2. Pretty straightforward.
While building this Lego stage, I kept my camera close, so I could check and see if what I’d build was large enough. This way I could keep the building to a minimum.
Lighting the scene
It was to be a night scene. At night the main light source is usually the moon. So way up in the air I put my LED-panel at low light and at a color temperature of 5600 K (I used the same panel overhead in the coffeeshop-scene). Furthermore, I wanted warm light from the window as a means to light the front part of the image. In figure 2 you can see I used a simple tabletop light for that purpose. To keep the light from leaking into the scene, I used a few Lego plates to block the light where I did not want it.
Lastly, I needed a subtle lighting of the back part of the scene. If I made the moon too bright, it would have washed out the front warm light, so I put in a small LED light from Brickstuff behind the shed-wall for this purpose (figure 3).
Populating the Lego stage
Though Tom Puss is prominently featured in the comic book scene, I did not want to put in a cat(like) person. I’ve been looking to feature Dwaas in one of the images so I first tried to put him in there. You can see some examples in figure 4,5 and 6.
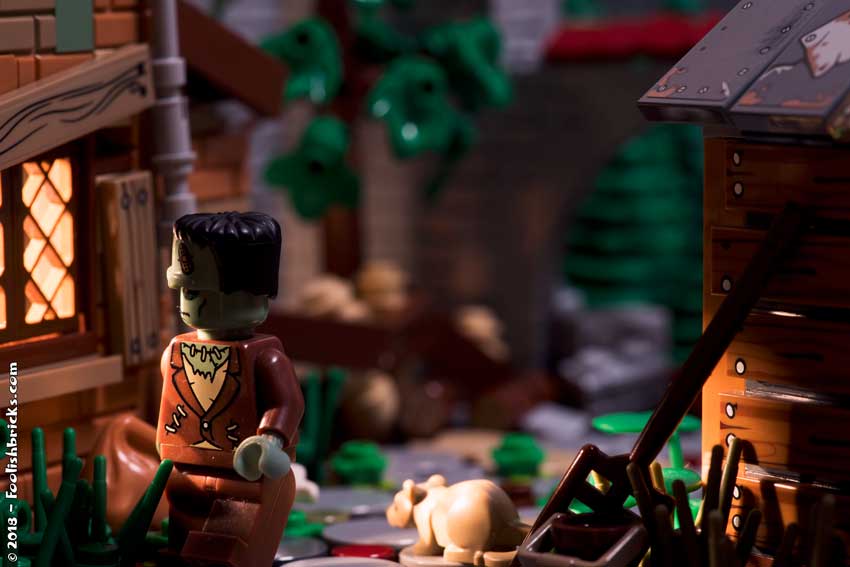
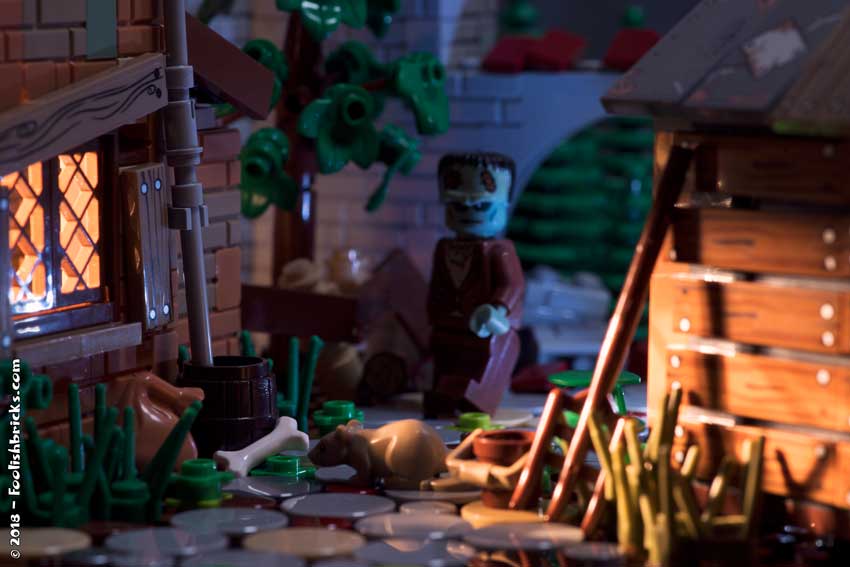
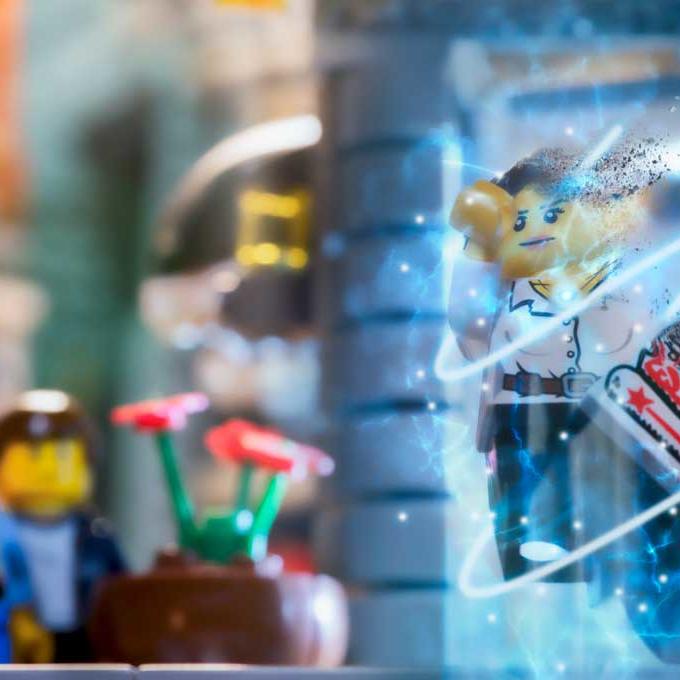
Yet, for several reasons, I did not like the result, mostly because Dwaas blocked quiet a few parts in the scene or Dwaas pulled too much attention from the scene as a whole. So in the end I decided to add a subtle ghost. By the way, now that I see them again, I kind of like the first of these three images to be honest. 🙂
Post production
Of course I added the ghost to the image. You can see him standing on a Lego stick in Figure 2. I used a similar technique to the one used for the ‘into the sky‘ Lego photograph.
Lastly, I deepened the colors a bit and added some contrast. The resulting Lego image is below:

OTHER POSTS THAT MIGHT INTEREST YOU;
You can subscribe to the newsletter to receive occasional updates from Foolish Bricks.
Behind the scenes: "Coffeeshop"
Blog
This is a set I build specifically for the Foolish Lego comic. However, it was such an elaborate set I wanted to create at least one high-end picture too. To be more specific, I wanted to see if I could light it as close to reality as possible. This behind the scenes post will specifically be on the lighting of the ‘coffeeshop’ Lego image.
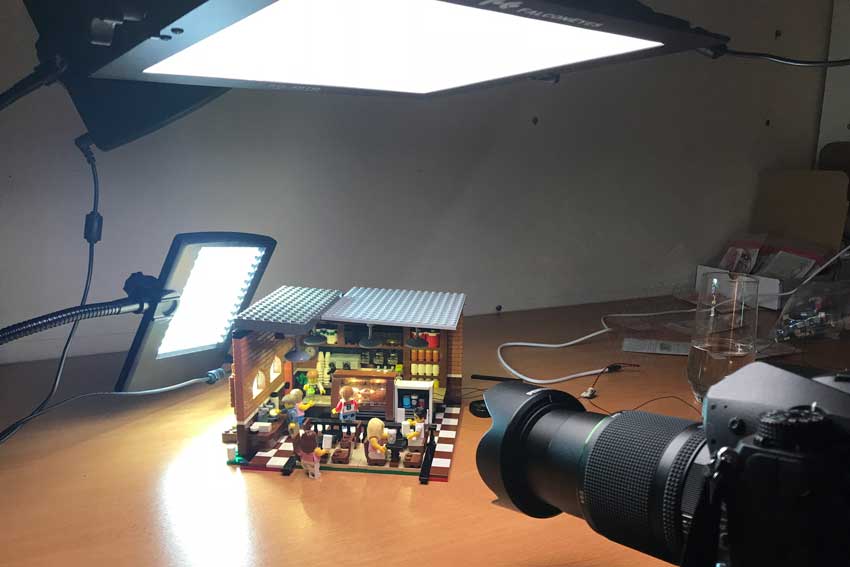
Lighting the scene
Mostly I like to have at least two color temperatures in an image because I like the subtle contrast. In this scene you’ll see different regions with somewhat different temperatures somewhere between cool and warm . First I wanted to take care of the main light-sources; the light falling through the windows and the ceiling-lights. This part actually consist of three lighting sources. The ceiling lights over the counter are from a wonderful company called Brickstuff and emanate a warm yellow light (figure 1).
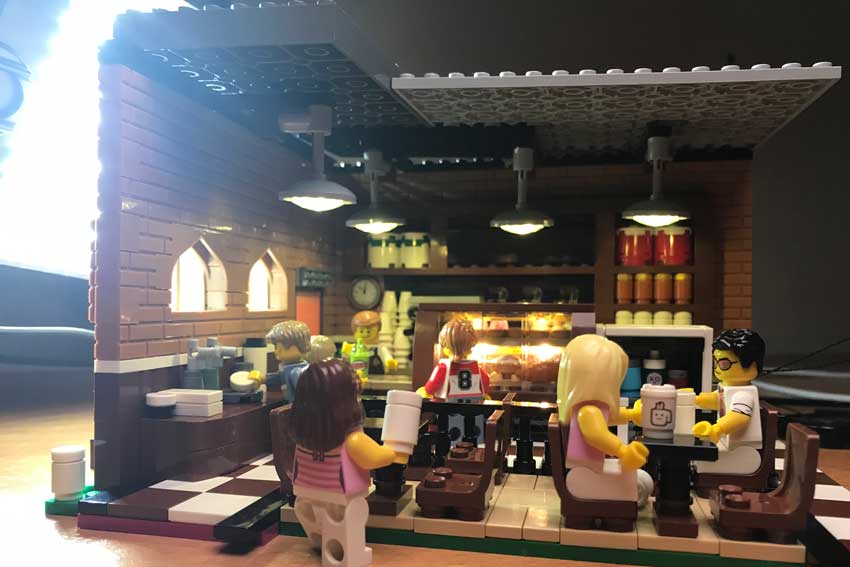
The light through the windows is from a harsh, cool LED-light, coming slightly from above because the sun would come from above at this time of the day (the clock in the corner reads 11:50 AM 😉 ). The customer-area was underexposed, so I added a third (soft) cool LED-light, whilst also blocking this light over the counter-area with a few large plates, so I would not lose the warm light at the counter (figure 2).
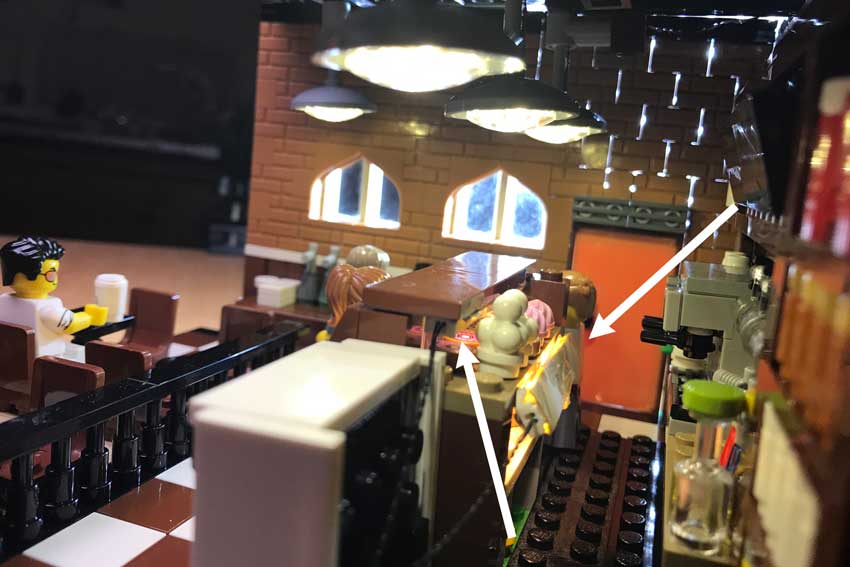
Smaller lightsources
As you can also see, the pastry cabinet is lit. For this I used two strips, each consisting of two warm yellow LED-lights (Brickstuff). These two strips are fixed with a little tac (figure 3).
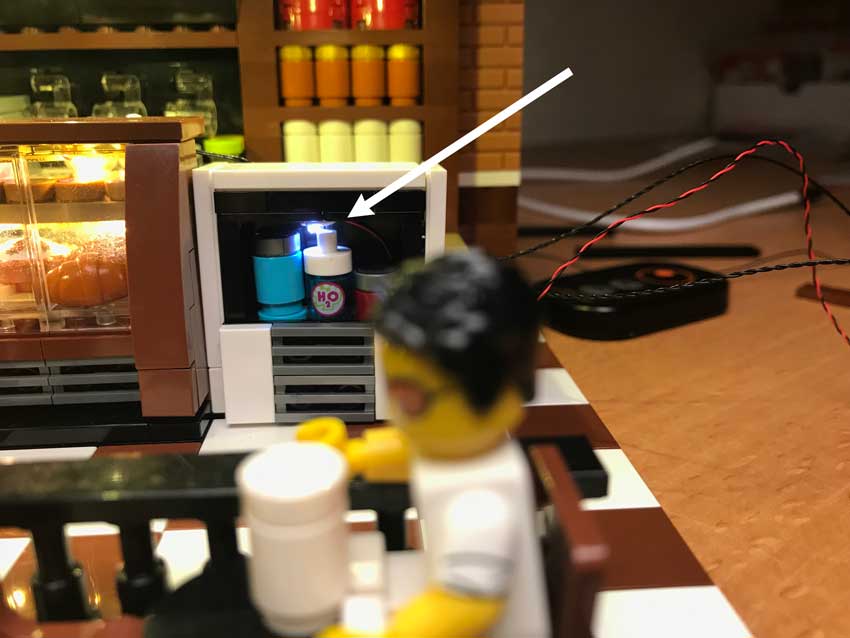
Lastly, I needed a light in the fridge. This one could be better, but I had too little space to fix get more lights in there. Anyway, I used another Cool white LED light from Brickstuff (figure 4).
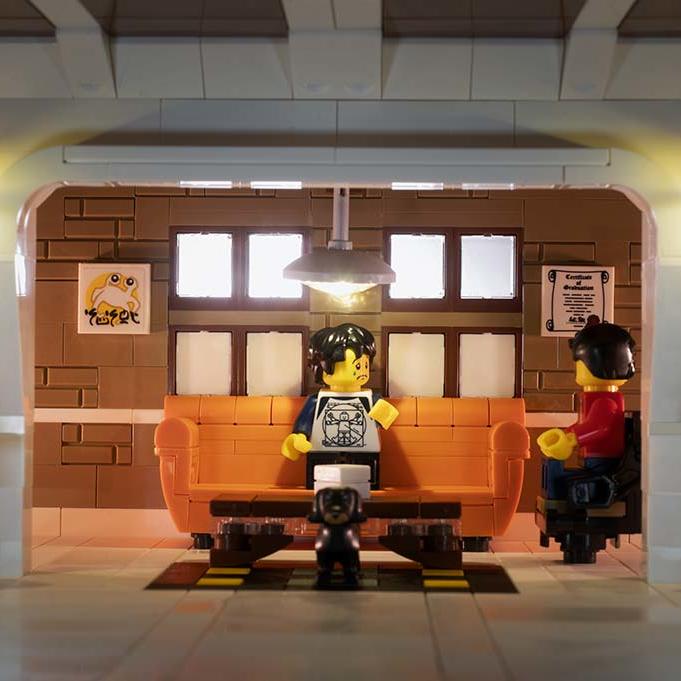
Final touches
Then Icarefully placed the Lego minifigures. I wanted to create the illusion of a busy coffeeshop without accidentally blocking interesting scenery with the minifigures. That was a challenge, yet, I feel it worked rather well.
I shot the whole scene with my Pentax-K1 at f105 mm (focal length), f/20 (aperture) 1,30’ (shutter speed) and ISO 100. In post-production, I deepened the contrast a little and added a few subtle light beams.

That’s it! The final Lego image: ‘coffeeshop’, is done.
OTHER POSTS THAT MIGHT INTEREST YOU;
You can subscribe to the newsletter to receive occasional updates from Foolish Bricks.
Behind the scenes: "Lazy Sunday Morning"
Blog
To my surprise one of my images was featured on the Brothers Brick recently; “Lazy Sunday morning“. This is a behind the scenes post on that image.
The idea
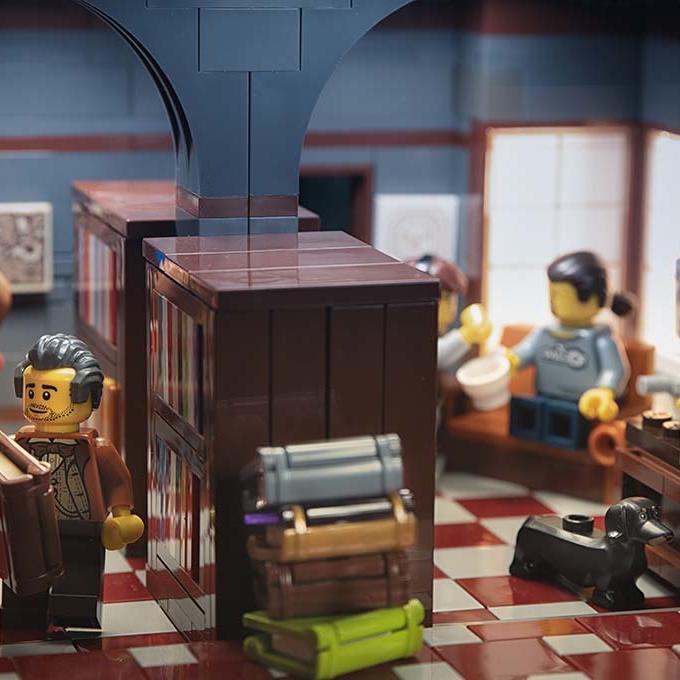
As some of you might know, for several reasons, I am not a fan of building with Lego. This time however, I felt the urge to build a nice MOC (my own creation) for a photograph. I’ve been wanting to experiment with light coming through windows for ages, so that was the goal for this build.
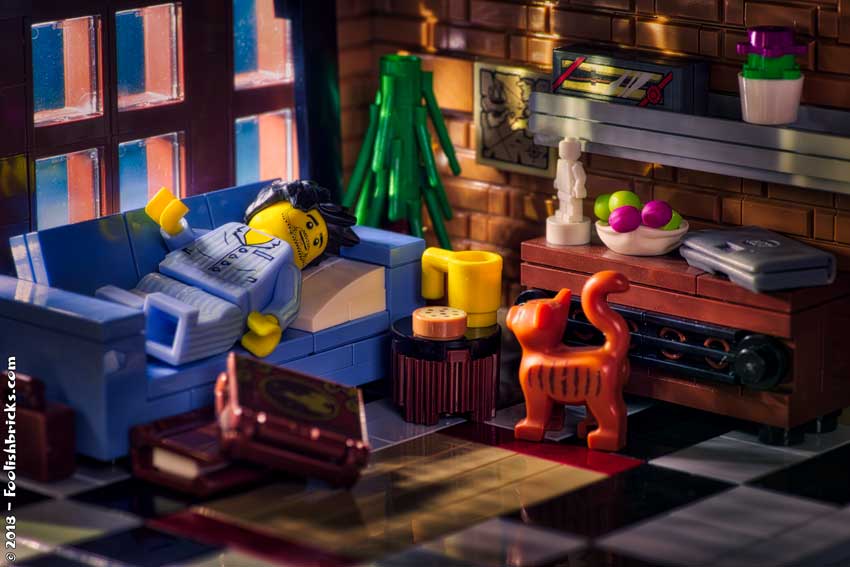
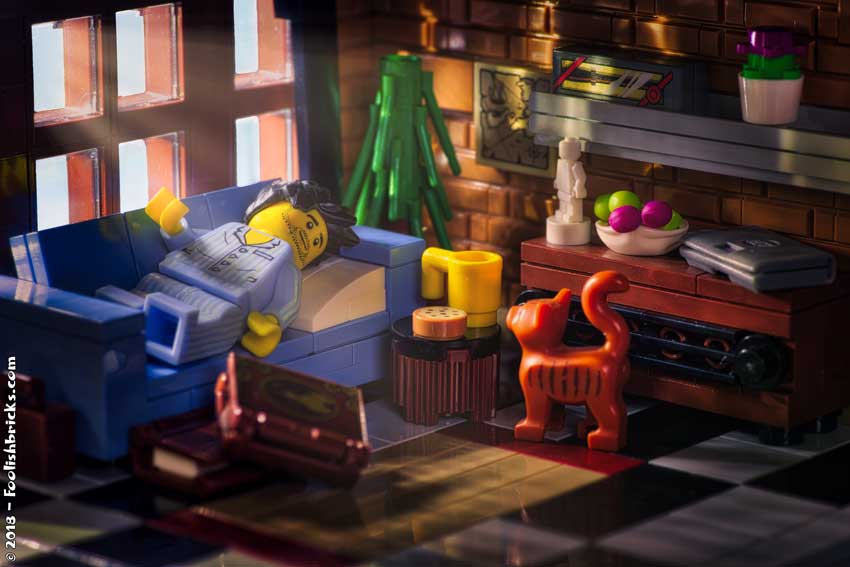
Because I wanted the light to hit something I wanted the build to have textures on the walls, so I did not want to use flat surface Lego bricks. Also I wanted a warm apartment. To achieve this I used more brownish colors.
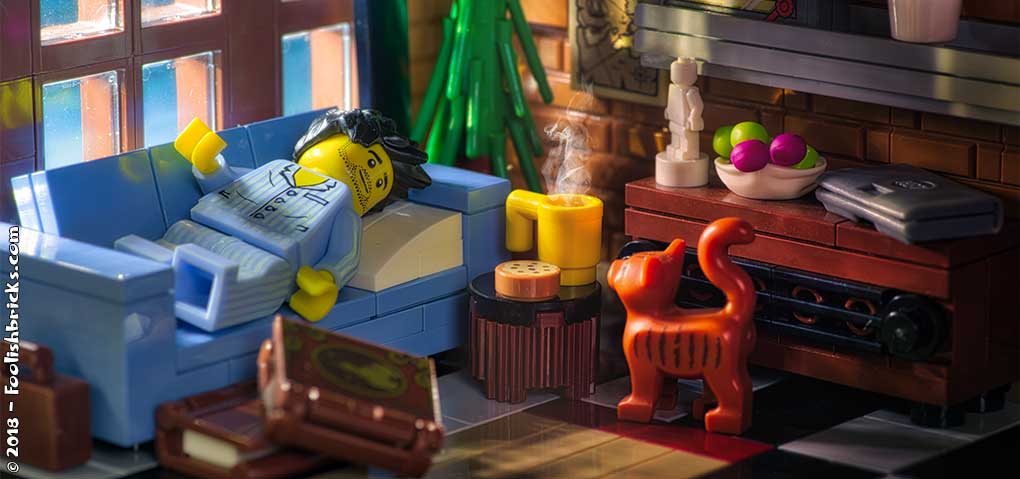
As narrative, I wanted to add all kinds of elements in there. First elements to show he’s relaxed; cosy sofa (modeled after a sofa I own myself (brown 😉 )) with a pillow so his nek won’t hurt besides a few books for relaxation (love that myself). In contrast some work-related stuff (his suitcase and closed laptop). He is also a man of travels (a map on the wall) and loves a bit off fantasy (a Harry Potter wand on the shelve). And so on.
As stated by in the review, there aren’t any fancy building techniques, however I was proud of one inventive part use: look at the fruitbowl, its the lower part of a Lego Ninjago mask 🙂
The set-up
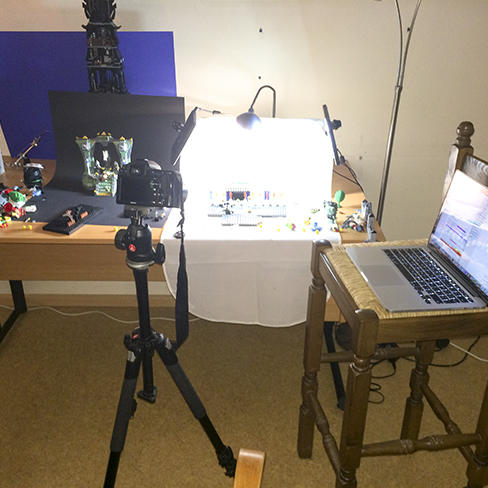
I have my mini-studio in the basement… but it’s a mess! As you can see in figure 1. So I had to shove some stuff aside to make room for my little apartment (the mayor’s office is in the back).
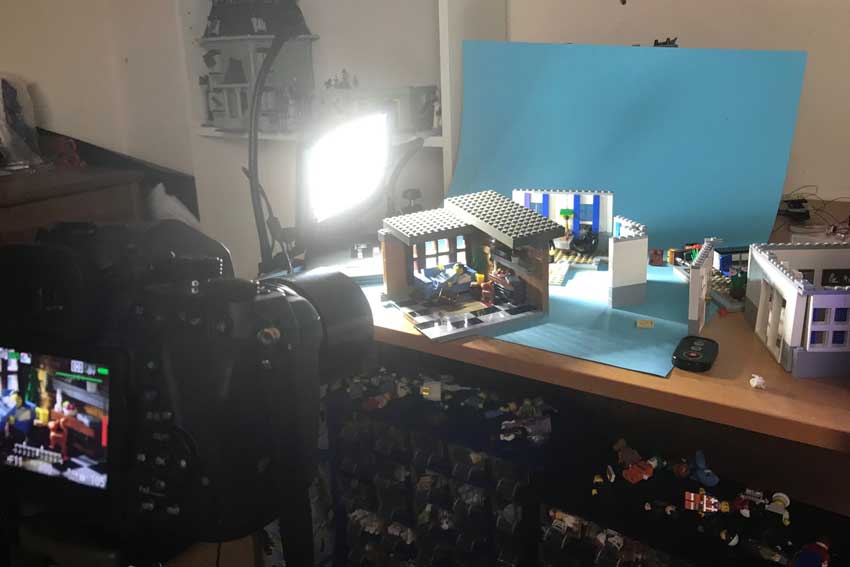
Besides that the setup is pretty straightforward; a large daylight lamp outside the windows and I keep dim light in the room to break the general darkness. I do not own a light with adjustable temperature yet, so I figured I could change the temperature of the light in post-production.
Furthermore you can see a camera-remote-control lying around (to lower the chance of camera-movement), and a little piece of paper-towl, to remove as much dust as I can see.
The original image
I used a Pentax K1, with a f100-macro-lens. The camera settings were: f/11, 2”, ISO 100. I always shoot my frames in dng-raw. Figure 2 shows you the original image. I wanted to get in really close, invading his personal space to make the viewers feel as-if they are part of the scene.
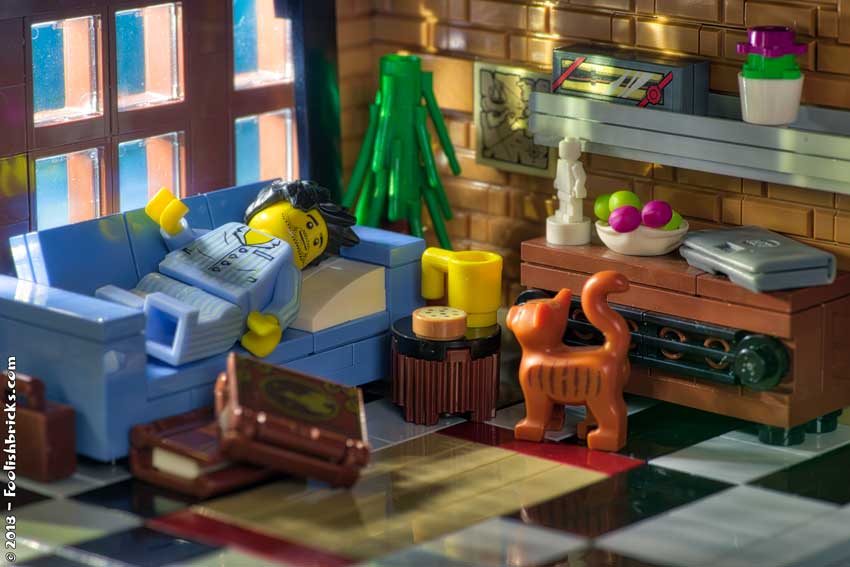
I shot quite a few frames before this image came to be… Cat not standing correctly, the light didn’t hit the walls like I wanted, the books reflected too much light, suitcase out of the frame, I knocked over some stuff trying to clean some dust away (and only noticed that afterwards), etc…
Post-production step 1; Cleaning up
There is always dust in my originals. The macro lens enlarges everything so much, that I don’t notice it with the naked eye… but it’s there. So the first step is digital cleaning. Besides, now I can also remove annoying reflections too! The result can be seen in figure 3.

Post-production step 2; “Basic” adjustments
This part is the most extensive, and also a lot of fun. I experiment somewhat until the image looks like I imagined. I started in camera-raw, first adjusting white-balance (higher temperature and more tint), second I Adjust the exposure settings (selectively darkening and brightening different tones) and lastly a bit more clarity, vibrance and of course saturation). After these adjustments I use ‘dodge and burn’ and ‘levels’ to selectively adjust the image. The result can be seen in figure 4.
Post-production step 3; Light through the windows
The windows were lighten and light beams added. Afterwards I selectively lowered brightness, saturation and played a little with the ‘levels’-settings in the rest of the image. Look at figure 5 for the result.
Post-production step 4; details
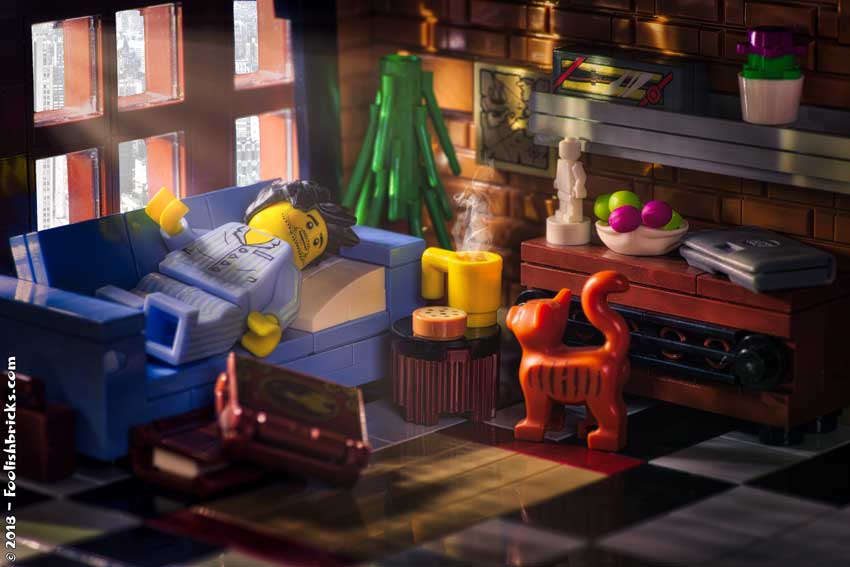
I need my coffee in the morning, especially if it should happen to be a lazy morning. I also need that coffee to be hot! So I used a smoke-brush (you can find all kinds of free brushes on the Internet) and added some steam to the mug. Oh, and I cleaned a bit more because I mist specs in the first round of cleaning. The result is in figure 6.

Post-production final step; outside!
At first I figured I was ready. I even uploaded the image as it was. Still it kept bugging me! It was missing something. That something turned out to be the windows. They looked as-if they were taped shut. I wanted something outside the windows. To add some contrast to the cosy inside I decided to add a busy city outside the comfort of this guys home. I overexposed and undersaturated an image of New York and used a layer mask to place that image in the windows. Below are the original vs. final version of the image.
So, thats it! It was more fun than I thought and I expect to be building some more after this experience.
What do you think, is there anything you would have done differently?
OTHER POSTS THAT MIGHT INTEREST YOU;
You can subscribe to the newsletter to receive occasional updates from Foolish Bricks.
Behind the scenes; into the sky
Blog
This is a behind the scenes post for the image; ‘into the sky‘. And though this image is not very difficult to create, it is useful to know how to make objects (or Lego minifures) fly in Lego photography.
Setup
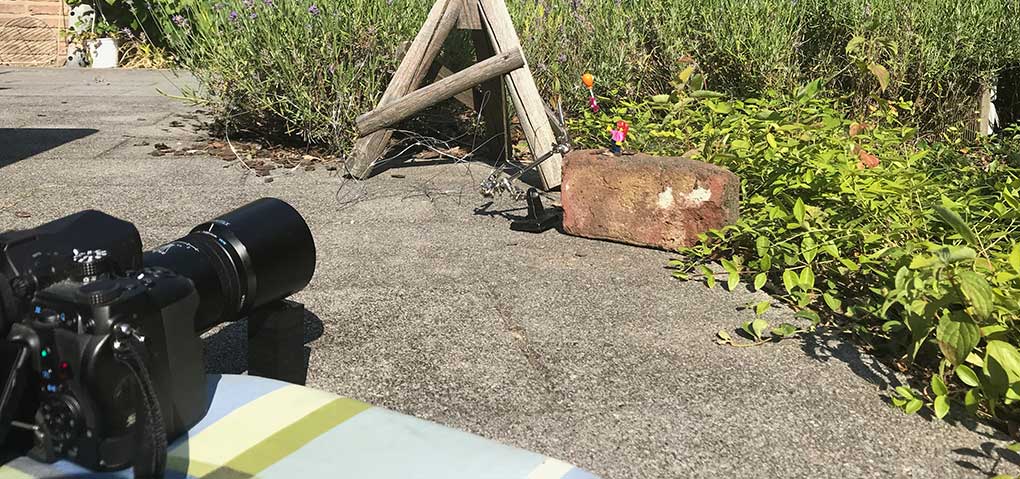
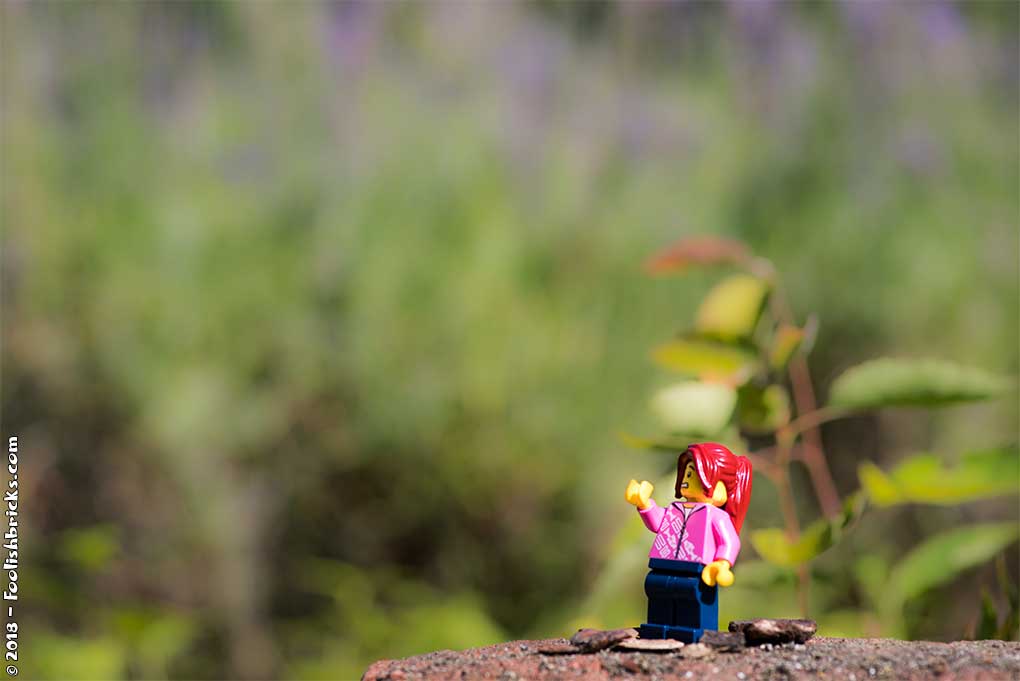
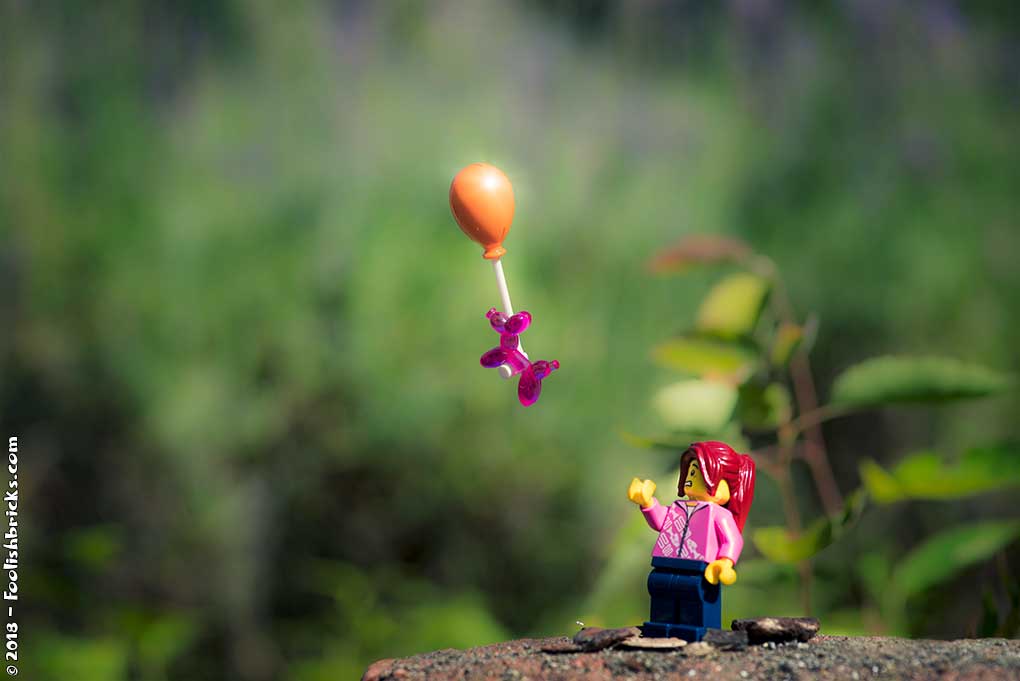
I wanted to create a scene with a balloon-animal flying into the sky hanging on a balloon after a woman lost it. Whenever possible, I go outside for a photo so the sun will take care about the lighting. The set-up is shown in figure 1.
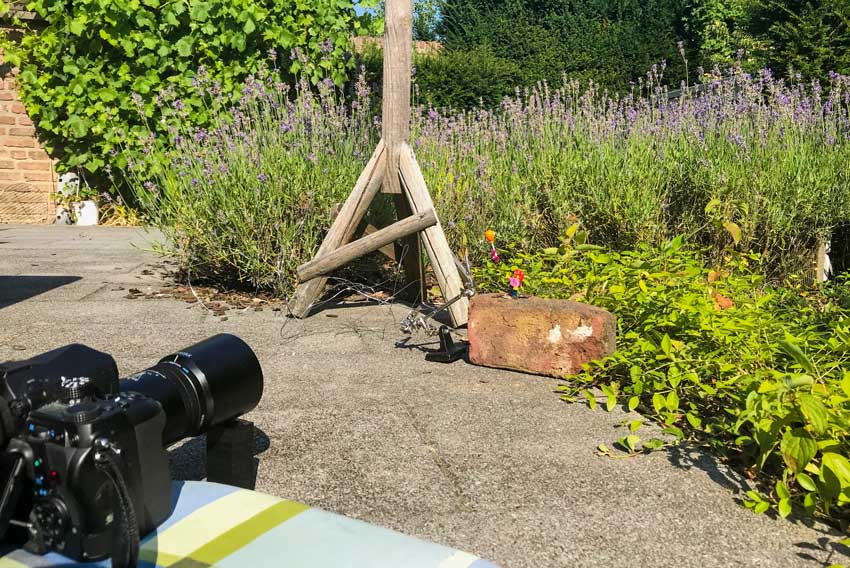
This time the camera is placed steady, this is important since I need two photos within the same frame (see later on). I use the remote control to take the photo after setting up the scene and adjusting the camera-settings. This will diminish the chances of me accidentally moving the camera between shots (like I often do 🙁 ) .
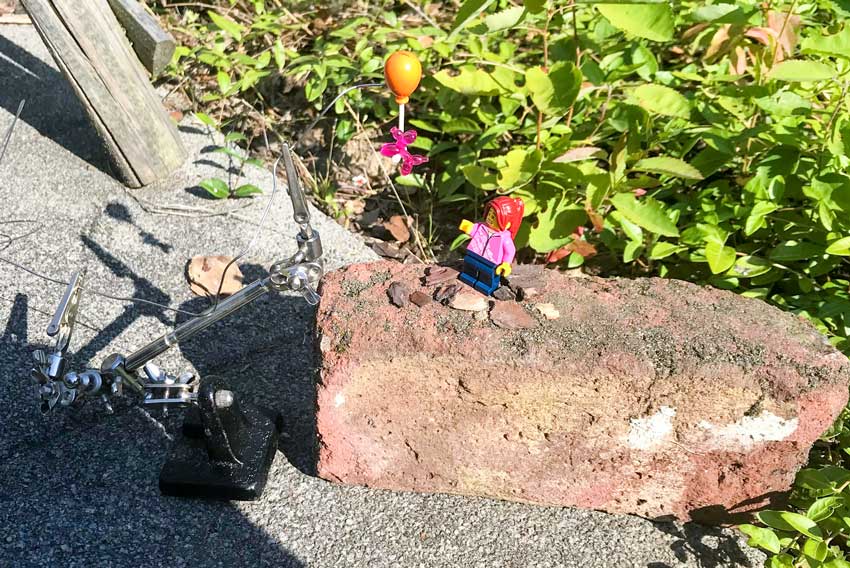

As you can see in figure 2 the balloon is attached to some wire to make it fly. Also the balloon-animal is attached to the balloon.
I use ‘tac’ (in the Netherlands this stuff is named ‘Pritt poster buddies’) for this purpose. Tac is very useful, I use it a lot, for example to stick minifigures to the floor when their center of gravity is such that they can’t stand on their own.
If you look at the image the Lego minifigure is bend a bit backwards to make her look at the balloon. This time it was not necessary to use Tac though. I simply placed the brick underneath at a slight angle so the minifigure wouldn’t fall backwards. The photo itself is shot from slightly underneath so you wont’t notice this angle in the final image.
Lastly, I take two pictures. One of the setup in figure 1, and one with the same setup but without the whole balloon. IMPORTANT: Be sure to set your camera-settings to manual for this, especcialy the focus. You’ll want the second image to be exactly the same as the first one. Also don’t linger to long between shots when you are outside. I often did and when I was ready for the second shot, the clouds moved in, completely changing the lighting.
Out of the camera
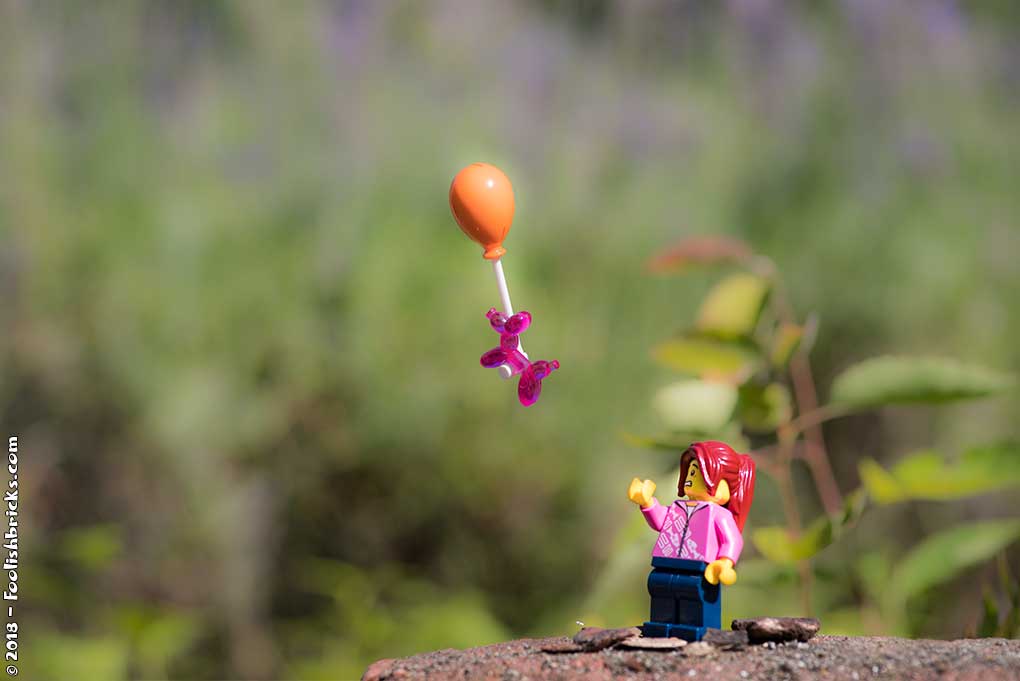
Figure 4 and 5 show you the images straight out of the camera. I wanted the background to be substantially blurry so it wouldn’t distract the viewers from the central image. Eventually, the images were shot at ISO 100, shutter-speed 1/800 s and aperture f/5.6.

Post-production
For post-production I always use Photoshop. I don’t know any other software from experience. However, there are (free) alternatives to Photoshop; the most well-known being GIMP.
In photoshop I performed a few steps.
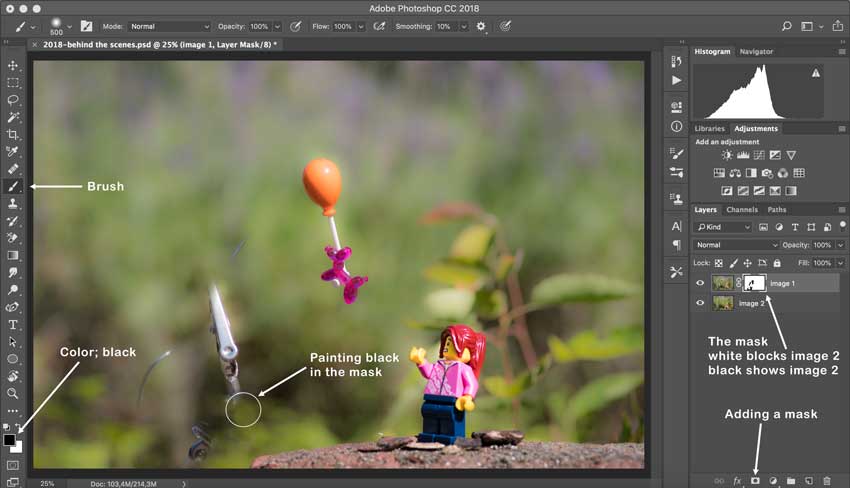
- I put the images in one file in two separate layers. Image two is the layer underneath image one. Then I put a mask on the image 1-layer and simply paint everything I want out of the picture black in the mask, revealing the layer underneath (image 2). Figure 6 shows you the proces, figure 7 shows the result.
2. I accentuated the green colors in the image (figure 8).
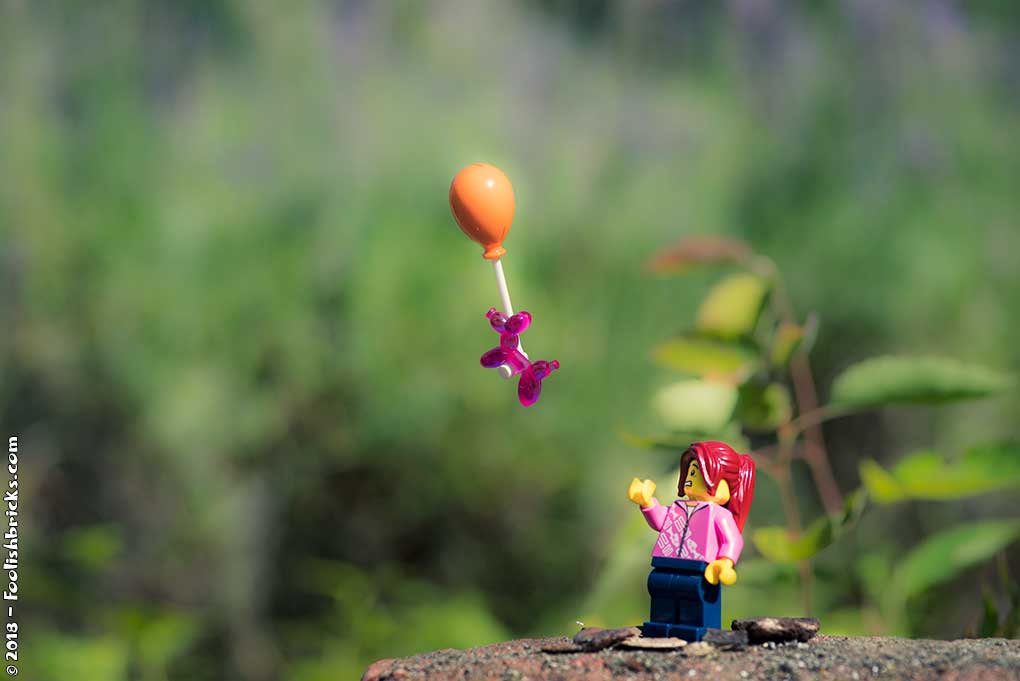
3. I added a little vignette and accentuated the reflection of the sun on the balloon (figure 9).
The final result
That’s it. Clean and simple. Only thing that remains is a before and after image.
OTHER POSTS THAT MIGHT INTEREST YOU;
You can subscribe to the newsletter to receive occasional updates from Foolish Bricks.
The premise of your story
Blog
The premise-line, possible consequences of not having one
Story-wise, I wrote the first Foolish Lego comic on the fly. I just shot my episode and got stuck somewhere near the end. Also, I started wondering what my main character -Barry- was actually doing. He was more or less riding the waves instead of causing them. Far too late a learned about the concept of a premise-line. You need to know what your story will be about and the premise line is THE primary guide for developing your story later on. It was too late for my first comic. However, I set out to write one for the second season of the comic. Yet, I abandoned the premise-line before fully developing it, because of time-constraints. Eventually, I had a notion of where I was going, but the faulty premise-line caused difficulties writing the later part of the story.
What is a premise-line?
I really suggest you develop your premise line before you write your story or script. At this moment I am working avidly on the premise-line of the third comic-chapter and I know it will pay off when developing the story itself. The premise contains, amongst other components, the primary story structure, important character(s), the conflict and ending. If you develop a good premise line, you can always return to it if you’re stuck writing your story.
The Seven components of a premise-line
A brilliant book on the premise line is: “Anatomy of a premise line” by Jeff Lyons. It comes highly recommended. Basically, the information in this book will help you identify the core structure of your story.
In short; there are usually seven components that you need to identify:
Character:
Who is the main character, your protagonist?
Constriction:
Your protagonist is inhibited in some way. Maybe material, usually a deep belief or moral. Whatever it is, this is what’s driving him in his daily life (even if your protagonist doesn’t know this is driving him; a moral blind spot).
Desire:
Your main character wants something. And his/ her actions are directly or indirectly related to this desire.
Focal relationship(s):
Usually there are one or more people your protagonist talks to. And through these conversations, your readers will get a deeper insight into the thoughts and desires of your main character. These relationships are part of the dramatic focus of your story.
Resistance:
Of course, there is someone or something that is the opposing force!
Adventure:
Because of all the elements mentioned before, your protagonist will (choose to) end up in an adventure.
Change:
And in the end, the adventure will be over. Your main character will have changed… will have a better understanding of him- or herself… for better or for worse.
As you can see, the first season of my comic missed a few elements; Barry being the main character; there was no constriction, no real desire. He didn’t really choose anything in the adventure part and he never changed. If anything; Amida or Darryl would’ve been much better candidates for a main character.
The structure of the actual premise-line
After you identified all elements, you can create your premise line:
When some event provokes your main character to act (not react), your main character joins with one or more people acting on some desire until your main character’s actions are met by an opposing force – creating the adventure – leading to a transformation of your main character.
When some event provokes your main character to act (not react)… [combine Character with Constriction]
…your main character joins with one or more people acting on some desire… [combine Desire with Focal relationship(s)]
…until your main character’s actions are met by an opposing force – creating the adventure – [combine resistance with Adventure]
…leading to a transformation of your main character. [Change]
Take your time developing
Developing a good premise-line can take a long time. Yet it’ll all be worth it. See it as a map to your story, a map to find your way when you get lost writing. And remember that if your premise-line doesn’t work, you’ll probably get stuck writing your story too. Besides, thinking, developing and tweaking the premise-line turned out to be a lot of fun. Especially when suddenly all elements fall into place!
OTHER POSTS THAT MIGHT INTEREST YOU;
You can subscribe to the newsletter to receive occasional updates from Foolish Bricks.