Lighting a scene; white-balance part 1
Disclaimer: this is an outdated article!
I never considered myself a good (Lego) photographer, there are so many great toy-photographers out there. Yet, I am slowly getting there. This year I will write some blog posts on the things I learned over the past five years I’ve been photographing Lego. This first episode is on white-balance. It is very basic; but at the time it was a real eye-opener to me… showing how little I knew about photography. Makes me wonder how many basic things I am oblivious to.
To me, the hardest part of Lego photography is lighting indoor scenes, composition of a scene coming in as a close second. There are so many factors to consider before you can take the shot. In the beginning, I didn’t look at specific lighting at all. I just arranged that my subject wasn’t too darkly lit, and that was about it. At some point I started paying a littlebit more attention, using the lights I had in and about the house, lightbulbs, leds, iPhones, etc… The photos back then didn’t come out of my camera the way I wanted. So I would turn to Photoshop and correct them as much as I could. However… I couldn’t get them right. I had no clue what I was doing. Shadows everywhere, uneven lighting, reflections… etc.
The problem: white-balance
One thing I found very annoying was the fact I couldn’t get the color temperatures/ white-balance right, At first I thought I could solve that problem by just shooting in raw and post-processing the white balance in Photoshop…. again, it didn’t work. Even two photos that were lighted approximately the same way gave completely different results at exactly the same settings for color temperature in Photoshop.
I considered that a tremendous problem for the comic. In those times I shot each episode the day it went up and for the better part I couldn’t get them consistent (just look at the first comic and you’ll see).
The crucial finding… providing more problems
It took me some time to figure out that not every light had all colors incorporated. For the comic episodes, I used over one type of lamp, all simple home lamps, all with different lightbulbs. For each episode, the scene was lit differently because I moved the lamps and did not distribute their light evenly. I didn’t notice with the naked eye… but, as a result, in post-processing I couldn’t get the temperatures the same.
To solve this, I bought daylight lamps. And that solved most of that problem! At least I lit the scenes the same regarding temperature. So most of the time I shot all photos in those lights (I became afraid of all other types of lights) and then corrected the white-balance in Photoshop, coincidentally introducing more problems. It was a lot of work. I had to remember all kinds of settings and mostly these photos looked artificial even when I longed for a more realistic look.
Solution(s)
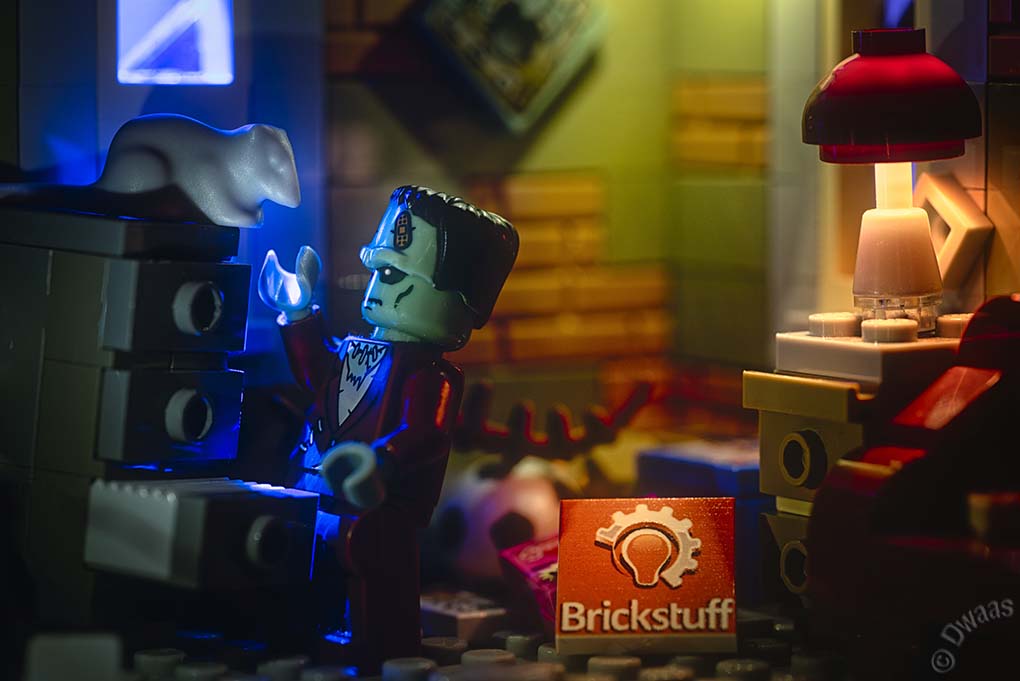
Nowadays, I don’t let the lights control me anymore, I control the lights! I still use the daylight lamps, but added smaller lights with different colors and temperatures whenever necessary (I got them at Brickstuff – check them out!). That means more consistency and less post-processing and more time for the shoot itself. Yay!
At least now I know how to get the white-balance right. However, there is so much, less basic, stuff to now and learn. I’m working on that and hopefully take you along for the journey.
OTHER POSTS THAT MIGHT INTEREST YOU;

You can subscribe to the newsletter to receive occasional updates from Foolish Bricks.
1st of all, this blogpost stuff is a pretty good idea! Congrats!
Now, the more I read to your post about photography, the more I realize I’ll never have the patience to learn everything about it… Everything seems so… Out of this world to me when it comes to mastering so much settings and how every one of those interact with others…
I mean, changing one thing may impact 2,3 or more other settings. Finding balance over more than 3 settings is beyond my power LOL (or my will…)
For all this, you’ll always have my full respect, as every self educated people learning to mastering their art.
I started with changing only one setting When I was comfortable with that setting I added a second one and seeing how these influenced each other. then a third etc…. after 4.5 years I finally adjust all available settings manually and now I start reading up on those to look for hidden possibilities.