Photo enhancement
Disclaimer: this is a (severely) outdated article!
Over the past few years, my photography skills have improved a little. As you all know, photography is about light and of course the one thing that is most problematic for me, is the lighting of my photos. I can’t seem to get the right lighting conditions in most of my photos shot with studio lights. So, my favorite source of light is – and always will be – the sun.
Currently, I’m still looking for the perfect lighting setup for in my small basement studio. Not solely for the larger lights but also regarding the smallest of light sources. So if anyone has any ideas/ tips on lights; please share them in the comments.
Because of this, I use Photoshop, to try and correct color, lighting and small imperfections that disturb me. Periodically I use it for special effects too.
For example:
– In sunlight I don’t have to enhance photo’s that much;
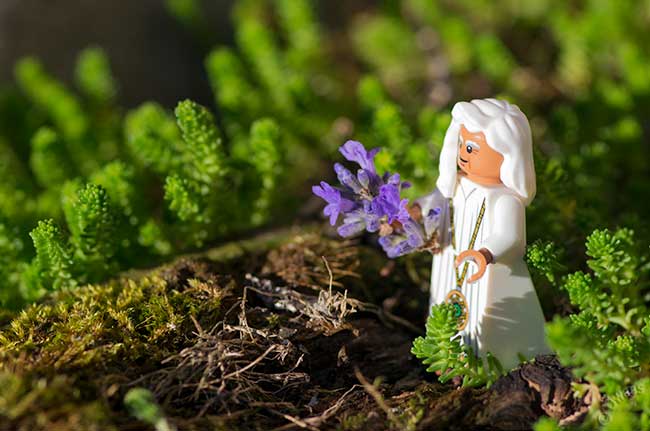 The original right out of the camera
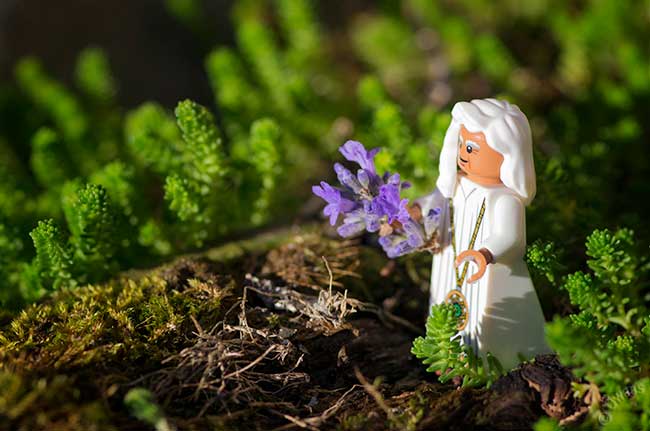 The end-result. I only applied a graduated neutral density filter and corrected the necklace a bit.
– This next photo took a bit more work, unnatural light
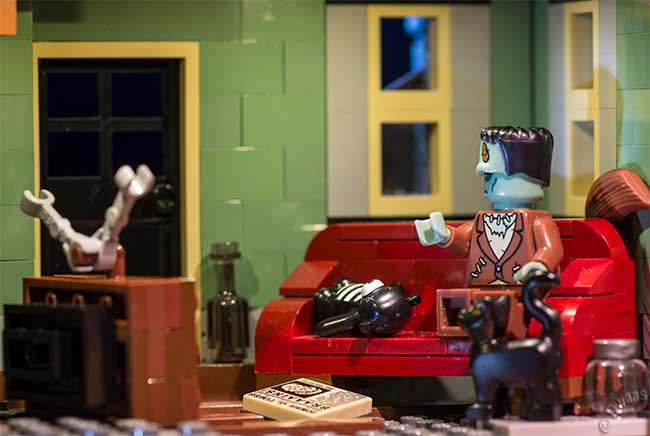
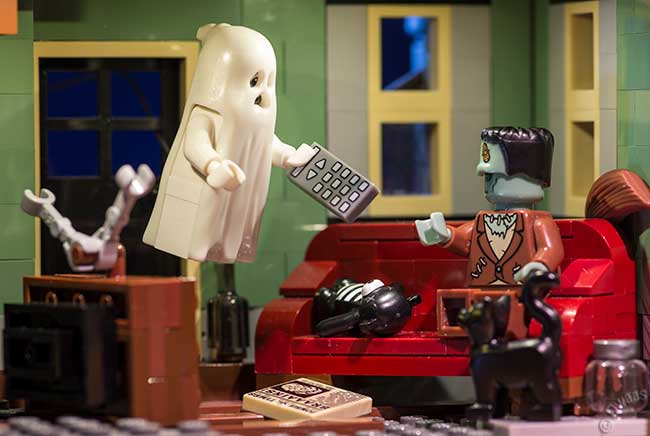 These are the two originals. I need two because of the ghost-effect. The only part of the first photo that will be used is the background of the ghost (and wire holding the ghost up), everything else will be the second photo.
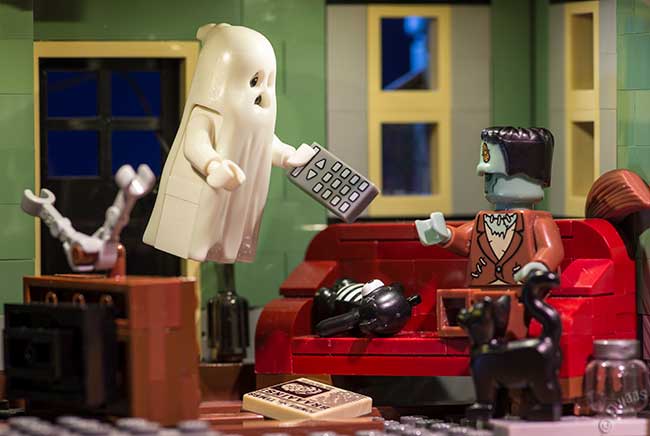 First I removed some irritating reflections (the couch, tv, Dwaas arm, etc.) and I removed the brown brick in the left upper corner.
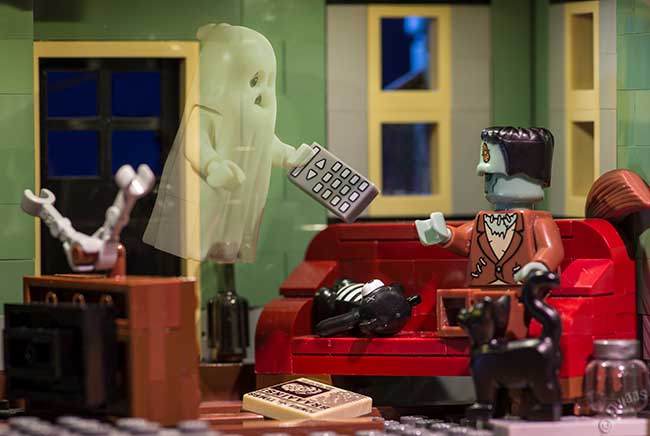 The second photo is layered over the first photo and a mask is applied over the ghost, making the ghost transparent showing the first photo underneath (same goes for the wire holding up the ghost; this one is completely masked, showing the first photo underneath). Also I removed the reflection on he forehead of the bear. Another detail is something nobody will really notice I guess but I reconstructed the upper part of the remote and put that underneath the ghost his hand. A detail ‘m very happy with by the way 🙂
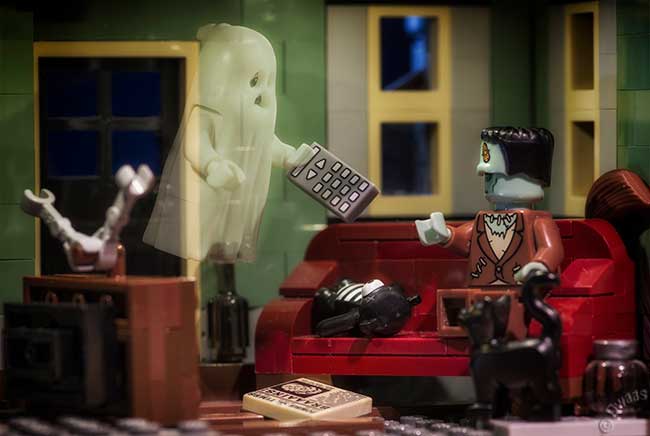 Making the photo a bit darker.
 I’m still not happy with the light, so I darkened the edges in the hope that the central part looks lighter.
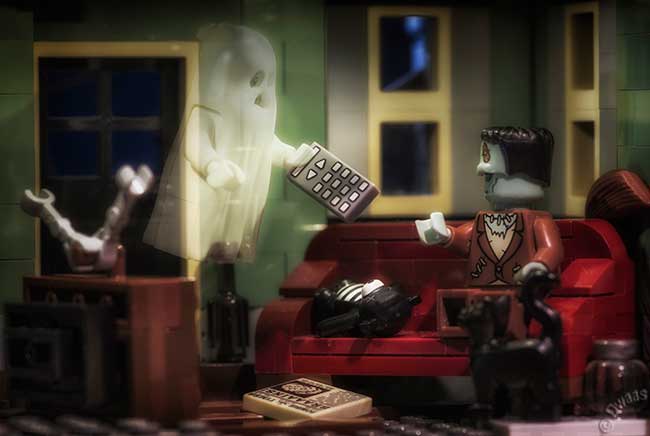 Still not completely happy…. I darkened parts a bit more. Still not happy though. It looks a bit to smooth for my tast. For example; it almost looks like Dwaas’ hand is glowing.
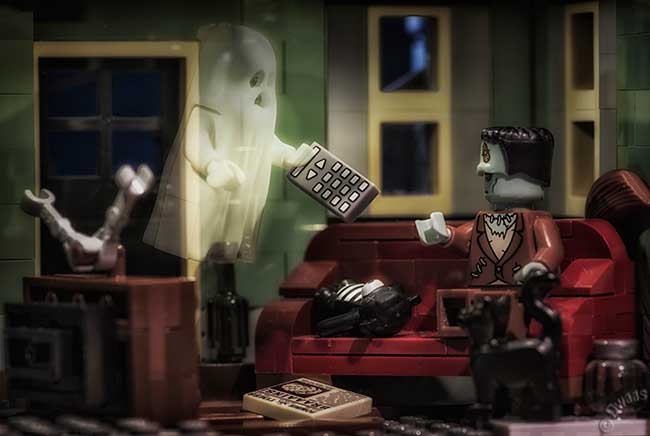 The final photo; I optimized the contrast and darkened many parts in the photo. I wanted this photo to have a bit of a dark, gritty feel to it. It is Dwaas’ house after all, and he still lives like some kind of gloomy monster.
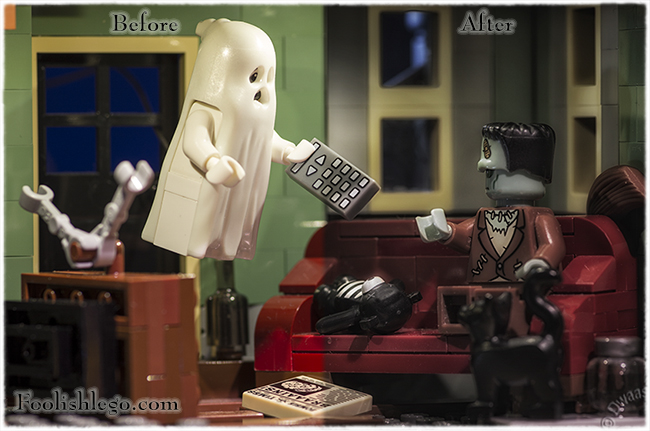
So that’s it. Just two examples of my photo-enhancement techniques. I hope it enhances the feeling I want to transmit about the world Dwaas and his ‘friends’ live in.
I like the possibilities of enhancing photo’s without changing essential parts and hopefully in the (near) future) I can use less and less of it by enhancing my lighting-skills.
So, do you enhance (some) of your photos? Why (not)? Some people feel cheated by this kind of enhancement; do you?
OTHER POSTS THAT MIGHT INTEREST YOU;
At the psychiatrist
December 9, 2020
Rejected Lego photos – part 1
September 24, 2018
Camera angles – a guide for Lego comics
February 20, 2022
You can subscribe to the newsletter to receive occasional updates from Foolish Bricks.

Photo enhancing is an art by itself. I mean it’s as hard as painting or sculpting as you need to first, have the idea of what you want to do, and then make it happen using technics and personal sensitivity. I don’t feel cheated by that, unless it’s made on purpose to fool the viewer (landscape promotion for tourism destination while cheating with color, light,… Or in fashion).
I don’t use photo or image enhancing a lot. I only use effects to create light beams or day for night effect (my favorite effect actually LOL). I use photo edition tool mostly to hide part of a picture via filters. I’m not as skilled as you are obviously LOL. I don’t I have the patience to develop those skills.
Anyway your 365 projects were absolutely stunning because of both the natural lighting (I prefer BTW) and your editing technics (blurring, glowing,…)
Keep up with the good work!
You have a point with the cheating for commercial reasons, like tourism and/ or selling stuff.
You might say I only try to bring my phantasy alive… with the possibilities and skill-set I have at that moment.