The workflow of the Foolish Lego comic – Season 1
Many readers asked me what my workflow is on the Foolish Lego comic. This post will bring you a general answer to how I worked on chapter one. These days I have a very different workflow.
The Foolish Lego comic has been a learning school for me. One thing that in hindsight didn’t do me any favors was that I didn’t have a clear script for this comic. I had a general idea of where it is going and of specific plot-aspects, but I didn’t know where the comic was going from episode to episode. The biggest problem with this was that the comic turned out to be pretty unbalanced and sometimes dragged. Besides this, I sometimes started a mystery without knowing where it was going. On the other hand, it gave me some freedom shooting each episode and I notice some jokes came to me the moment I was working on the episode.
Oh, one other problem the absent general script gave me, was that I had little time to build sets… that got me in trouble from time to time so sometimes I stayed in a scene too long because I had to find time to build a new set.
For the next installment of the comic, I will have a script though (more on that in another blog-post). Well, enough on this, now on to the workflow.
The workflow was straightforward.
- The evening before publication:
- I wrote the script for one or a few episodes
- I put together the panels in text, without the images
- I shot the photos
- I did a bit of post-production
- The photos went into the comic
- Some resizing
- Upload with a brief text
The writing of the script was (and is) the most time-consuming part. Only the story-arc where Willy and Amida were in Willy’s mind was very heavy on the effects, which took a LOT of time, so I was happy when that arc was over.
The script for one or a few episodes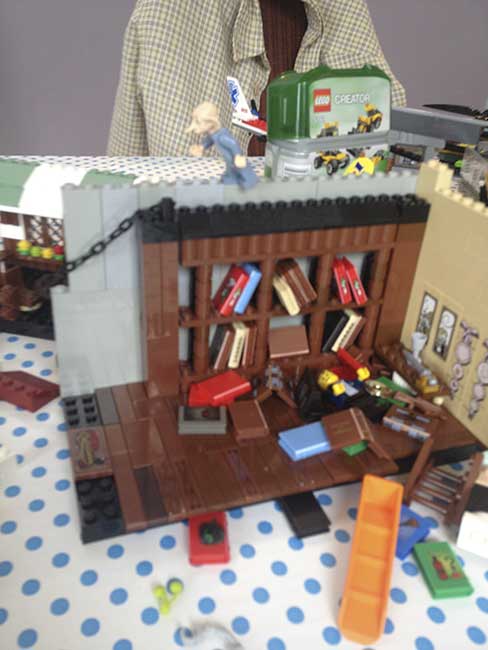
I used ‘Scrivener’ to do this. An incredible versatile piece of software which I didn’t use to its full power.
In each episode I tried to achieve a few things. At the very least, it had to be on route towards the end that I had in mind. And I try to give the episode a surprising or interesting end-panel.
Writing the text, I also imagined the scenes going along with it.
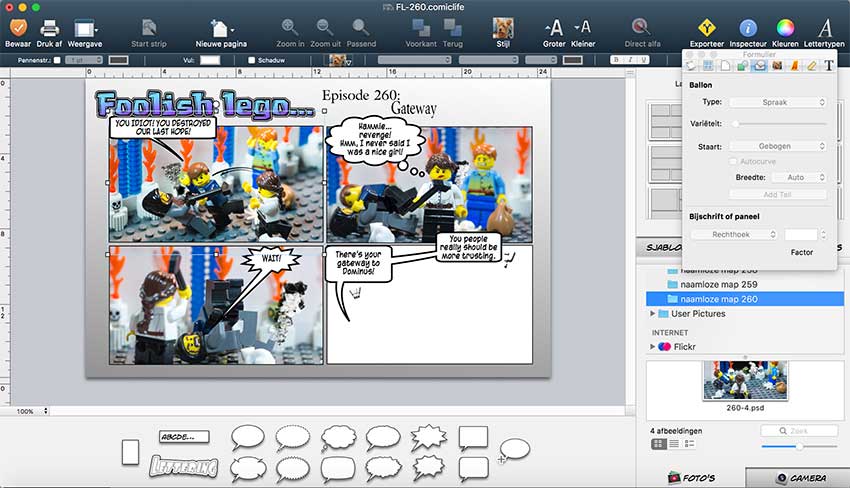
Creating the panels in text, without the images
 I did this to get an idea of space in the panels. This sometimes changed the way I shot the photos and helped me envision the scenes. I’m terrible at drawing, otherwise I would’ve done this in the scriptwriting-phase. I use the “comic-life 3” software for this by the way.
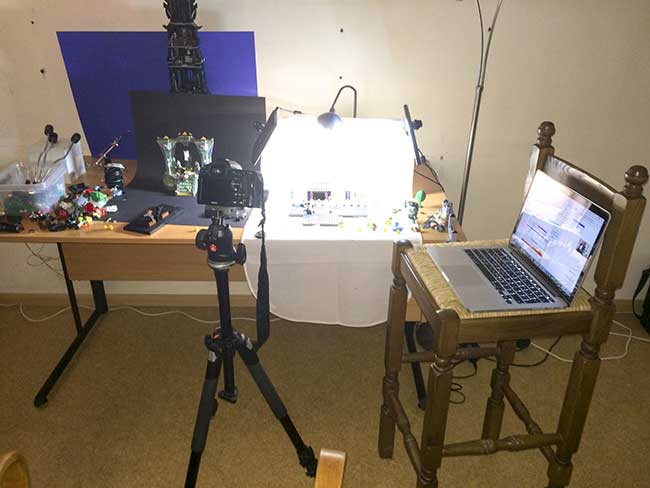
Shoot the photos
For shooting the photos I used a Pentax K5-IIs combined (mostly) with a 100mm macro-lens. I shot the photos in Raw-format (DNG-files).
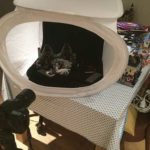
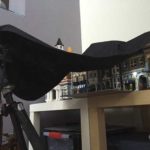
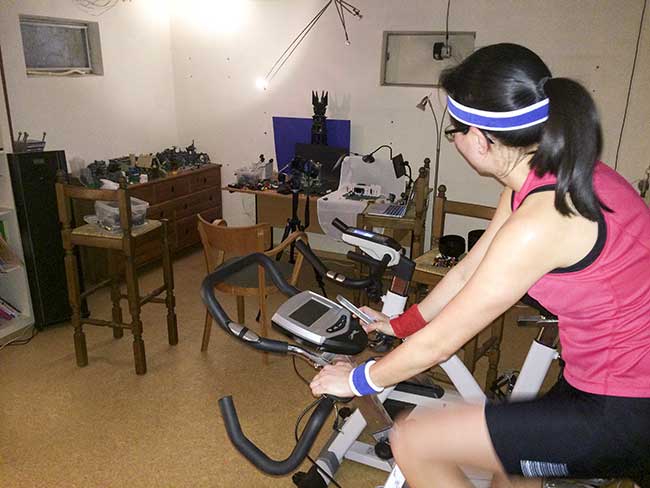
When I first started the comic, I used to shoot these photos all around the house, sometimes even in the backyard in the sunlight. These days I have a small ‘studio’ in the basement. It’s a multifunctional room, really. My daughter played there, my wife worked out, and I shot the comics.
The reason I wanted a studio is to get the circumstances the same in each photo, mostly lighting-wise. Also, it is good to have a place where you can leave your stuff lying around.
A bit of post-production
 I use Adobe Photoshop and NIK-software to do this. (sadly google bought the NIK software, and made it free to use recently… an ominous sign that in the near future it won’t be developed anymore, so hopefully I am really wrong on this one). I also checked contrast, sharpness etc.
When elaborate, this part takes a lot of time. Especially the first time I use a specific effect. The first time I still need to fabricate the effect (I mostly use Photoshop-tutorials on the Internet, in books or magazines for this.).
The photo’s go into the comic
This used to be the easiest part. I just dropped them into the panels I prepared in phase two. Sometimes I changed the text a little.
If my wife was around, she got to proof-read the episode, which sometimes led to a change of text and sporadically even to a new photo being shot.
I saved the episode as a comic-life and jpg-file.
Some resizing
The original file is too large to go on the internet so I resized it to 1020 x 656 pixels (that used to be 850 x 546pixels). I tried to keep the file-size maximally between 500 and 600kb in order to keep loading times on the site as short as possible.
Upload with a little text
For the final part I uploaded the episode to my website (Wordpress combined with the (free but worth a donation) plugin comic-easel.
I scheduled it for publication!
OTHER POSTS THAT MIGHT INTEREST YOU;
You can subscribe to the newsletter to receive occasional updates from Foolish Bricks.
Glad to have some behind-the-scene post to read!
As I said before this blog part of the website is a great addition and I’ll gladly read all you post here! I realize that even if we don’t create our images the same way (you shoot real time bricks and I use LDD) we both face the same difficulties (scenario, building sets,…). Never heard about Scrivener, I may check on it someday. I tried to use Comic Life 3’s editor tool, but found it not so handy.
I’m quite surprised to see you work on a laptop computer. Seems like I’m the last person on Earth to use a desktop PC LOL.
I’m also jealous who have a special place to work… But as you work with real time LEGO I guess that’s a must do.
Great post, loved the way you presented your workflow.
Now if I would have a question, (well several actually) most would concern the scripting, the scenario.
1/ Can you give me one scene or episode you imagined and shoot on the fly for your comic? Without previously scripting it? Cause honestly so far I can’t think about one episode you didn’t scripted before shooting! If you can remember one in particular, I’d like you to explain why (was it funny, was it because of the visual look, character’s development,…?)
2/ Did you, for Foolish Lego, need to completely remove a scene you had in mind, you found was so top-notch, but didn’t fit in the story. If yes, In which way did this disrupted your routine, are you upset you couldn’t actually make this special scene happen? Could this be part of a future “Editor’s cut” bonus blog spot?
Once again, really happy you found some time to make this great post. Makes your experience even more personal to your readers! Keep it up 😉
Hope you enjoy your trip and found time to finish the amount of work you have!
Long live Foolish Lego!
Scrivener is an incredibly powerful tool. At this moment I don’t even use 1% off it’s power. I might as well use a standard text-editor like word. I am using it however and slowly try to use more and more features.
Concerning your questions:
1. To be honest, and I just checked to be sure, everything before episode 81 is barely scripted and everything before episode 48 or so isn’t scripted at all. I don’t even know how I did that. I just looked where Barry, Darryl, Amida and the story took me. Around episode 40 I started looking at the future and how to tie things together. I had a few small storylines… that was it. The storylines changed quiet a bit… and often!
2. Nope, I don’t have these scene’s because I work last minute, so what I think up, get’s shot. In hindsight there is a scene that probably goes nowhere allthough I had some plans with it. I’m not gonna tell what scene yet, because I might still use it in the end 😛
Now that I’m working on the next script beforehand, I guess these scene’s will come along, maybe even characters I like and can’t use… “kill your darlings” as ‘they’ say.
I guess we work very differently when it comes to “scripting”, I just can’t work last minute, I guess this is due to your tight schedule of course… 2 episodes a week gotta be stressful at times LOL. Sometimes I need to step out for 2 or 3 weeks just to look where I am in my story and where I wanna go… Yet, like you, I quite never scripted anything LOL. Just thoughts in my head…
So, realizing ideas just pop out, you shoot it, edit it, release it, and the the result is this great… That’s insane! I can’t imagine what your next comic will bring to the table… Cause I’m sure you learn a lot with Foolish Lego the Comic.
I hope a better and exciting story… Smaller probably, but more powerful. 🙂
It’s going to be very different, story and scripting-wise. Hope it will be better too! 🙂
Interesting thoughts on script writing. I produce The Guard Lego Brick comic here in England and I too don’t tend to produce a full script complete with story boards, before starting on a story.
Perhaps this style of script writing is similar to high wire acts working without a safety net!
My method of working is as follows –
I usually have a rough idea in my mind about how a particular story will start and end. I will have made a note of visual jokes, conversations characters will have and so on that I want to incorporate into the story. It’s only once I shooting the story, that I will think about camera angles and type of shot. I use close up, medium and long shots similar to a film or TV programme. I’m keen on mixing up the shots, so it doesn’t get boring visually for the reader.
One story which I did script was ‘Single to Hangman’s Noose’, which involved the same view as seen through two railway station ticket booking windows. The background was constantly changing though day by day. The main story unfolded in the foreground, with changing movement in the background. For example, different newspapers on display on the newspaper stand, different people walking by the windows. It was a hard story to put together, but worth all the hassle.
If you’re interested you can read the story and others via the link below –
http://www.victorhornetcomics.co.uk/guard.html
I too am going to attempt a much longer storyline in the coming months. I’m hopefully going to keep everything on track by using a Excel spreadsheet with stories running along one axis and the various characters running along the other axis. This way I can keep an eye on who is in which story and other elements. Ideas, plots and so on for each story I will be keeping separate in a notebook. It might work or I it might be a total fiasco!
(I read about the spreadsheet idea in a work written by one of DC Comics editors, whose name escapes me at present. He also mentioned the idea of having plot A running in one issue, with other sub-plots running in the background. Once plot A has finished, sub-plot B become plot A, whilst sub-plot C, becomes sub-plot B and so on).
Someone who is a very keen scriptwriter is Anthony Valentino over at the Ballinabricky comic. We collaborated on a story last year and Anthony produced a complete script with photographs for parts two and three of our story The Coffin Ship. Totally awesome. You could ask Anthony about his script creating process?
I think the secret (as is the same for everything else in life possibly), is the planning. Get the planning correct (including a back up plan(s) for when things go wrong) and everything else will follow. Hopefully.
You might find the following short comic article I put together which is an introduction to my comics and about how I work below –
http://www.victorhornetcomics.co.uk/article.html
Adrian.
I’m so sorry Adrian. It looks like my spamfilter had a blast. Your comments were seen as spam, probably because there were more than one link in the text. It should be okay now that your e-mail is set as ‘no-spam’.
For now: Welcome to Foolish Lego! Thank you for your extensive comment. I will get back to you on that, because I want to take the time to read through it all 🙂
Thank you for your extensive comment Adrian. You’ve got some interesting thoughts on scriptwriting. I especially like the excel idea. I might try that. I am working on a script now, an idea is the most problematic part for me, after that it’s tweaking. I’m trying to get a little more “professional” this time around. The story is progressing nicely in my opinion. One thing I’m wondering about is, if I can keep the story as I wrote it, once I start shooting. I notice I tend to do last second changes to my episodes, and I kinda like that now.
I love the idea of the changing background btw! A great way of showing the flow of time, which can be challenging sometime.
I like your stories and I read the story in your Ballinabricky-collaboration. I’m kinda jealous of his storydeveloping-talents haha… I’ll get there 😉
I may steal your idea and ask different brickcomic-authors for their workflows… sounds like a great idea!
Cheers!
Oh, and btw… the reason you started the brickcomic…. exactly the same as mine… I suck at drawing lol 🙂