Behind the scenes: “Back alley ghost”
This is a behind the scenes post for the Lego photo: “Back alley ghost“.
Inspiration
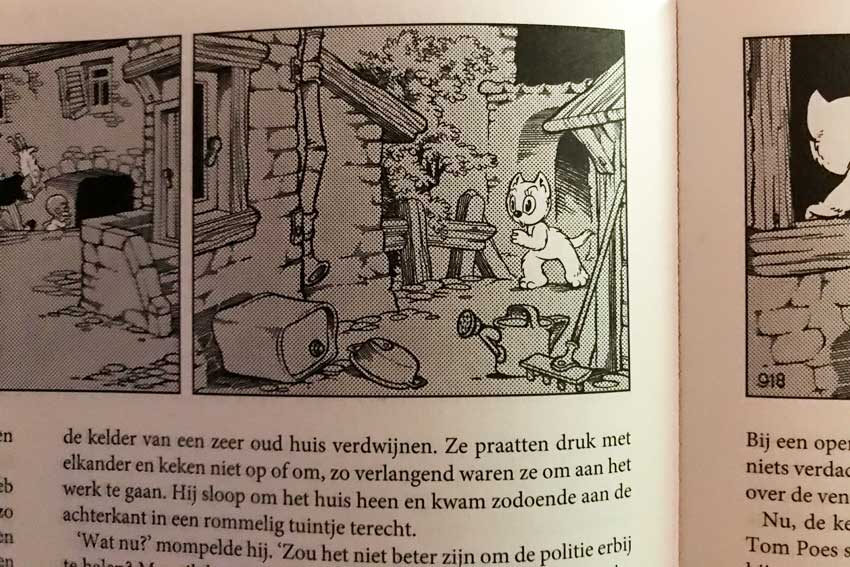
Inspiration for toy photography can arise from anything. The past few years I’ve been reading all the stories of Tom Puss (Dutch readers will instantly know who this is). One of the stories, “Kwetal de Breinbaas”, published in 1949 had a panel which immediately struck my eye. As you can see in figure 1, the inspiration for the back ally photograph came from one of the panels in that comic.
Setting up the Lego photography scene
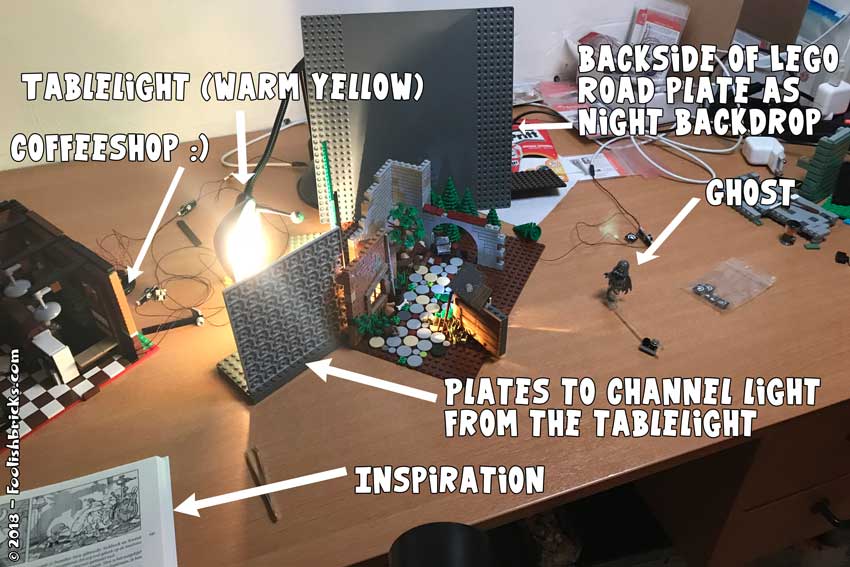
The basic Lego setup can be seen in figure 2. Pretty straightforward.
While building this Lego stage, I kept my camera close, so I could check and see if what I’d build was large enough. This way I could keep the building to a minimum.
Lighting the scene
It was to be a night scene. At night the main light source is usually the moon. So way up in the air I put my LED-panel at low light and at a color temperature of 5600 K (I used the same panel overhead in the coffeeshop-scene). Furthermore, I wanted warm light from the window as a means to light the front part of the image. In figure 2 you can see I used a simple tabletop light for that purpose. To keep the light from leaking into the scene, I used a few Lego plates to block the light where I did not want it.
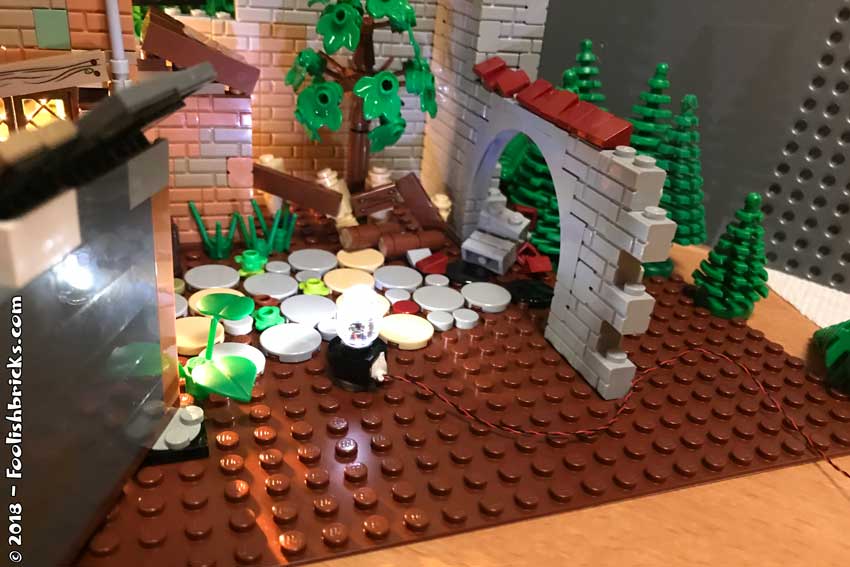
Lastly, I needed a subtle lighting of the back part of the scene. If I made the moon too bright, it would have washed out the front warm light, so I put in a small LED light from Brickstuff behind the shed-wall for this purpose (figure 3).
Populating the Lego stage
Though Tom Puss is prominently featured in the comic book scene, I did not want to put in a cat(like) person. I’ve been looking to feature Dwaas in one of the images so I first tried to put him in there. You can see some examples in figure 4,5 and 6.
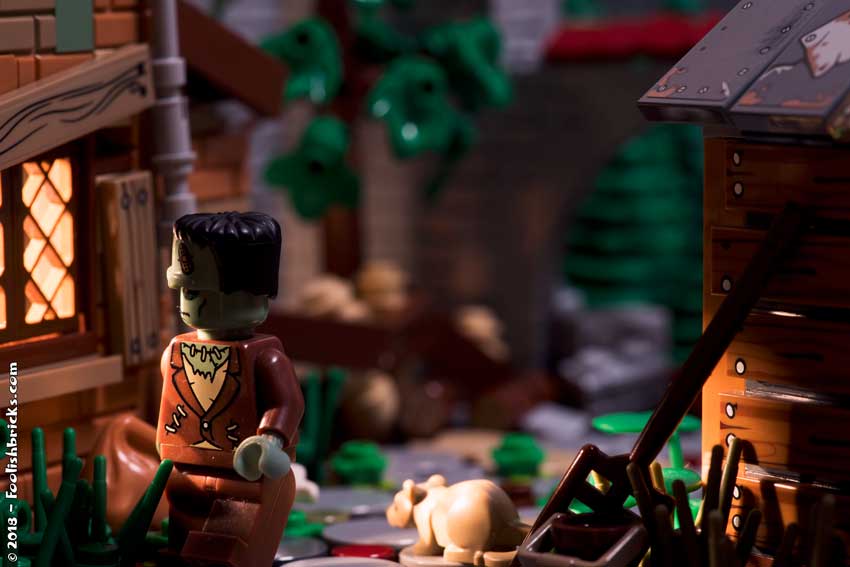
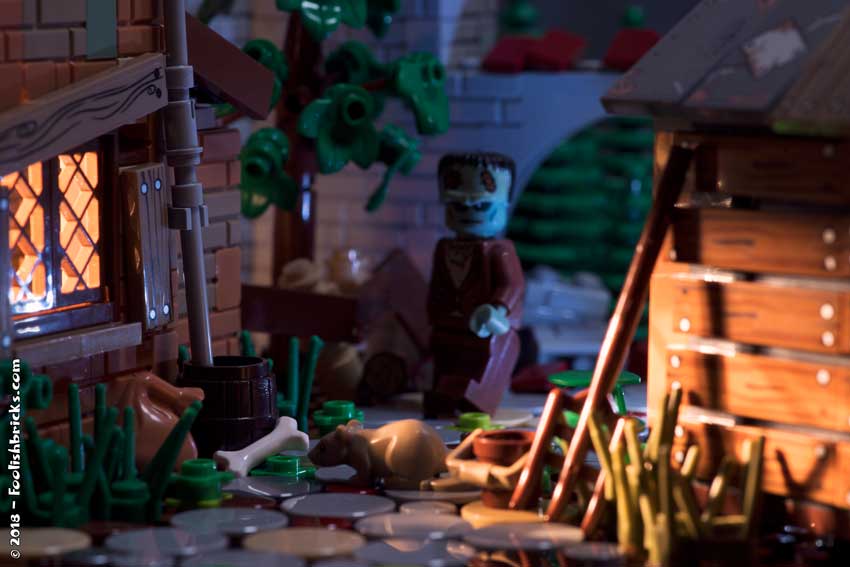
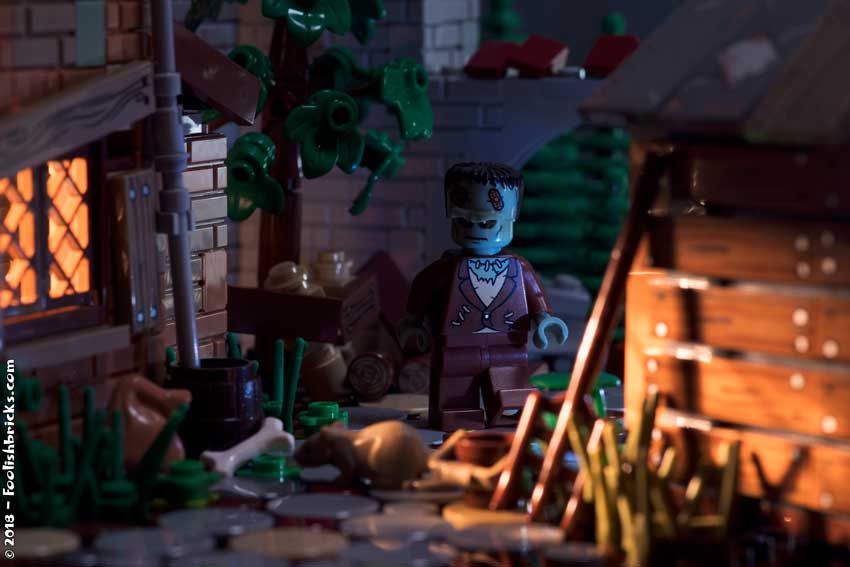
Yet, for several reasons, I did not like the result, mostly because Dwaas blocked quiet a few parts in the scene or Dwaas pulled too much attention from the scene as a whole. So in the end I decided to add a subtle ghost. By the way, now that I see them again, I kind of like the first of these three images to be honest. 🙂
Post production
Of course I added the ghost to the image. You can see him standing on a Lego stick in Figure 2. I used a similar technique to the one used for the ‘into the sky‘ Lego photograph.
Lastly, I deepened the colors a bit and added some contrast. The resulting Lego image is below:

OTHER POSTS THAT MIGHT INTEREST YOU;
You can subscribe to the newsletter to receive occasional updates from Foolish Bricks.
This happens a lot to me, where I get some good photos but they don’t quite capture something that I’m looking for. I think you did a great job with the final image, and I agree that Dwaas dominates the scene when he’s there, even when he’s in the background.
I also agree that the first image with Dwaas looking in the window is a powerful story and beautiful photo on its own.
As much as I enjoy seeing photos that my friends post on Instagram, hearing more about the thought behind them and seeing the “outtakes” like this is even MORE enjoyable! I hope to be launching my own toy photography blog soon, separate from my personal blog. I’ll be sure to link to you from that — you are doing a great job here!
Thank you Teddi. I’m looking forward to seeing what the angle of your blog will be.
I agree. I love seeing photos, but I get REALLY excited to see BTS-posts, always trying to learn! I only recently started doing behind the scenes posts. It had one unexpected side-effect… knowing that I might do a BTS post makes me think a lot more before I think the shot. It forces me to add more meaning to images, place close attentions to details and I’m not allowing myself to cut corners anymore.