Behind the scenes: “Lazy Sunday Morning”
To my surprise one of my images was featured on the Brothers Brick recently; “Lazy Sunday morning“. This is a behind the scenes post on that image.
The idea
As some of you might know, for several reasons, I am not a fan of building with Lego. This time however, I felt the urge to build a nice MOC (my own creation) for a photograph. I’ve been wanting to experiment with light coming through windows for ages, so that was the goal for this build.
Because I wanted the light to hit something I wanted the build to have textures on the walls, so I did not want to use flat surface Lego bricks. Also I wanted a warm apartment. To achieve this I used more brownish colors.
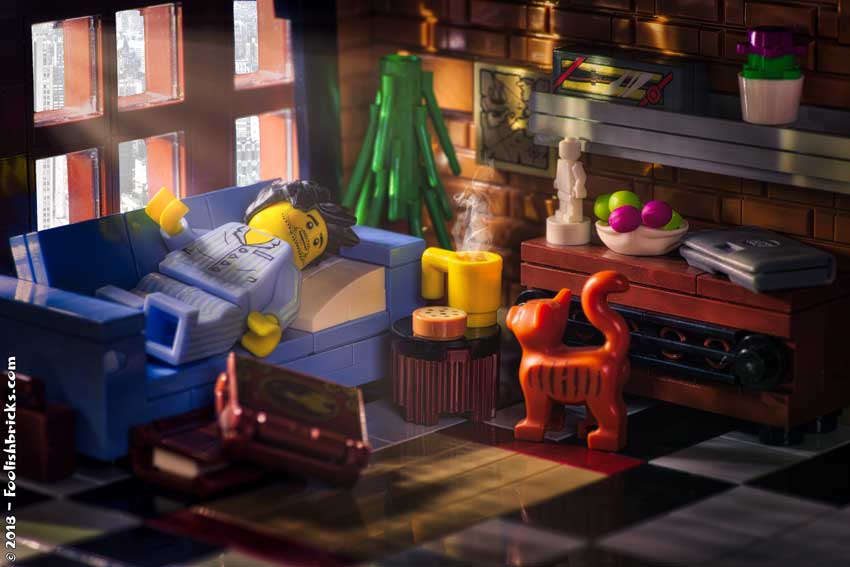
As narrative, I wanted to add all kinds of elements in there. First elements to show he’s relaxed; cosy sofa (modeled after a sofa I own myself (brown 😉 )) with a pillow so his nek won’t hurt besides a few books for relaxation (love that myself). In contrast some work-related stuff (his suitcase and closed laptop). He is also a man of travels (a map on the wall) and loves a bit off fantasy (a Harry Potter wand on the shelve). And so on.
As stated by in the review, there aren’t any fancy building techniques, however I was proud of one inventive part use: look at the fruitbowl, its the lower part of a Lego Ninjago mask 🙂
The set-up
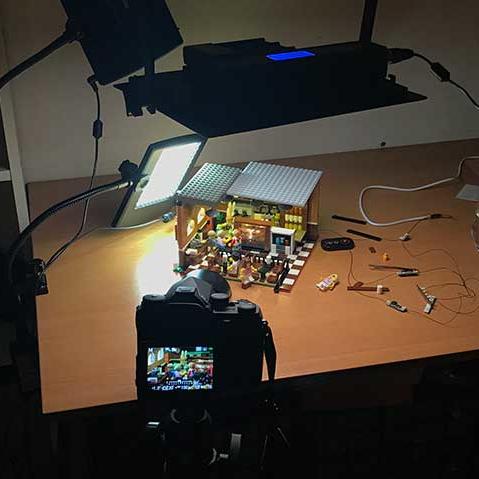
I have my mini-studio in the basement… but it’s a mess! As you can see in figure 1. So I had to shove some stuff aside to make room for my little apartment (the mayor’s office is in the back).
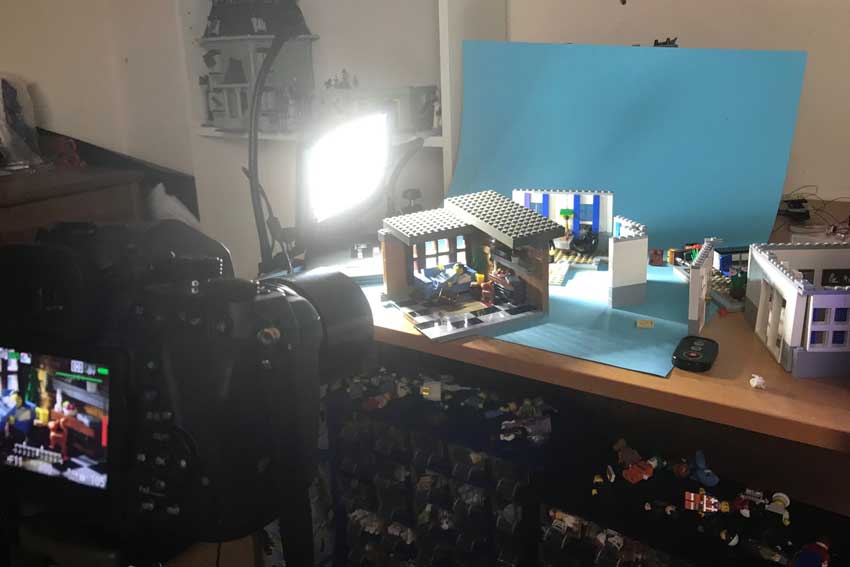
Besides that the setup is pretty straightforward; a large daylight lamp outside the windows and I keep dim light in the room to break the general darkness. I do not own a light with adjustable temperature yet, so I figured I could change the temperature of the light in post-production.
Furthermore you can see a camera-remote-control lying around (to lower the chance of camera-movement), and a little piece of paper-towl, to remove as much dust as I can see.
The original image
I used a Pentax K1, with a f100-macro-lens. The camera settings were: f/11, 2”, ISO 100. I always shoot my frames in dng-raw. Figure 2 shows you the original image. I wanted to get in really close, invading his personal space to make the viewers feel as-if they are part of the scene.
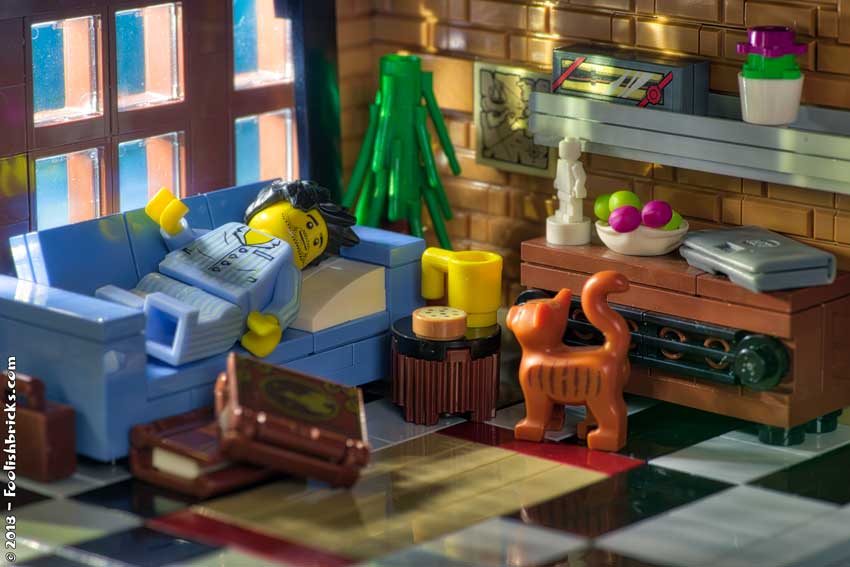
I shot quite a few frames before this image came to be… Cat not standing correctly, the light didn’t hit the walls like I wanted, the books reflected too much light, suitcase out of the frame, I knocked over some stuff trying to clean some dust away (and only noticed that afterwards), etc…
Post-production step 1; Cleaning up
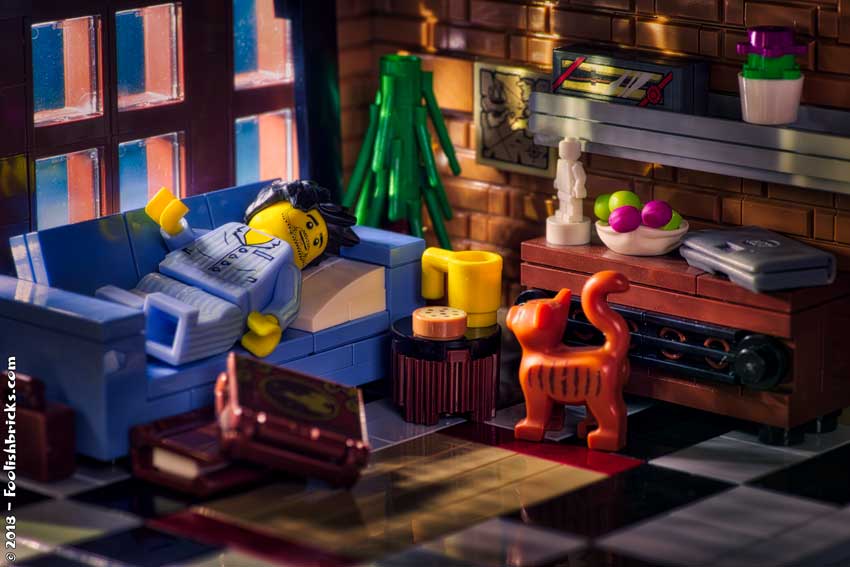
There is always dust in my originals. The macro lens enlarges everything so much, that I don’t notice it with the naked eye… but it’s there. So the first step is digital cleaning. Besides, now I can also remove annoying reflections too! The result can be seen in figure 3.

Post-production step 2; “Basic” adjustments
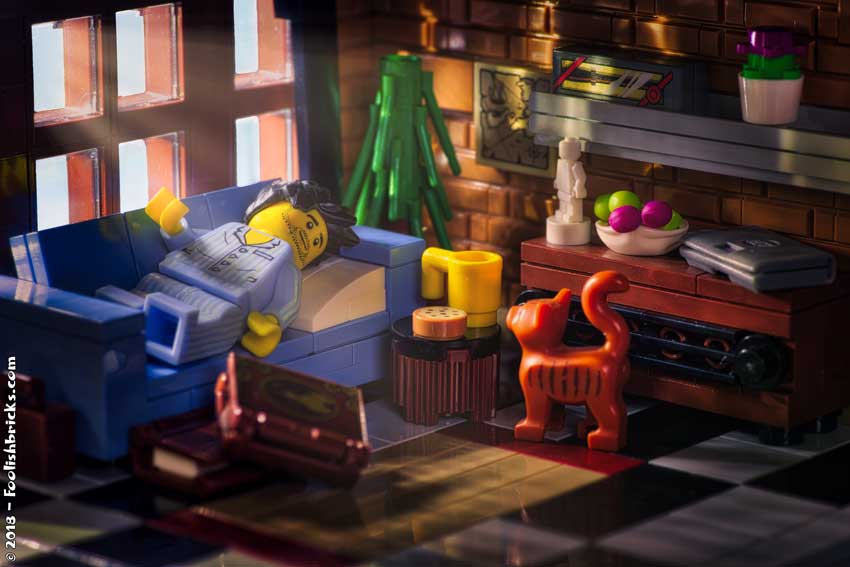
This part is the most extensive, and also a lot of fun. I experiment somewhat until the image looks like I imagined. I started in camera-raw, first adjusting white-balance (higher temperature and more tint), second I Adjust the exposure settings (selectively darkening and brightening different tones) and lastly a bit more clarity, vibrance and of course saturation). After these adjustments I use ‘dodge and burn’ and ‘levels’ to selectively adjust the image. The result can be seen in figure 4.
Post-production step 3; Light through the windows
The windows were lighten and light beams added. Afterwards I selectively lowered brightness, saturation and played a little with the ‘levels’-settings in the rest of the image. Look at figure 5 for the result.
Post-production step 4; details
I need my coffee in the morning, especially if it should happen to be a lazy morning. I also need that coffee to be hot! So I used a smoke-brush (you can find all kinds of free brushes on the Internet) and added some steam to the mug. Oh, and I cleaned a bit more because I mist specs in the first round of cleaning. The result is in figure 6.

Post-production final step; outside!
At first I figured I was ready. I even uploaded the image as it was. Still it kept bugging me! It was missing something. That something turned out to be the windows. They looked as-if they were taped shut. I wanted something outside the windows. To add some contrast to the cosy inside I decided to add a busy city outside the comfort of this guys home. I overexposed and undersaturated an image of New York and used a layer mask to place that image in the windows. Below are the original vs. final version of the image.
So, thats it! It was more fun than I thought and I expect to be building some more after this experience.
What do you think, is there anything you would have done differently?
OTHER POSTS THAT MIGHT INTEREST YOU;

You can subscribe to the newsletter to receive occasional updates from Foolish Bricks.
Really neat to see the BTS on this image. So many details, and they really are worth it. The image is beautiful, and all the elements make it fun to look at again and again, noticing little details and subtle touches. Thanks for sharing it!
Welcome to Foolish Bricks and thank you. Also for taking the time to comment.
Currently I am trying to improve upon my building skills and I’m happy to hear it shows 🙂