Guiding the eye in Lego photography | A comprehensive guide
In the previous post, I discussed storytelling in Lego photography. In this article, I’ll discuss another technique through which you can increase the storytelling capabilities of a (Lego) photo: guiding the viewers’ eye.
What is “guiding the viewers’ eye”?
A story is most often constructed to present all the elements important to the story. Also, you’ll want to present these elements in a specific order for them to have the greatest impact, for you to tell the best story.
Essentially, the same reasoning applies to storytelling through photography. You’ll want to present all the elements important to the story and for them to have the greatest impact, you’ll want to show them in a specific order. This is where: “guiding the viewers’ eye” comes in.
A viewer does not “see” an entire photo at the same time, eyes move constantly as they try to “read” the shot. You want to guide that journey. Where in your photo do people look first? Where do they look next? And after that? How much control do you have on leading the viewer’s eye through your photo?
Our eyes take in a lot more visual information than our brain can consciously handle. We prefer to focus on the most interesting information, so we selectively look at what we consider most important. This is called selective attention. However, visual information can distract people even when it’s not relevant. If it’s tempting enough, it’ll grab our attention, even against our intention. This indicates we can control where the eye will look and choose what will gain the viewer’s attention.
Following, I will discuss basic tools you can use to get that control. Nonetheless, leading the eye is not an exact science, so there’s often room for some interpretation.
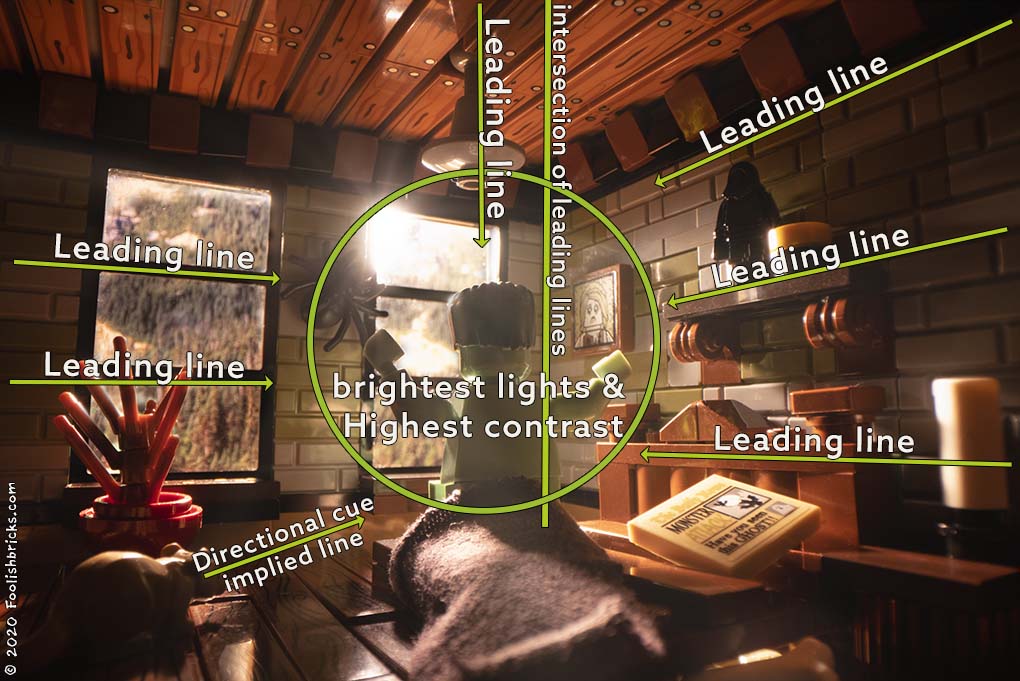
The infograph serves as a summary of guiding the viewers’ eye in Lego photography.
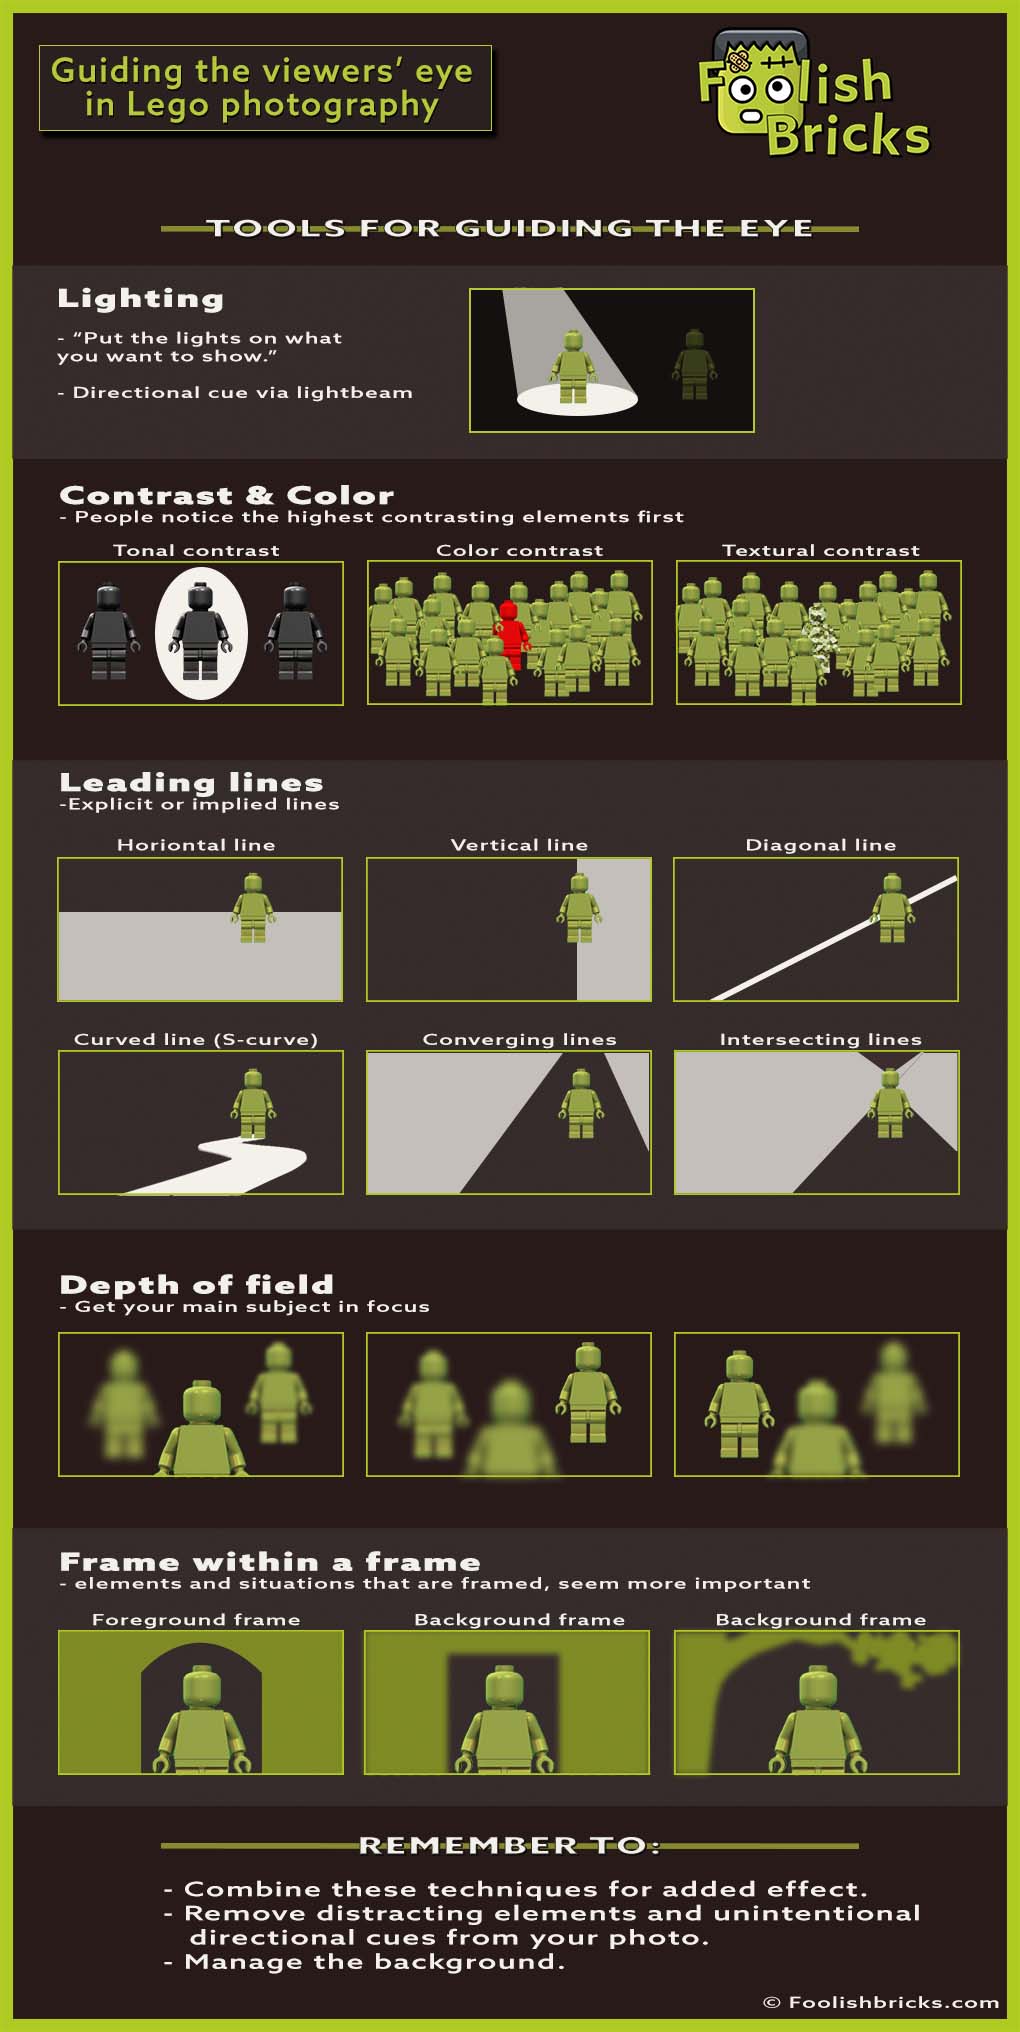
Lighting
Light the most important story-element with the brightest lights and the most contrast (see below). Put your lights on what you want to show. You should light all less important elements less and/ or with less contrast than the major story-elements. If nothing stands out or if the wrong elements are lit; the story will be unclear or confusing.
Directional cues
Visual directional cues will (subconsciously) lead the eye toward a major story-element too. For example, you can use beams of light which are directed at a major story element. Or implied lines from someone looking at a specific detail of your photo.
Two subjects looking at each other give rise to bi-directional implied lines. Once the viewers’ eye reaches that area, they might direct their gaze back and forth for a while. This makes bi-directional lines a great tool for keeping attention.
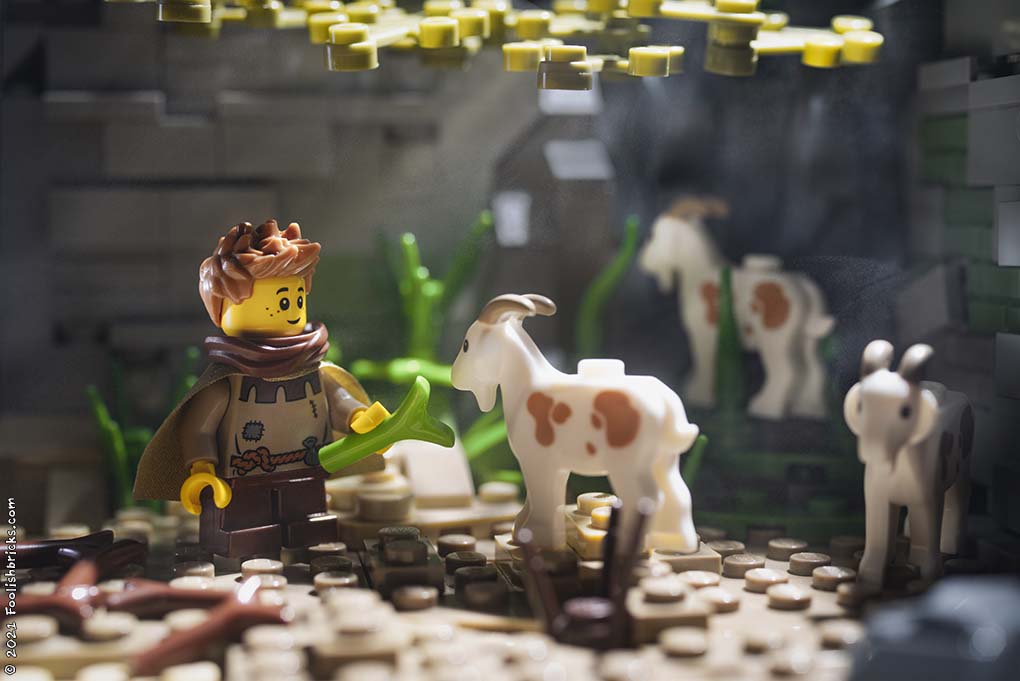
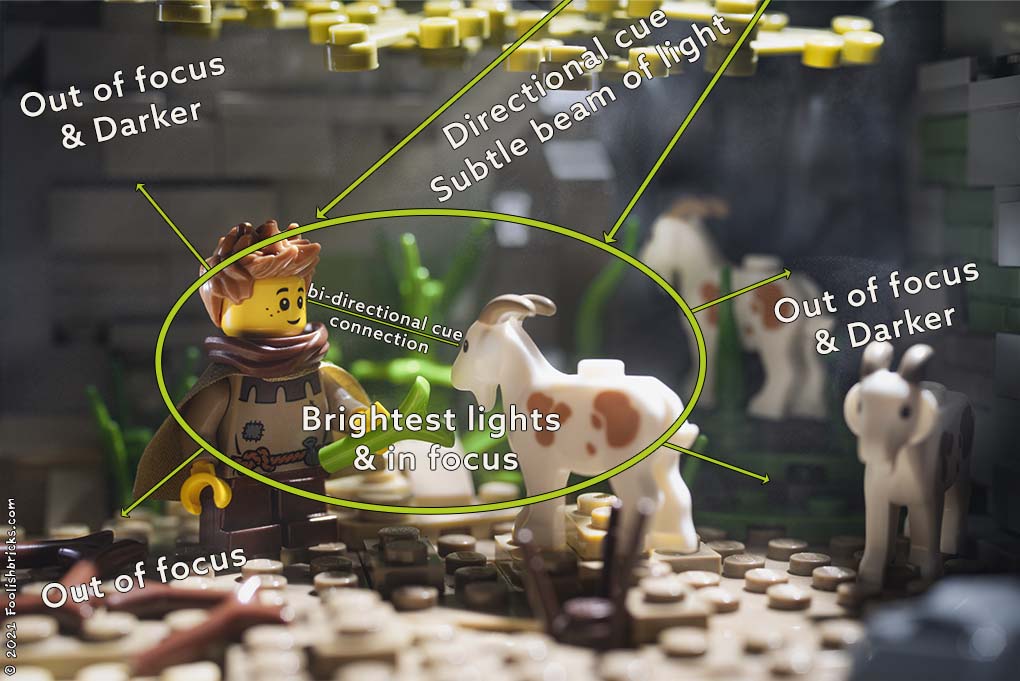
Example: A combination of techniques. However, the AFOLs eyes all went straight to the goats that turned out to be pretty expensive. No technique on earth could’ve changed that. 😉
Leading lines
Leading lines are directional cues, and extremely effective at directing a viewer’s attention. It’s a compositional tool through which you can draw the viewer’s eye in a specific direction, towards a specific point of interest. These leading lines may be horizontal, vertical, and diagonal. These lines can be explicit or even implied through the placement of objects and spaces. Diagonal lines are more powerful than straight lines. Straight lines suggest stability and often take the eye from side to side rather than directing it towards the subject. Diagonal lines are strong and dynamic.
You can also use curved lines, or combine lines into converging lines. Intersecting lines that meet behind the subject especially enforce the effect of leading lines. Another type of effective line is an S-curve leading towards the subject, meandering around the interesting parts of your photo instead of going straight to the destination. An in-depth article on lines in photo composition is in the works.
Always try to find the lines in your scene. They are often present. If you can’t find them at first, try moving the camera or the subject around until you find the most effective setup.
Example: A combination of techniques. The most important one being leading lines. The photo could’ve even been better if I placed Dwaas over the intersection of leading lines.
Depth of field
Elements that are in focus will attract the viewers’ eyes as opposed to elements that are out of focus. This makes depth-of-field a powerful tool for guiding a viewers’ eye through your photo. Viewers will look first at the subjects that are within the depth-of-field before looking at the rest of the photo that is out of focus.
This will also work with more subtle differences in focus. If you can still recognise the out-of-focus objects, you can add a surprise within the out-of-focus area of the photo. After the viewer saw the principal subject and direct their gaze to other segments of the photo, they’ll suddenly see the surprising element which may change the story your telling all-together.
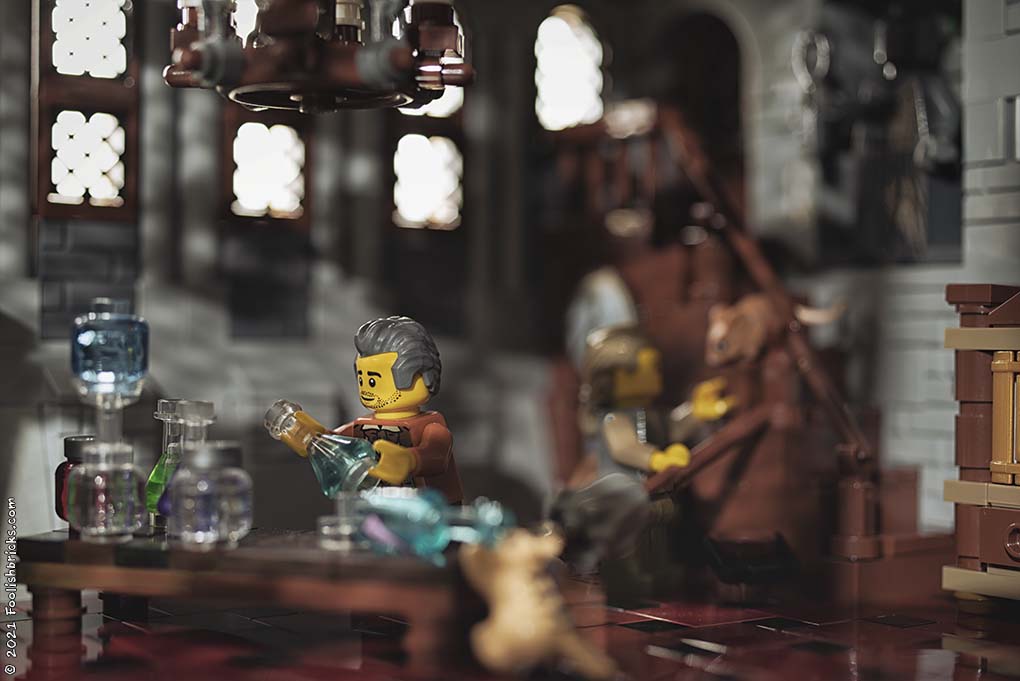
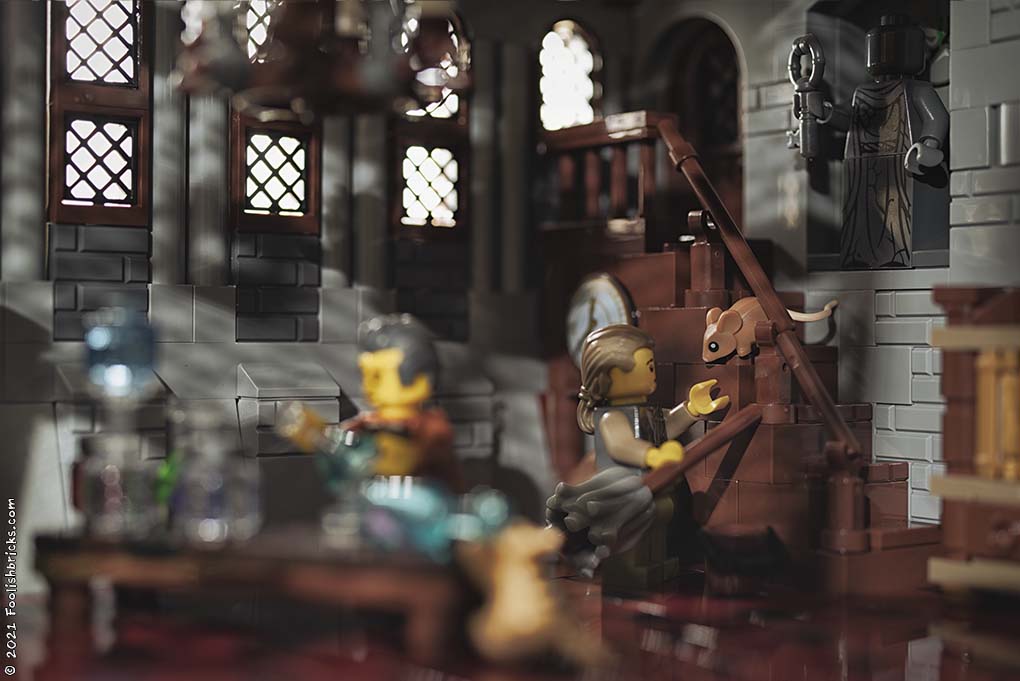
Example: These two photos show the immense power of Depth-of-field and how the viewers’ eye is instantly attracted to the one element in the photo that is in focus!
Contrast and color
A hugely important tool for guiding the eye is the use of contrast. Evolutionary, our brains are hot-wired to notice high contrast situations because it’s a key survival trade. Also in a photo we notice the highest contrasting elements first!
Use contrast to highlight the center of interest in your photo. There are three types of contrast you can use. Tonal contrast works best if bordering segments of your photo differ substantially on the grey scale. For example, silhouetted characters or objects stand out clearly in a composition. Color contrast means you can use vivid colors as opposed to dull colors or an extremely different color in a photo where the rest of the photo uses another color to make important elements stand out. Textural contrast can make something stand out because its pattern is distinctive.
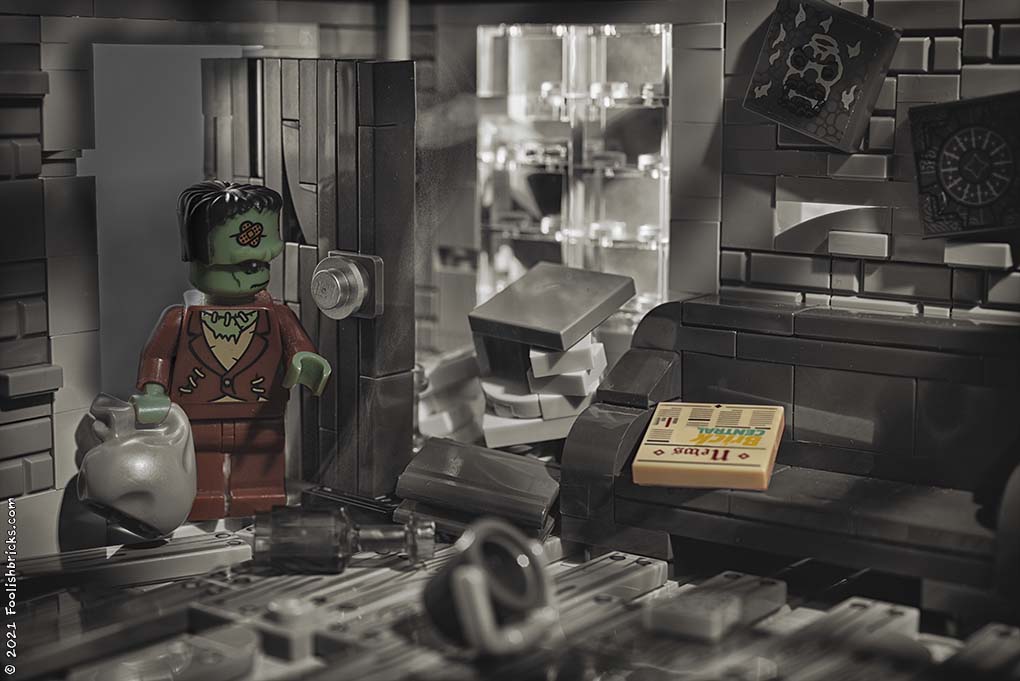
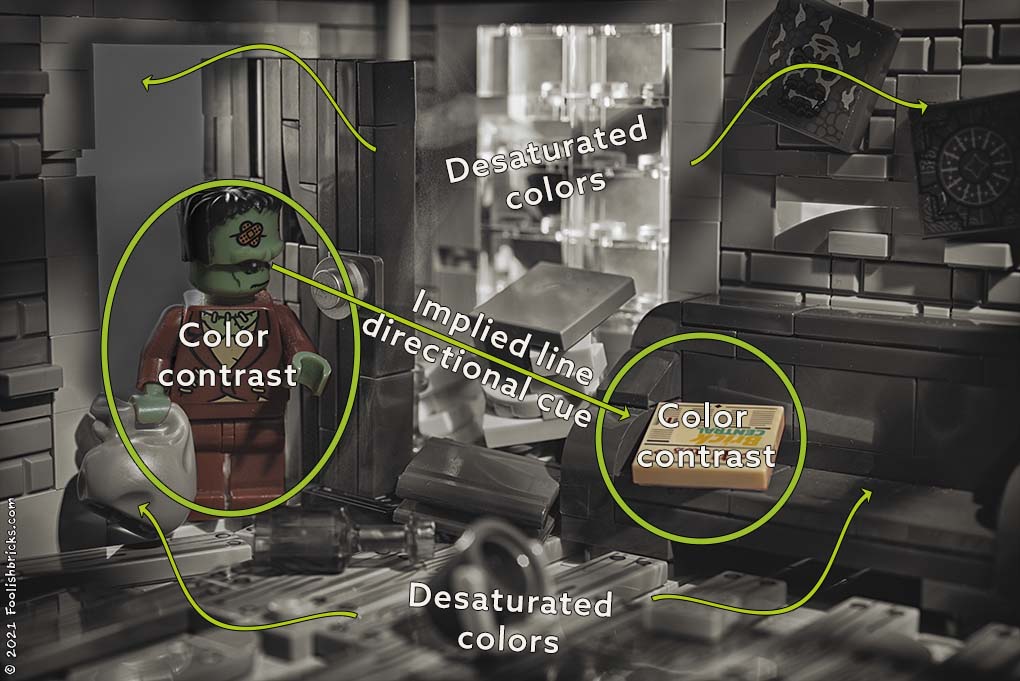
Example: A combination of techniques, the most important one being tonal contrast. The two separate colourful elements are tight together through color. However, Dwaas’ gaze at the paper, makes the most important element the newspaper on the couch (and it was, this was my goodbye to Brickcentral).
Frame within a frame
People tend to look at what is contained within a frame first. So, placing an object in a frame within a photo is a great way to draw attention to that specific element. They don’t even need to be complete. Frames can be in the foreground, or background.
A frame can also add depth (especially when the frame is out of focus), and context as well as lead the viewer’s eye into the scene.
Remove distracting elements
Now that you know about these techniques, examine your scenes for elements that unintentionally guide the viewers’ eye to other areas than the important story-elements in your photo.
Also, manage the background! It can steal focus from the story-elements by attracting part of the attention to it. Maybe it’s too busy, or too visually equal to the subject. If that is the case, change the background, get it out of focus, or maybe even out of the shot by going for a low-angle shot, for example.
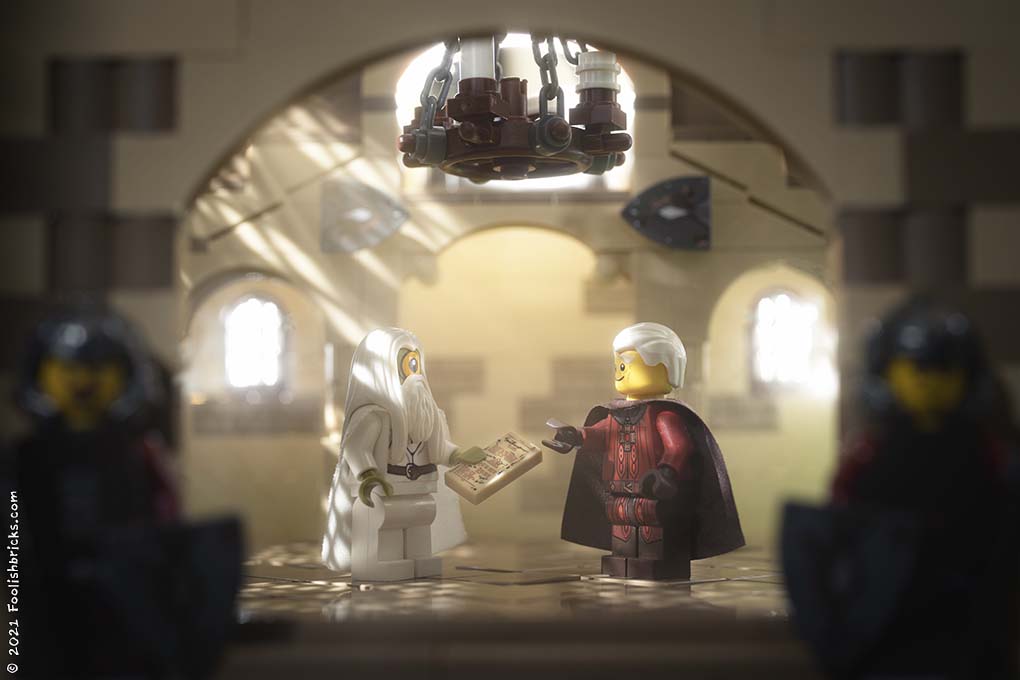
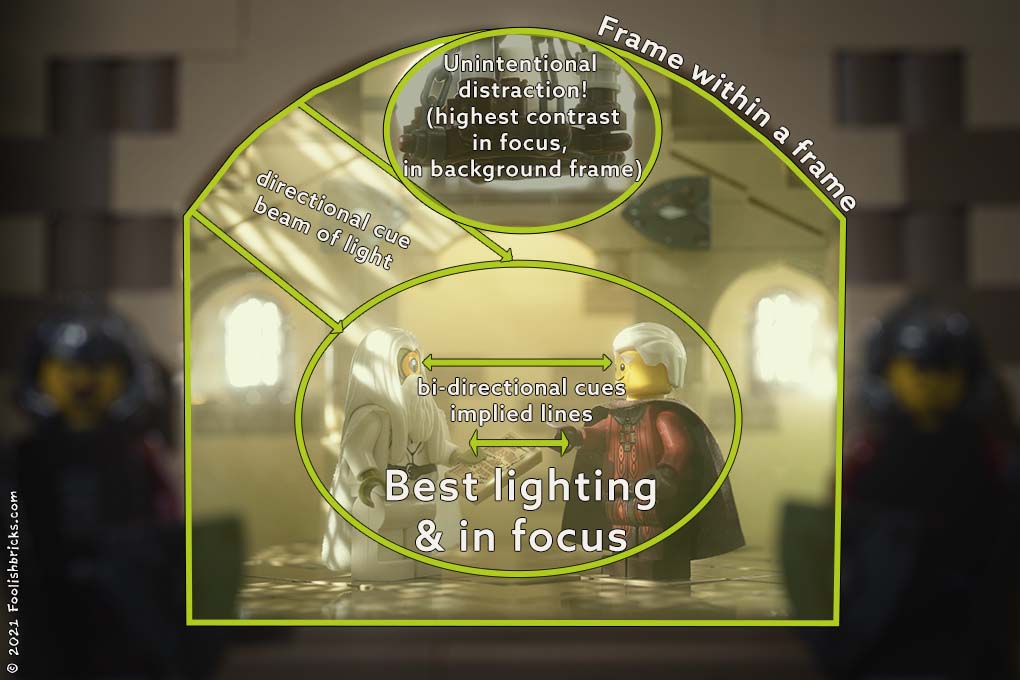
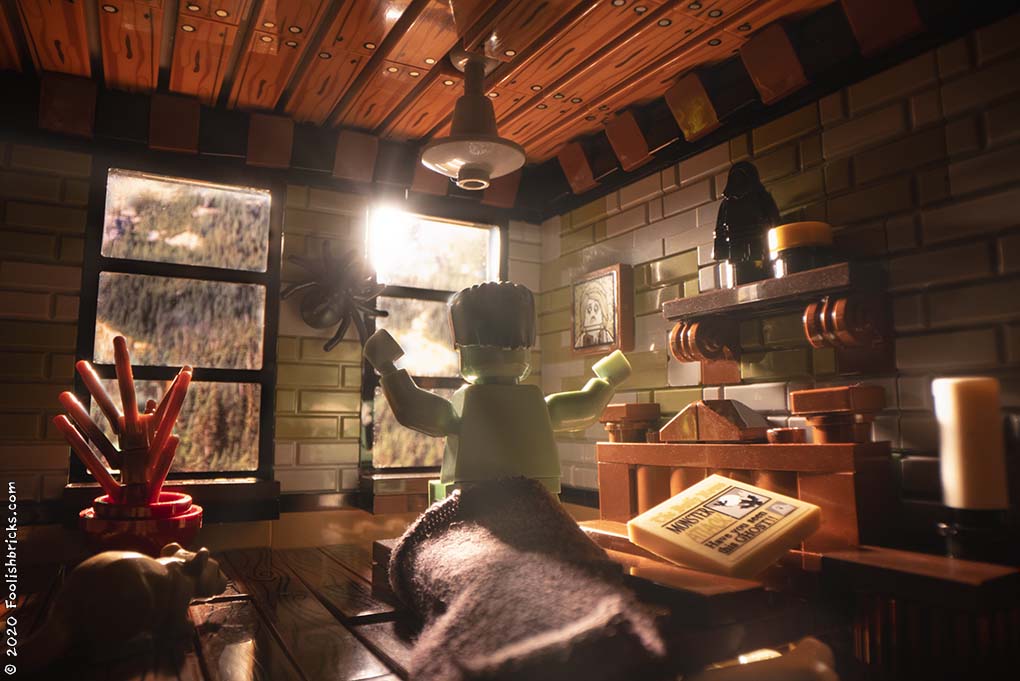
Example: This photo has an unintentional distraction in it because I wanted complete focus on the interaction between Willy and the king. Now the chandelier has too much focus. However, it could have been important if this photo would have been a panel in a comic… and in the next panel the chandelier would’ve come down! it’s all about artistic choices.
Combine the different techniques
On its own, these are all more or less powerful tools. However, as you can see in all examples in this article, combining them makes them even more effective in guiding the eye through your photos.
Happy creating!