Shutter speed in Lego photography | A beginners guide
Original: July 5, 2018
latest: February 17, 2022
After writing about exposure and the aperture in (Lego) photography, today’s post will be on shutter speed. Everything you need to know to switch the camera from automatic to manual for your Lego photography will be in this article. Let’s dive right in.
WHAT IS SHUTTER?
The shutter is a part of your camera that is in front of the sensor. The camera sensor handles the ‘recording’ of the light from a scene you’re photographing, ultimately forming your photo. In front of this sensor, there is a blinder, named the shutter. The shutter covers the sensor until a photo is being recorded. When you press the shutter-release-button (or simply ‘shutter-button’) the shutter uncovers the sensor for an amount of time equal to the shutter speed, records the light from the scene, and then covers the sensor up again.
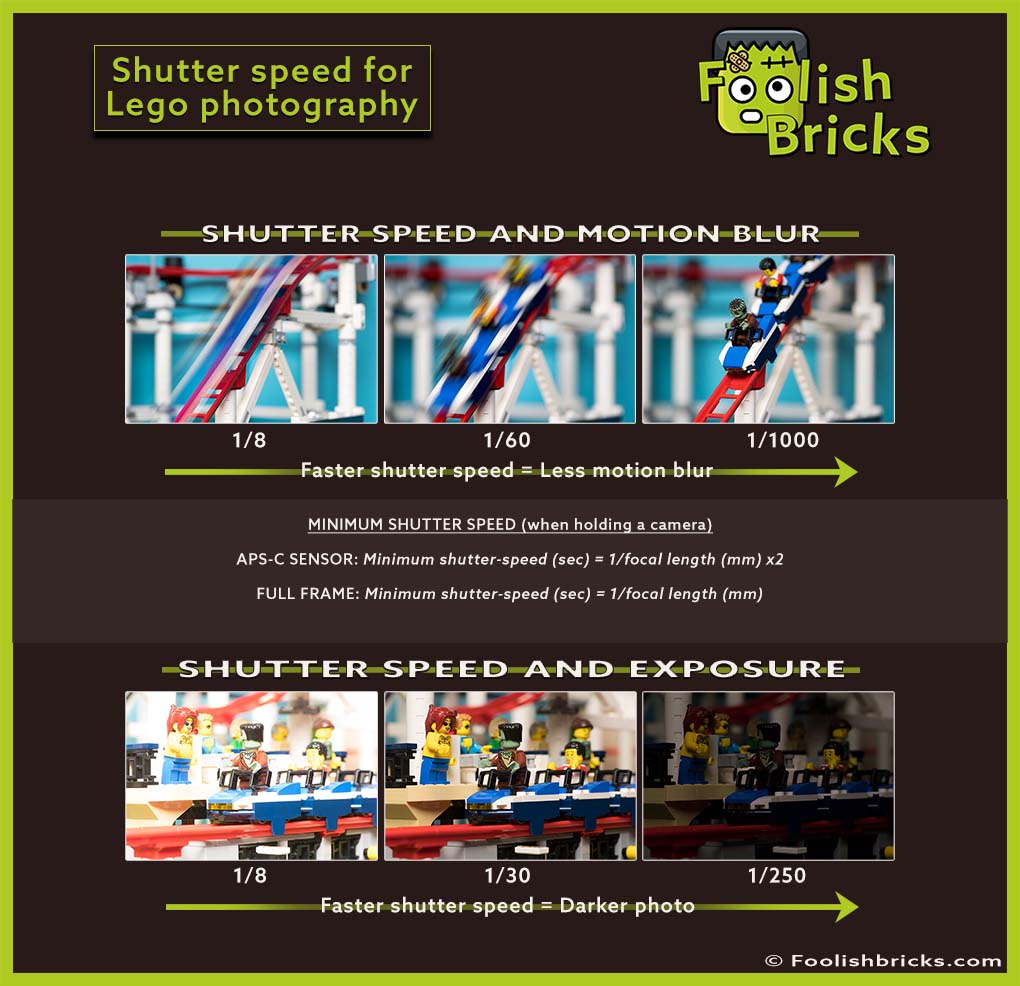
The infograph below will serve as a summary on shutter for Lego photography.
WHAT IS SHUTTER SPEED?
Shutter speed, also called exposure time, is the time the shutter of your camera is open, enabling light to reach your camera sensor.
This time is measured is seconds or fragments of seconds. The larger the denominator; the faster the shutter speed with less light reaching the camera sensor. For example, 1/60 is faster than 1/30.
Different cameras have different ranges of shutter speeds, usually between 1/4000 sec (fast, sensor exposed for a short time) and 30 sec (slow, sensor exposed for a long time).
EFFECTS OF CHANGING SHUTTER SPEED
Shutter speed influences two aspects of the photo you are making; exposure and motion blur.
Effect of changing shutter-speed: exposure
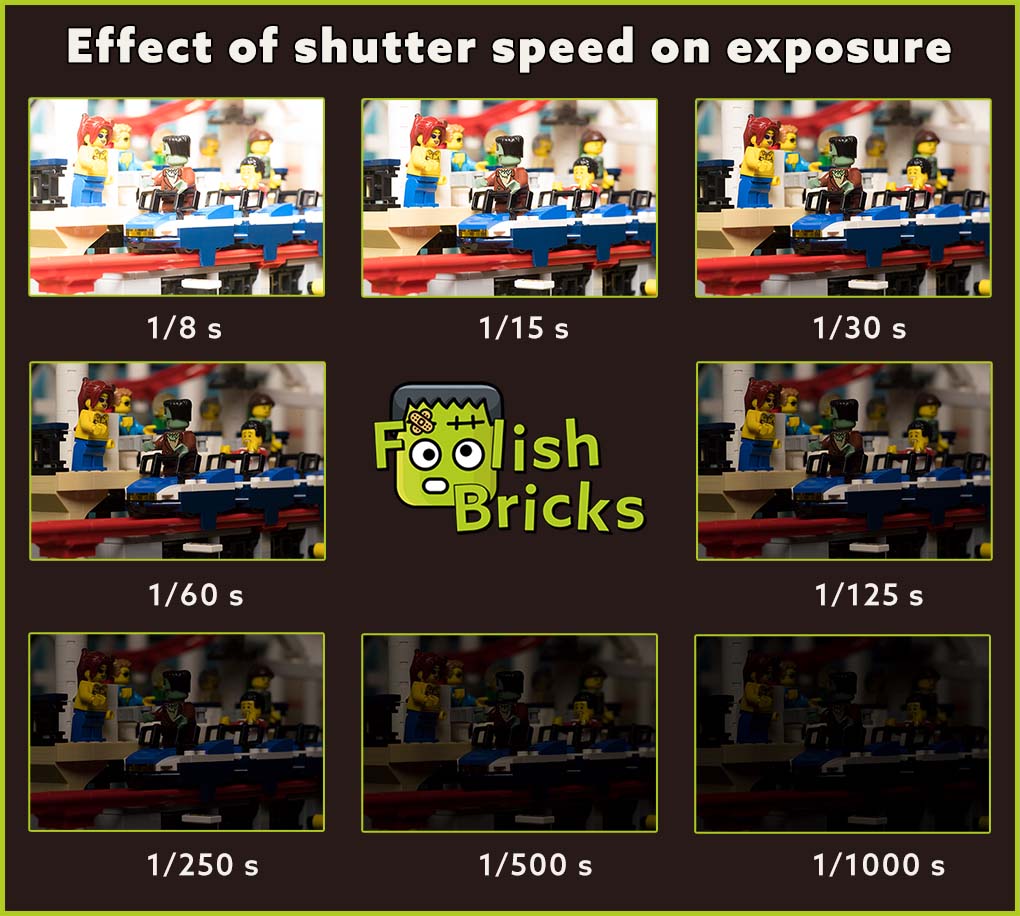
Usually shutter speeds will (approximately) double between each setting. For example: 1/1000, 1/500, 1/250, 1/125, 1/60, 1/30, 1/15, 1/8, etc. This is good to remember, since doubling the time the shutter is open will also double the amount of light that reaches the sensor, increasing the exposure Value (EV) by one stop. Conversely, halving the time the shutter speed is open will halve the amount of light that reaches the sensor, decreasing the EV by one stop.
These stops are the same as the ones when adjusting aperture. This means that when you increase or decrease the shutter speed by several stops, you can adjust the aperture in the opposite direction by the same amount of stops. The exposure should remain the same, however motion blur might and depth-of-field (DOF) will change between settings. Figure 1 shows examples of how exposure changes resulting from changing the shutter speed.
An example; let’s say your make a photo at 1/30, f/5.6. You decide you want a deeper DOF so you adjust your aperture to f/11 (2 stops). For the exposure to remain the same, you can adjust your shutter speed to 1/8, also increasing the possibility of motion-blur. If you have trouble remember how to calculate these values, first use the exposure triangle. Last, besides changing shutter speed or aperture, you can also change the ISO, as I will discuss in the following article on ISO.
Effect of changing shutter-speed: motion blur
The other effect of changing shutter-speed is that you might introduce motion-blur. Motion blur can occur if there are moving objects within the scene you are photographing. Moving objects can be at one location when the shutter opens and the sensor starts recording light, and at another location when you close the shutter again, stopping the recording. The more distance between those two locations; the more motion blur occurs in your photo.
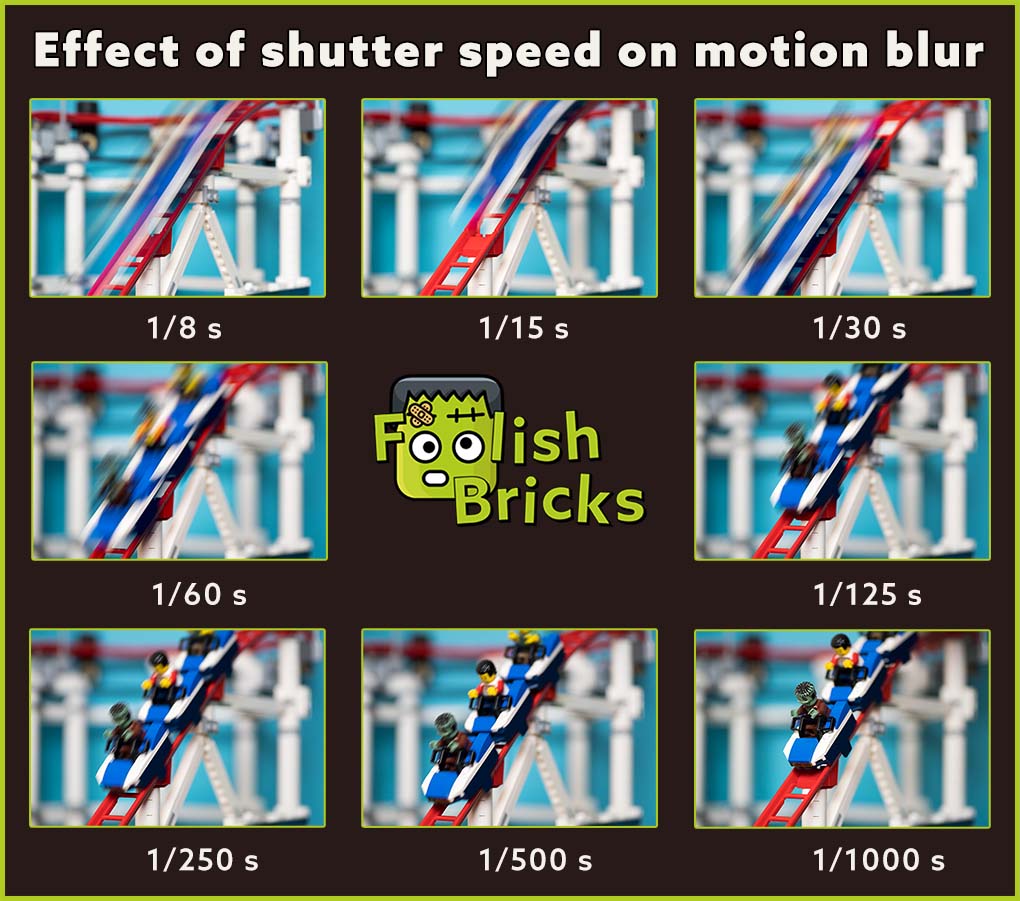
Effectively, if there is movement in the scene you want to photograph, shutter speed gives you the choice of either freezing the movement or giving the object a motion blur (and so a sense of movement). Figure 2 shows you examples of motion blur at different shutter speed settings. I adjusted the aperture and ISO to keep exposure equal.
Effect of changing shutter speed: camera motion
A second type of motion blur can occur, even when the scene you’re photographing is static, because of (unintentional) camera-movement. Mostly, this is an unwanted effect when shooting in low light and/ or with aperture values, underexposing your image so you need slow shutter speeds. As a rule of thumb, if you want to take a photo with a shutter speed of 1/60 or slower, it is probably best to use a tripod. The 1/focal length rule (explained below) gives a more precise shutter speed, depending on the focal length of your lens.
Last, there are two other potential sources of camera-movement which can give unintentional camera movement. Especially when shooting macro-photos of Lego, I have this problem. First, when I press the shutter-release-button it can move the camera a little. This means I usually use a remote-control besides the tri-pod. Second, SLR-cameras can move a little when the mirror goes up. So, when it’s crucial to have a perfectly still photo, I lock the mirror before shooting the photo.
HOW TO PICK YOUR SHUTTER-SPEED
Picking your shutter-speed is -again- an artistic decision. So, when considering what shutter speed to use, you should always ask yourself whether anything in your scene is moving and how you’d like to capture that movement (water, cars, birds, etc…).
Wanted; motion blur
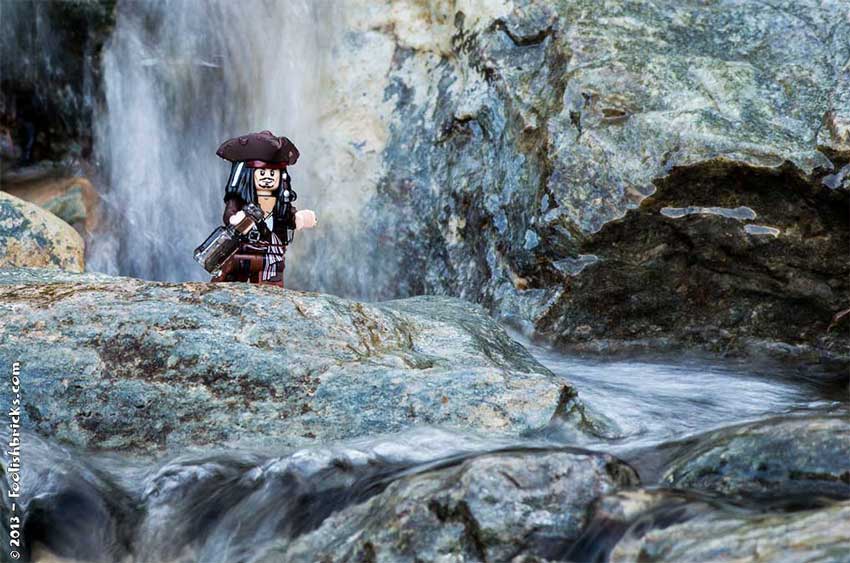
Motion blur is not always unwanted. In fact, purposely introducing motion-blur can significantly improve some photos. As I’ve written earlier, yo can choose to freeze a moving object, making it look perfectly still, however you can also intentionally introduce motion blur giving the object a sense of movement. The more motion blur there is, the faster we perceive the photographed object to be moving. Two examples are below. Figure 3 shows motion blur in the moving water coming down the waterfall and stream, showing you how fast the water is moving.
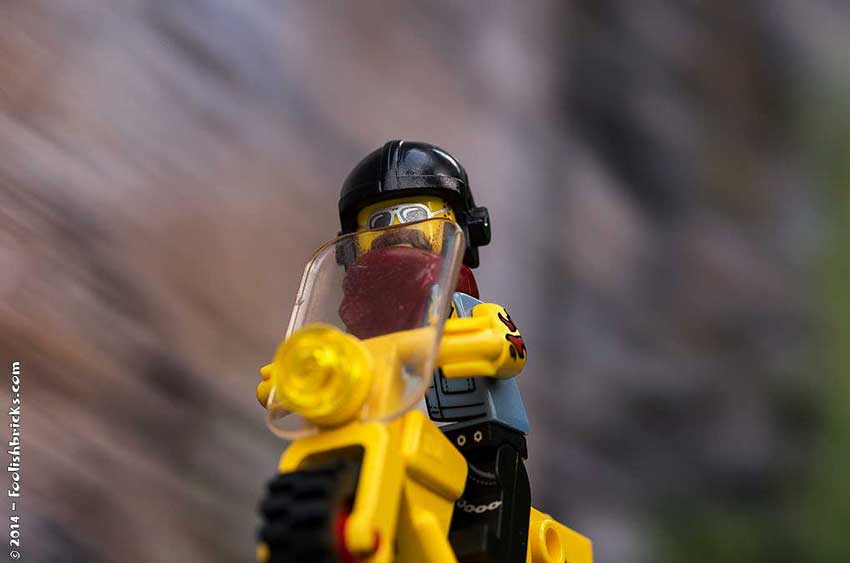
For the photo in figure 4, I used a slower shutter speed and followed the motorcyclist with the camera, giving it a sense of speed because of the motion-blur of the background. Should the background have been completely in focus, it would have looked as if the motorcycle stood still. I don’t consider this a good photo btw, mainly because I had trouble keeping a moving object in focus.
Focal Length and shutter speed
When you’re holding your camera, you may notice your hands trembling a little, causing camera movements. Mostly, you can get rid of these movements by using a faster shutter speed. Or you can use a tripod.
The amount of camera movement is magnified by the amount of zoom (focal length) of the lens your using. The more zoomed in you are (longer focal length), the higher the amount of camera movement and the faster the shutter-speed needs to be to counteract this movement.
To decide on what shutter-speed to use, if you use a full-frame sensor, you can use the 1/focal length rule:
Minimum shutter-speed (sec) = 1/focal length (mm)
It means that, to prevent camera-movement, your focal length in mm should be equal or greater than the denominator in the shutter speed fraction. For example, if you are shooting a photo with a focal length of 50 mm, you’ll need a shutter speed no slower than 1/50 (so 1/125 or 1/500 etc, is ok too.)
For cameras with cropped sensor (APS-C sensor) the rule changes to:
Minimum shutter-speed (sec) = 1/focal length (mm) x2
For example, if you are shooting a photo with a focal length of 60 mm, you’ll need a shutter-speed of no slower than 1/125.
This is simply a rule of thumb. However, you might get away with faster shutter speeds at a given focal length because of stabilised lenses, camera-bodies (Pentax) and sensors.
SETTING YOUR SHUTTER-SPEED
In a camera, the fractions of shutter speed are usually displayed as the denominator only; so, 1/100 sec. as 100, 1/8 sec. as 8, ect. Shutter speeds over a second are followed by an apostrophe; so, 2 sec. as 2’ and 30 sec. as 30’.
If you want to select your shutter speed manually for a photo, there are two modes you can use: shutter priority mode (S or Tv (=time value)) and manual mode (M). In shutter priority mode, you select the shutter speed, and the camera automatically selects your aperture. In manual mode, you select both the shutter speed and aperture manually. Some cameras also have a bulb mode (B). this mode lets you keep the shutter open for as long as you hold the shutter-release-button down.
CONCLUSION
The shutter speeds on your camera are relatively straightforward. Simply decide how you want to capture movement and how you want to deal with unwanted motion blur and camera movement, considering the available light/ exposure. Then, set the shutter-speed accordingly. Use your knowledge of the exposure triangle to adjust aperture and ISO accordingly.
Happy creating!
COMING UP…
A guide on sensor sensitivity/ ISO
OTHER POSTS THAT MIGHT INTEREST YOU;

You can subscribe to the newsletter to receive occasional updates from Foolish Bricks.